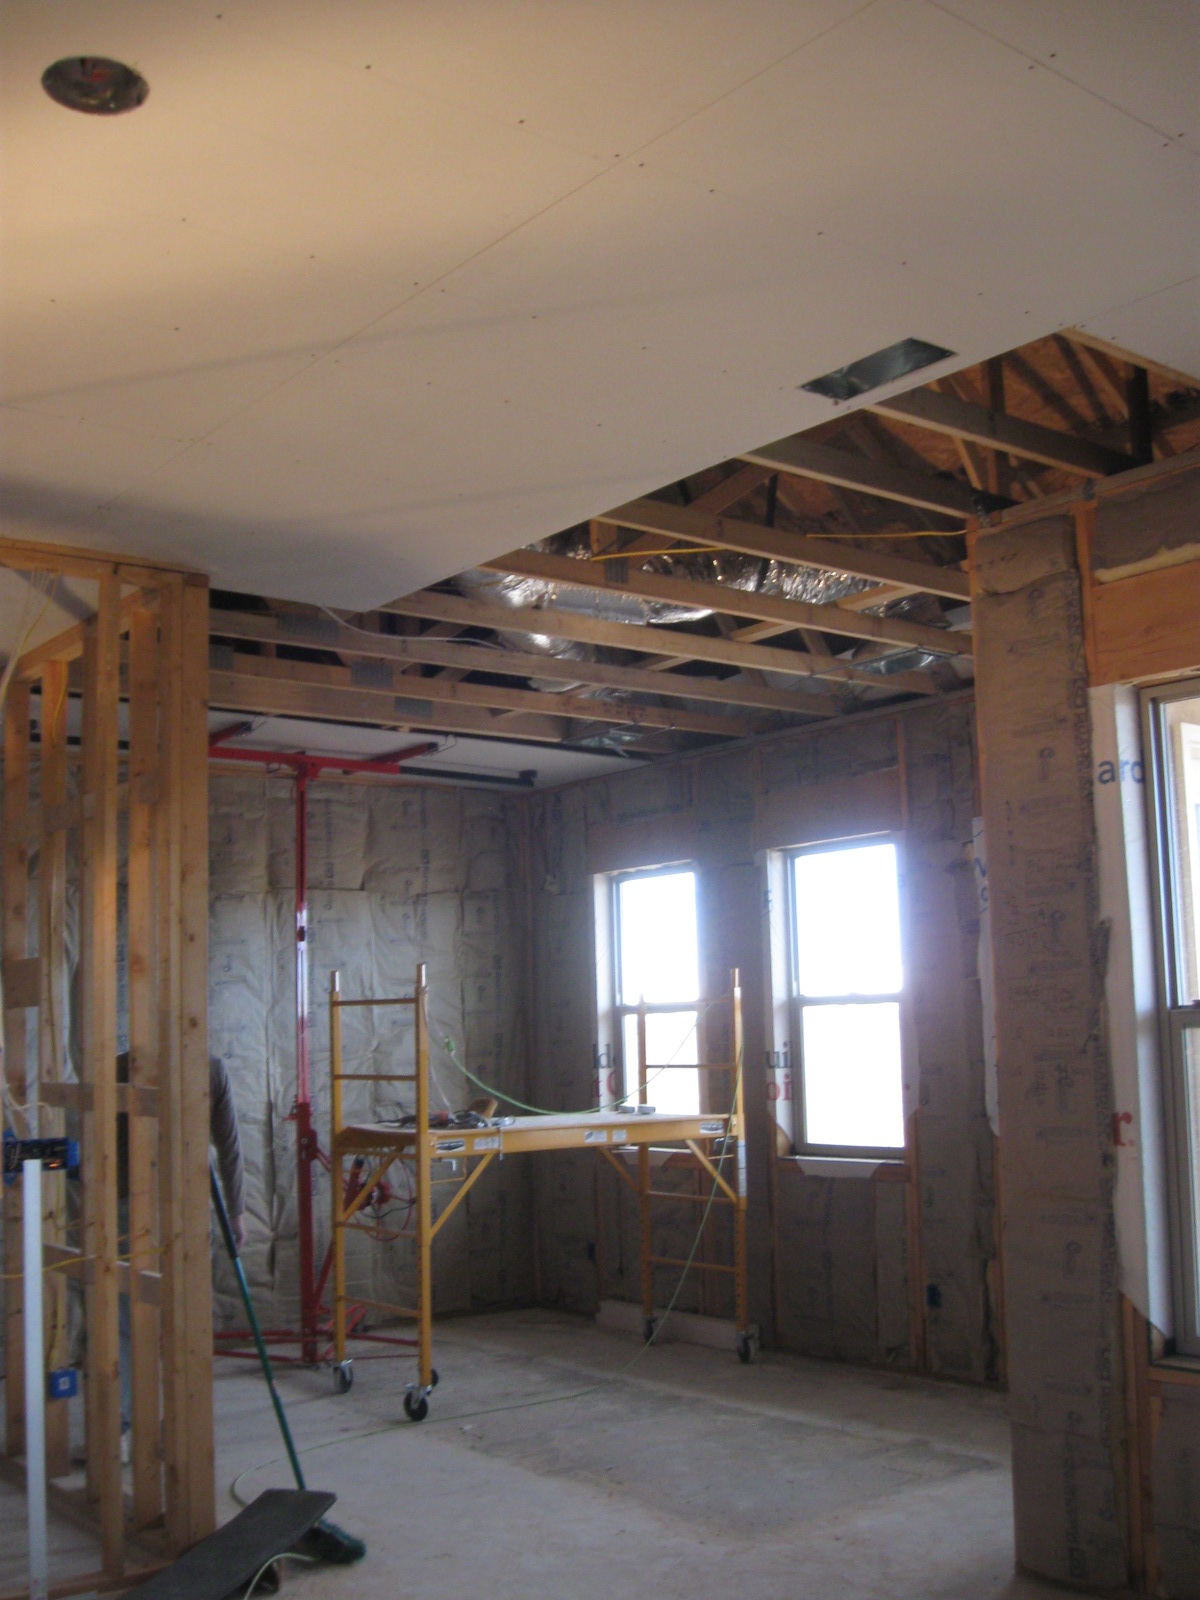
We’ve been learning as we go on so many different things during the home construction. Sheetrocking has been another. We just finished sheetrocking the ceilings of the entire house, in preparation for attic insulation.
Since the ceilings are all 10 feet tall, we knew before we ever began that we needed a lift for the sheetrock. In the fall, Oz found a good price on a sheetrock lift that has proved very valuable.
Based upon the recommendation of our contact at the local building supply store, we went with 4′ x 12′ sheets, rather than 4′ x 8′ sheets. We are very glad we accepted his advice, since it was that many fewer sheets to lift and place and less seams to tape later on.
We found that we worked pretty well as a team, measuring and cutting and then lifting the sheets into place. Oz got pretty good at rotozipping the cutouts.
Here are a few photos of the ceilings when we had just a few more to place.Cutting and layout station
Placing a sheet with the liftOur woodstove helps warm the space
We also poured front sidewalks. We requested an aggregate finish on the walkways to help the color blend well and add a bit of interest to the entryway.
Several tasks had to be completed before the insulation could happen. They were:
Electrical rough-in (subcontractor)
HVAC rough-in (subcontractor)
Plumbing top-out (Oz)
Security system wiring (Oz and the boys)
CAT-6 Internet cable wiring (Oz and the boys)
Blocking for installation of brackets/handrails, etc. (Oz)
Final installation of woodburning stove and chimney (Oz)
During the past month, all these things have been accomplished. So… we got started on placing insulation on the wall sections. We used R-19 batting for the exterior walls and R-13 for the interior insulation for the pantry. We insulated between the living area and the bedrooms (R-19), providing a nice sound and heat barrier between them. The bedrooms are on a different HVAC zone, so we can keep the bedrooms at the desired temp. relative to the rest of the house. We’ve been very happy with the work done by the subcontractor. He used hard metal ducting for all but the last few feet on each duct, so no problems with collapsing ductwork is expected.
Hard metal ductworkMore metal ductwork
It has been definitely chilly on a few mornings, so we’ve been happy to have the woodburning stove ready for use. We’ve been very happy with how easy it is to get a fire started and how much heat the stove puts out.
Pacific Energy Vista woodburning stove
The plumbing project was quite a bit different than plumbing systems we’ve had in our other homes. Oz used pex plumbing this time. We especially like the manifold design, which allows us to control water flow to any part of the house from the main manifold. The plumbing inspection was passed with flying colors.
Shower control valve and pex plumbingPlumbing manifold back sidePex manifold front side
The boys and Oz had a good time running through the rafters to install security wiring for all doors and windows, as well as computer wiring to allow ease of use of internet throughout the house.
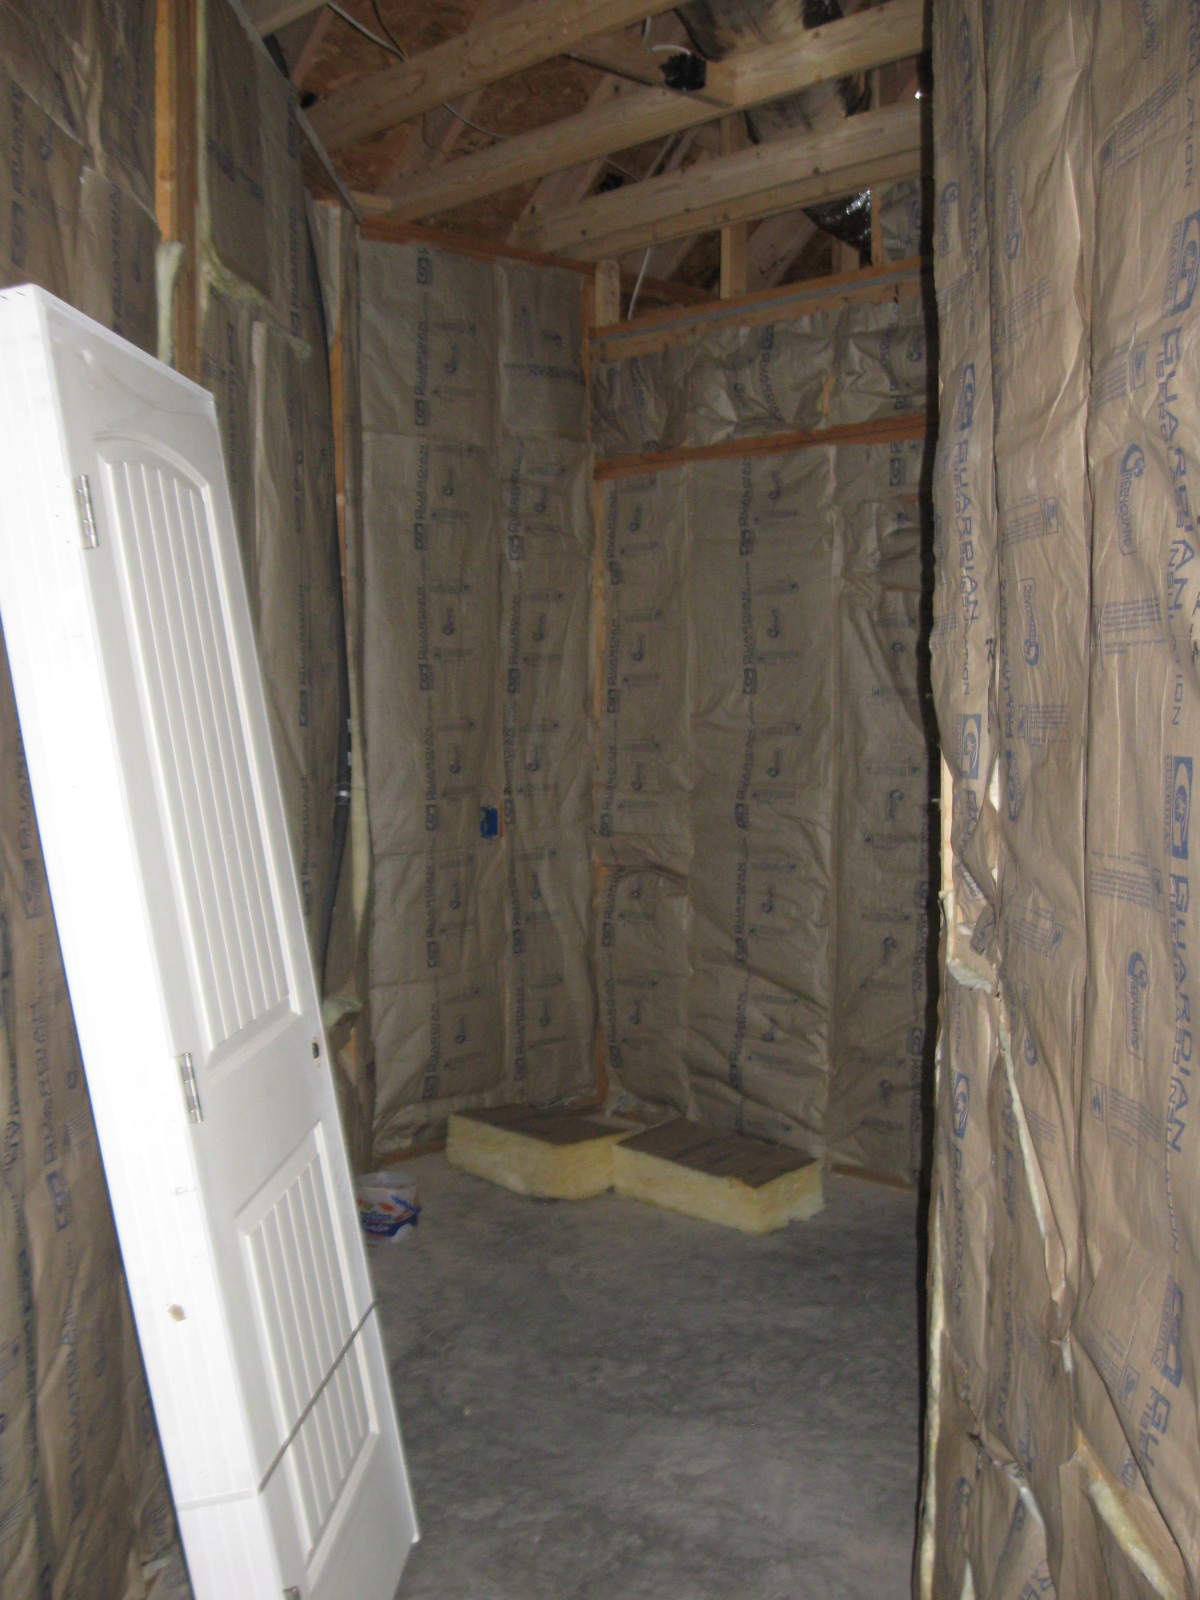
Our very large walk-in pantry has been completely insulated to allow for the possibility of making it into a walk-in cooler in the future. We installed a plug and framed a section of the back wall to accommodate a wine cellar A/C unit. We don’t plan to do this right away, but it will be very temperature stable in the meantime and allow for the possibility later.
Pantry completely insulated
Upstairs in the hobby room above the garage, we were concerned about the heat on the south side of the house. To try to minimize the heat in the hot summertime, we added a layer of styrofoam insulation between the rafters before adding the bat insulation. On the south side, we also added an additional layer of wall insulation to try to minimize the heat gain.
Hobby Room (aka Military research center) insulated
We gained a new appreciation for the folks who do this for a living (and are somewhat mystified as to why anyone would). This is easily our least favorite task thus far. We wore long-sleeve shirts, gloves, breathing masks and eye protection to do this job (quite miserable) and washed the same clothes every day to try to prevent the permanent ruination of several different sets of clothes by the fiberglass fibers… ugh.
I cannot believe it has been more than a month since I posted an update… suffice it to say that we have not stopped working and been laying about!
In the past month, the exterior of the house has been almost finished, including:
Stucco
Caulking and Painting Exterior Trim (soffits and fascia)
Exterior Door installation
Chimney
Roofing
Installation of Garage Doors
Gravel placed on drive and on road
Exterior Light fixture installation
We hired a subcontractor for the stucco. While they worked on stucco, I kept up (barely) with painting and caulking all the soffits and fascia. We used the elastomeric stucco that is well-suited to our dry climate. I know that in some parts of the country the tight seal the synthetic stucco provides brings potential problems. Here in the dry southwest, it works very well.
We did our own installation of all doors, including the garage doors. This allowed us to secure the house while we are away from home and also cuts down on the dust and dirt inside. Since the garage doors were installed, we were able to move all the tools and building materials over to the new house garage and give ourselves a bit more space in the workshop. Exterior light fixtures have also been put into place.
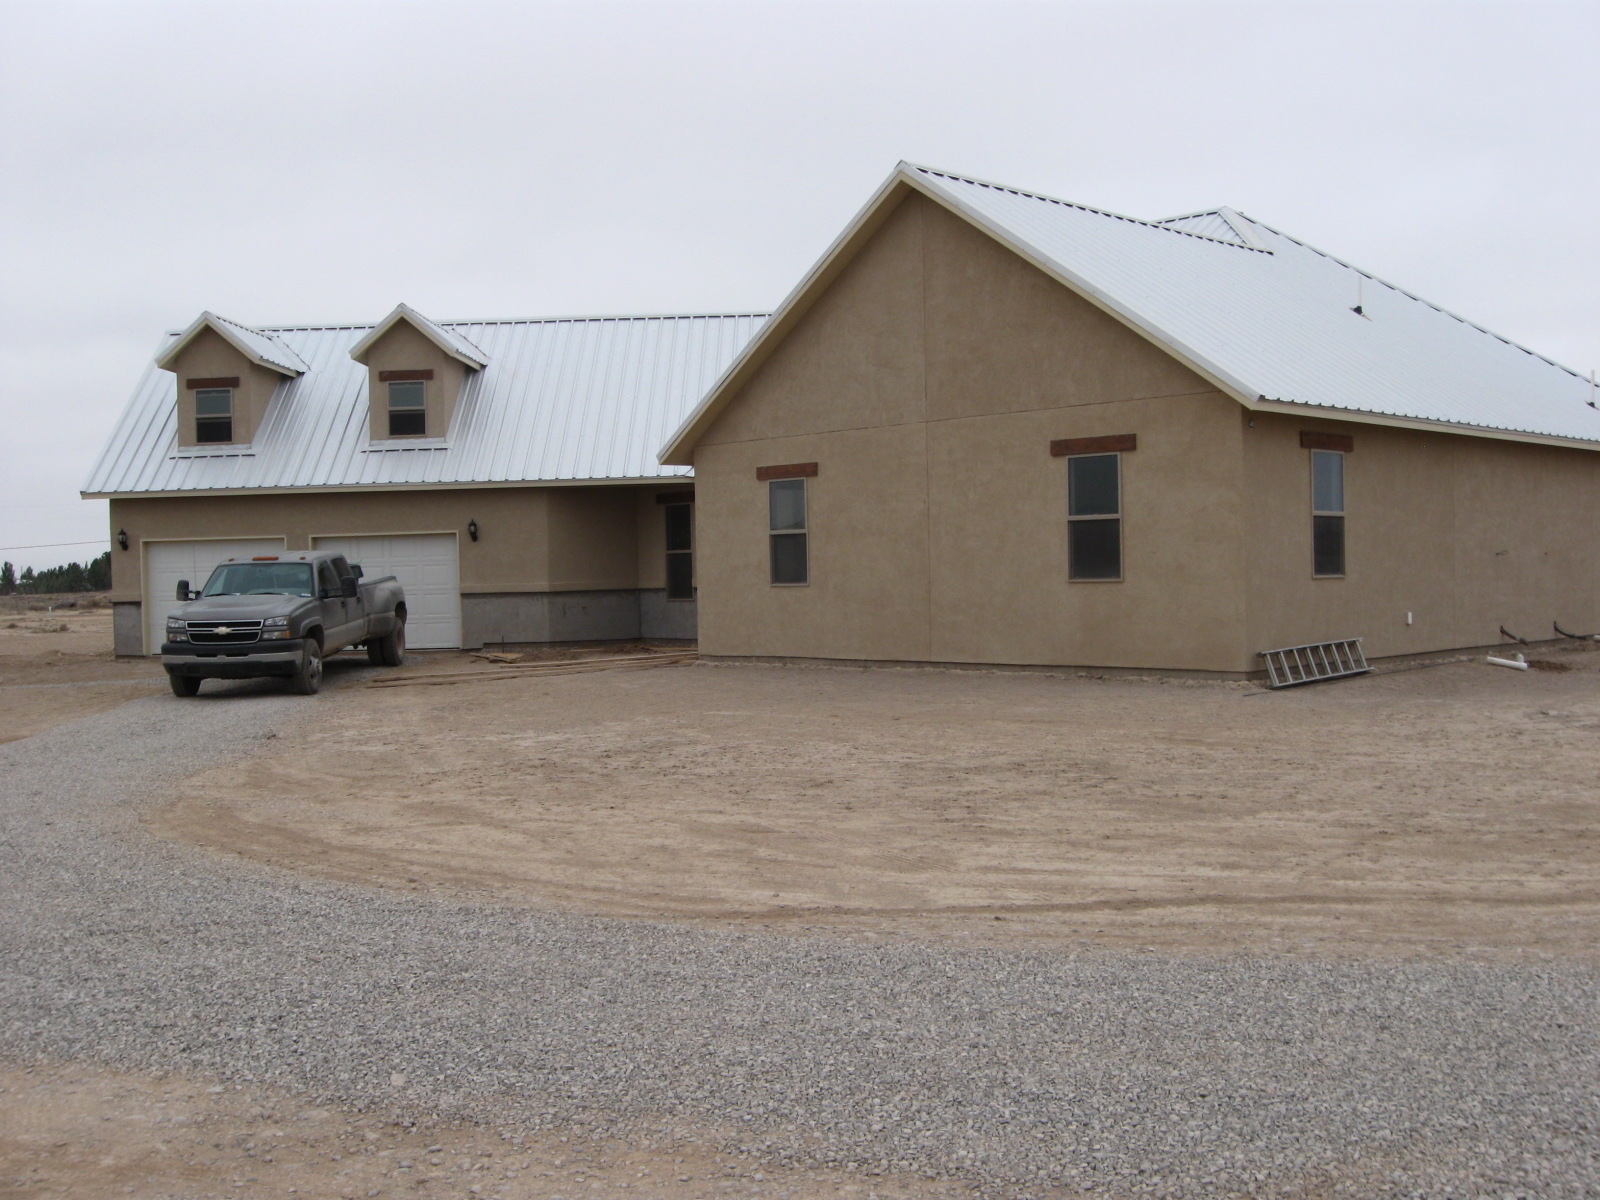
The roof is a metal roof, installed by a local contractor. We chose a somewhat unusual color — simple galvalume. The reasons we decided on that color are that 1) the unpainted metal surface has the highest reflectivity of any of the metal roof materials, and 2) it is also the least expensive. We think it goes well with the territorial-style of our home and will last virtually forever. Low maintenance, baby.
Finally, as the winter weather approaches, we put down a layer of gravel on our formerly dirt road. During the driest parts of the summer, the caliche in the area causes the dust to build up several inches deep on the road. Driving on our road at that time raises a veritable cloud of dust. The roads are also very nearly impassable after heavy rains. So… laying several inches of gravel has vastly improved the road. Heck, I may even wash the car…
See some photos of the exterior:Synthetic rock trim delivered and ready to install...
Front entry (door wrapped in plastic)View from the northwestBack porch viewSide porch and garage rear
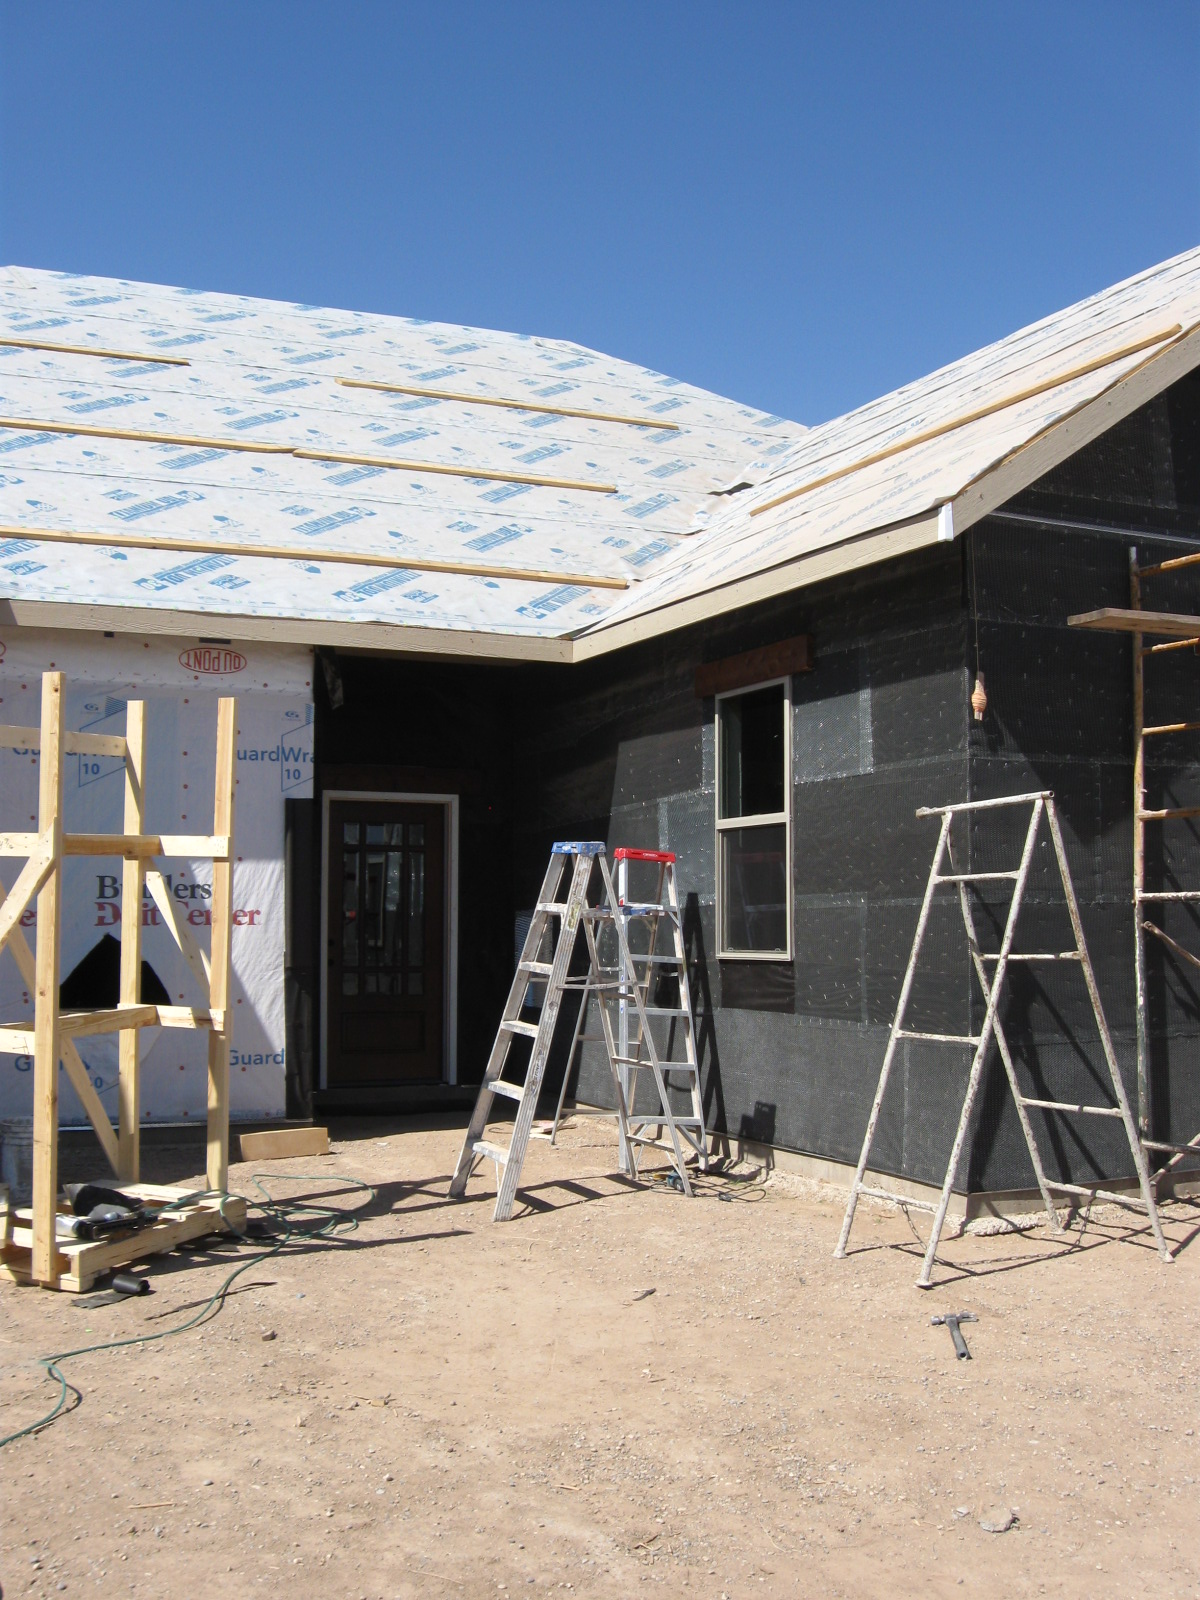
We have been so very busy on the house that posting has been spotty (we admit it). Here are some photos to give you a view of the work that has happened in the past couple of weeks. It is really starting to look like a home.
Framing completeFirst Window installed...House wrapped... stucco begins.Stucco in progress...Window installation... Stucco on the back begins..Back porch stucco begins...Tarpaper going up...Scaffolding for front gable...Front door prepped...
This week our windows arrived…all 23 of them. They ranged in size from 2’x3′ to 3’x6′. The larger sizes were very heavy. Installation was fairly straight forward. We reviewed several videos and how-to sites and reviewed the material from a few books we have.
We prepped the openings by cutting the house wrap. The cut was horizontal at the top of the window, vertical in the middle and ending in an inverted “Y” at the bottom. Each of the flaps were pulled into the window opening and stapled on the inside of the frame. Excess material was cut off.
Next we installed a bottom ledge moisture barrier using 6″ wide butyl rubber tape. The tape is installed over the outside lip of the lower window opening. We used a blow dryer to heat the tape and pull it nicely around the lower corner to form a water tight barrier.
The window openings were caulked top and sides. Bottom is left uncaulked to allow any moisture to drain down.
We installed the window in the rough opening, ensuring it was roughly centered from the inside. We checked level, using shims on the bottom to make adjustments. The window was then nailed in place at two points and checked again for plumb and level.
One the window was level, we nailed it home. It was then sealed by putting window wrap tape first on the bottom edge, then on the sides and finally on the top.
I have relearned the military principle of war-Simplicity-many times. I was taught at West point: “Issue clear, concise and simple instructions.” Doing so will minimize the possibility of confusion and enhance effective mission accomplishment. Obviously I failed to observe this principle when directing the Stucco Subcontractor.
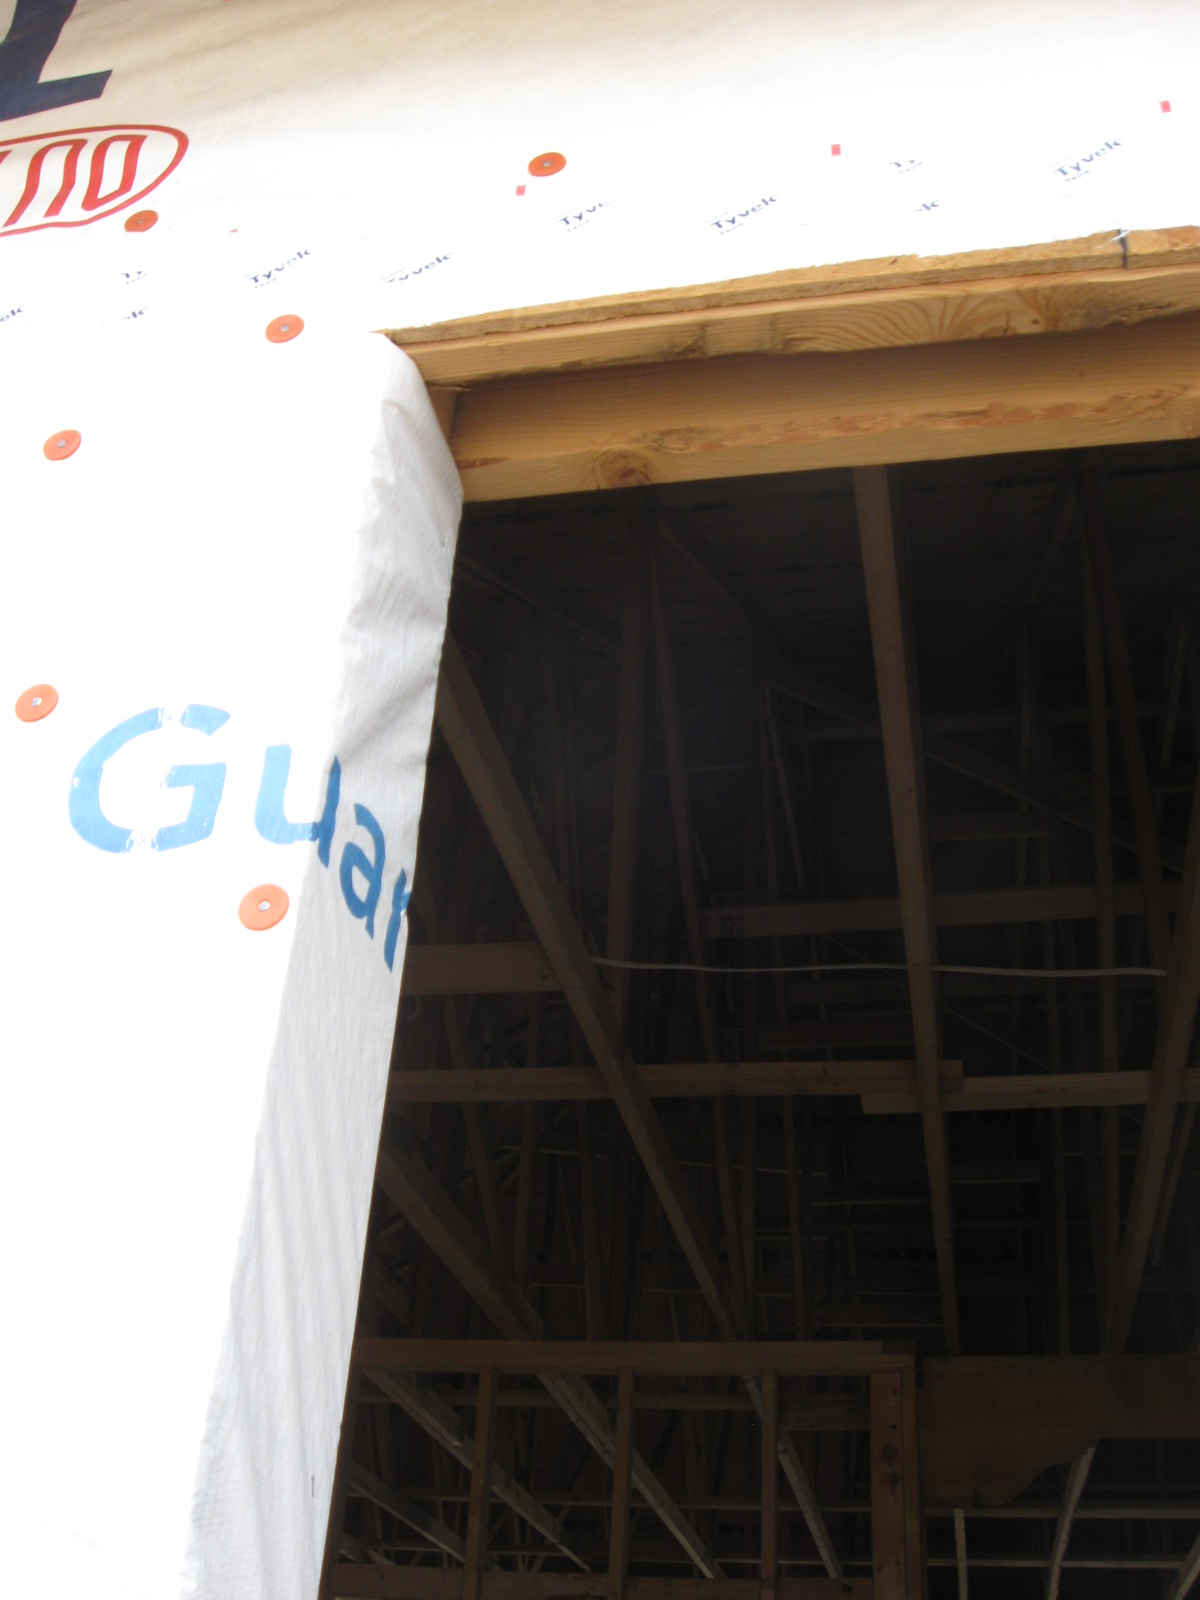
What I thought I conveyed(first image):
After issuing clear and concise orders my wife and i move to the opposite side of the house to install some more windows……
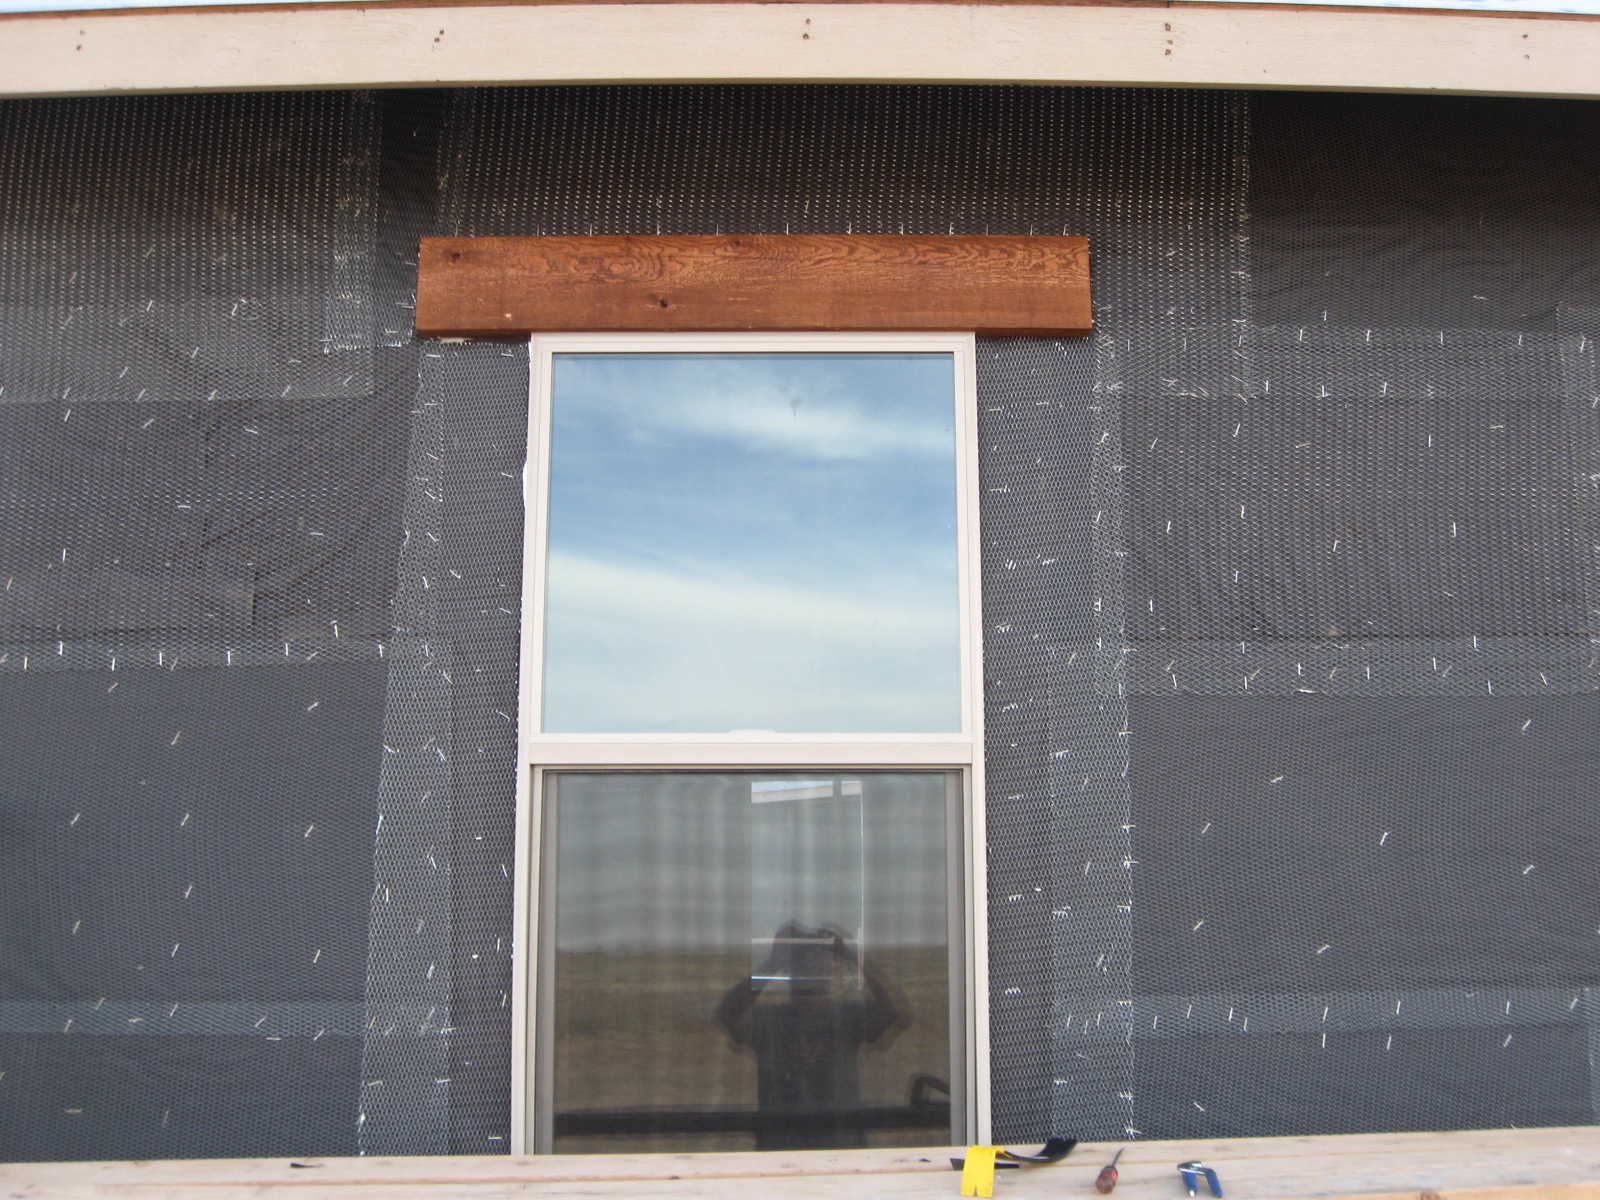
What the subcontractor heard (second image):
Meanwhile, the sub is busy covering up those expensive cedar beams which have been beveled, stained and neatly installed above the windows. Why the heck would they want those ugly things showing…let’s stucco over them.
As G.N. Construction continues working on the roof decking and soffits, they are also continuing with the framing of the bonus room above the garage (in case you’ve forgotten, it is really the future home of the WWII Museum and Research Center). The progress is moving along well as we continue to complete small jobs around the house while they work. Most of the bracing from the interior of the house has been removed, so you can safely navigate without fear of head-bonking. Also, Oz finished building the water heater platform and has been working on the plans for the woodburning stove installation and chimney. We also bought paint to begin painting the soffits before the roof flashing is installed.
Additionally, we got our exterior door for the kitchen ordered, windows on order and have gotten word that our interior doors have arrived and are ready to be delivered. After the roof decking is in place, the roof will be wrapped with Titanium 30 to keep out future rain. That will be a very happy day! Here are a few photos showing current progress:
Framing the bonus room end window Framing on bonus room - dormer spaces
A short post with photos of the pillars and corbels that Oz is installing before they start the soffits:
Beams and Corbels Going in...Looks Pretty...Staining needed on short piece...Corner plumb line...Not bad planning for a rookie.
We think the stain looks great… still have more to do — probably another coat on all the pillars and then the clear coat on top. We were trying to hurry to get as much done before the pillars and corbels were put into place as possible… but we didn’t want to delay the guys who are putting on the trusses, decking and soffits.
In case you are interested in stains, chinking materials, deck protectors, etc., check out Mountain Home Building Products — excellent service and fast delivery.
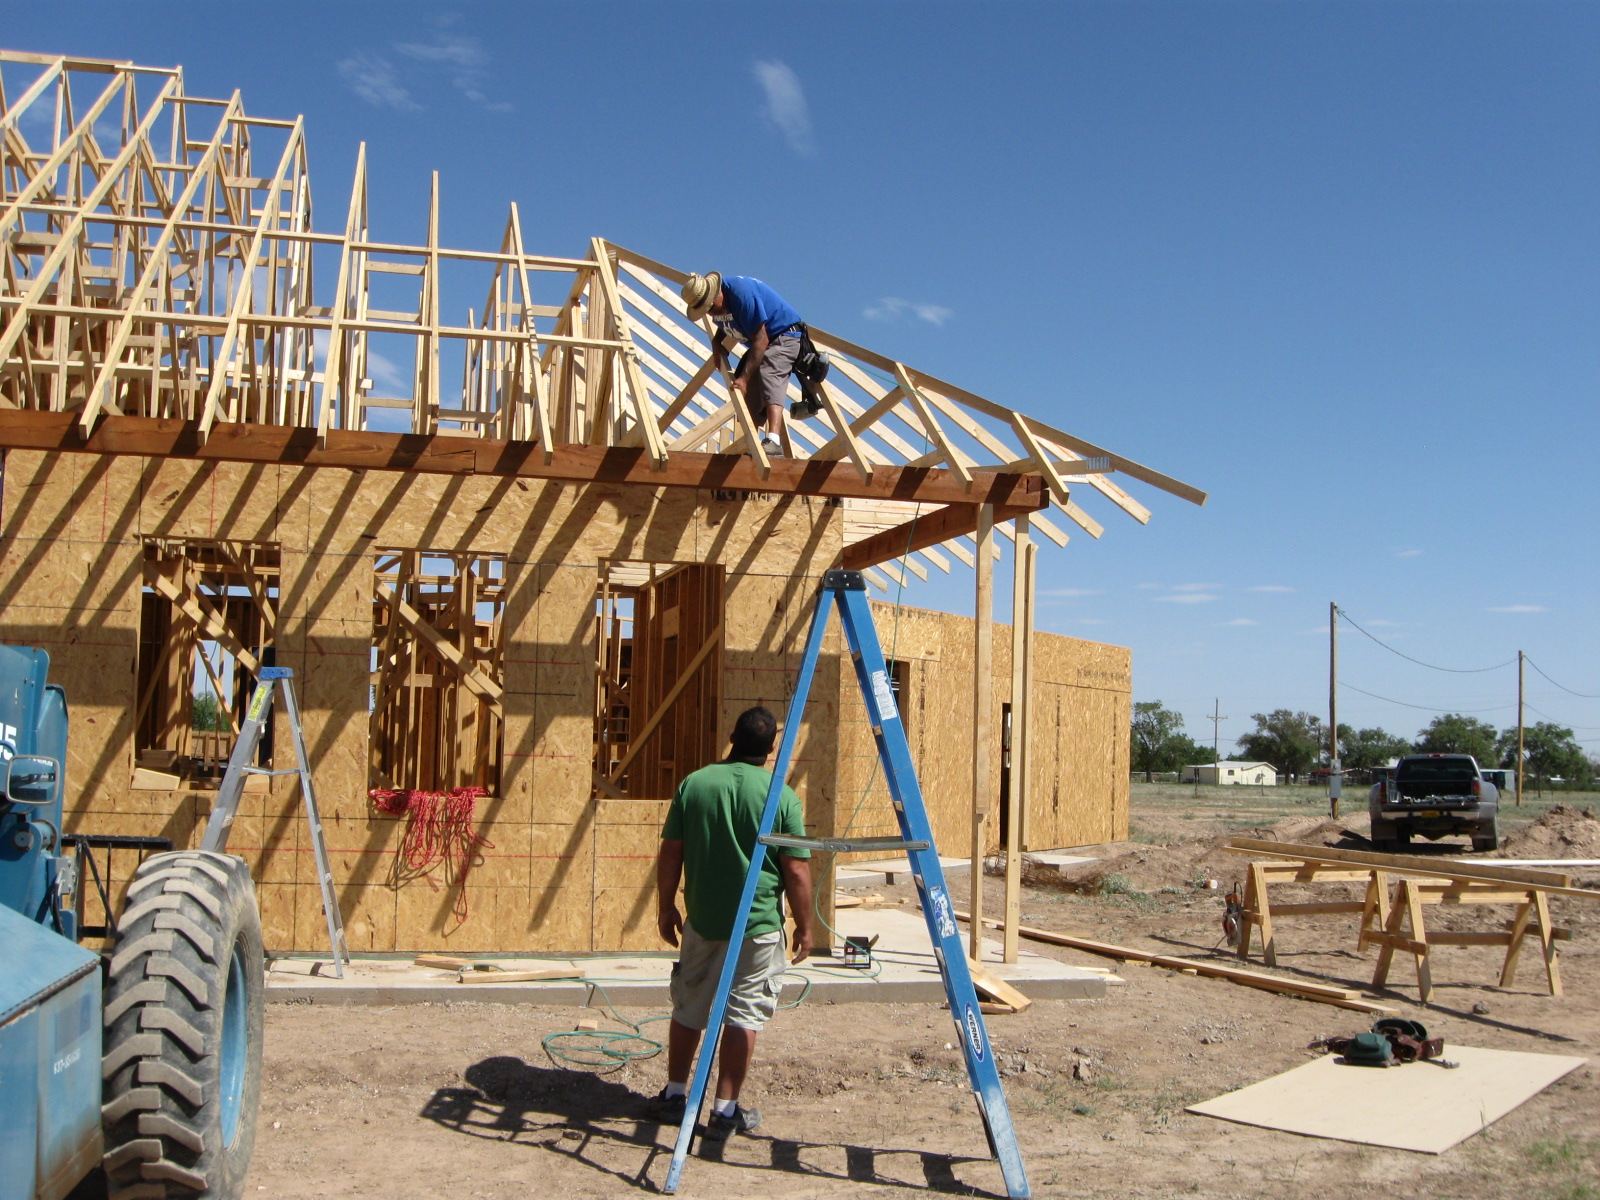
As the work continues on setting the trusses, the shape of the house and how the roofline will look is becoming more clear. I was surprised that they were decking the portion of the roof that will have rafters above, but that provides extra stability and provides structure for setting those rafters. I took a few photos:
View from front
The work of setting trusses, decking the roof and framing the bonus room above the garage is being done by G.N. Construction, LLC. Freddy and his crew have been doing a great job here. You can contact them for work in the region by phone at (575) 914-0018 or (575) 420-3194. View from the north side
Placing the beamsView of back porch
End corbel and beam...Freddy Nasarallah (GN Construction LLC)Lifting a BeamAdjusting the Beam's position
We received our stain from Mountain Home Building Products very quickly and were able to get the beams stained on the ground before they were lifted into place. We like the look of them very much. We were very pleased with the stain and with the quick shipping. If you missed our post on choosing which stain to use, you can find it here.