I have been invited to be a guest contributor at the Brink of Freedom blog. I submitted my first article there. Please check it out if you have time.
Brink of Freedom Blog

… starting a new phase of life.

I have been invited to be a guest contributor at the Brink of Freedom blog. I submitted my first article there. Please check it out if you have time.
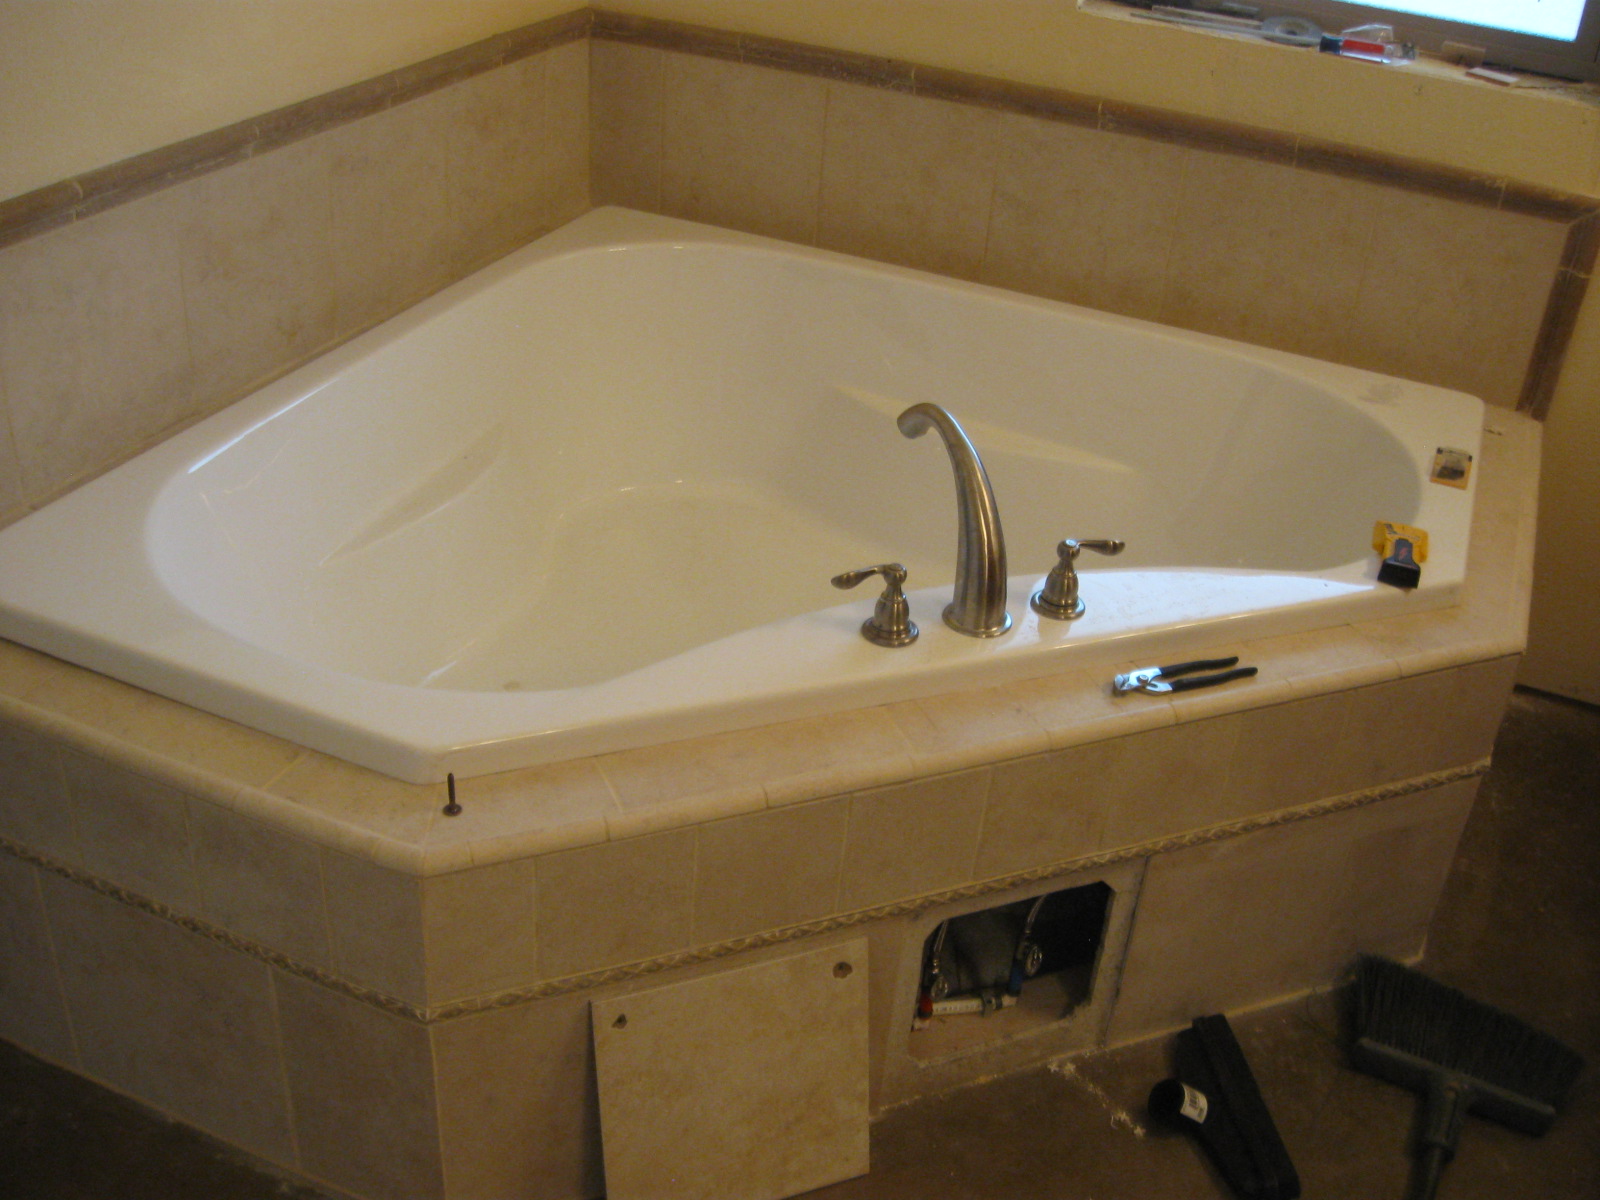
… and it works!
Oz, the oldest boy and I set the tub in place… After Oz finished the plumbing, we were very pleased that it works well and does not leak!

Just a few photos of the beautiful rain we are getting here…


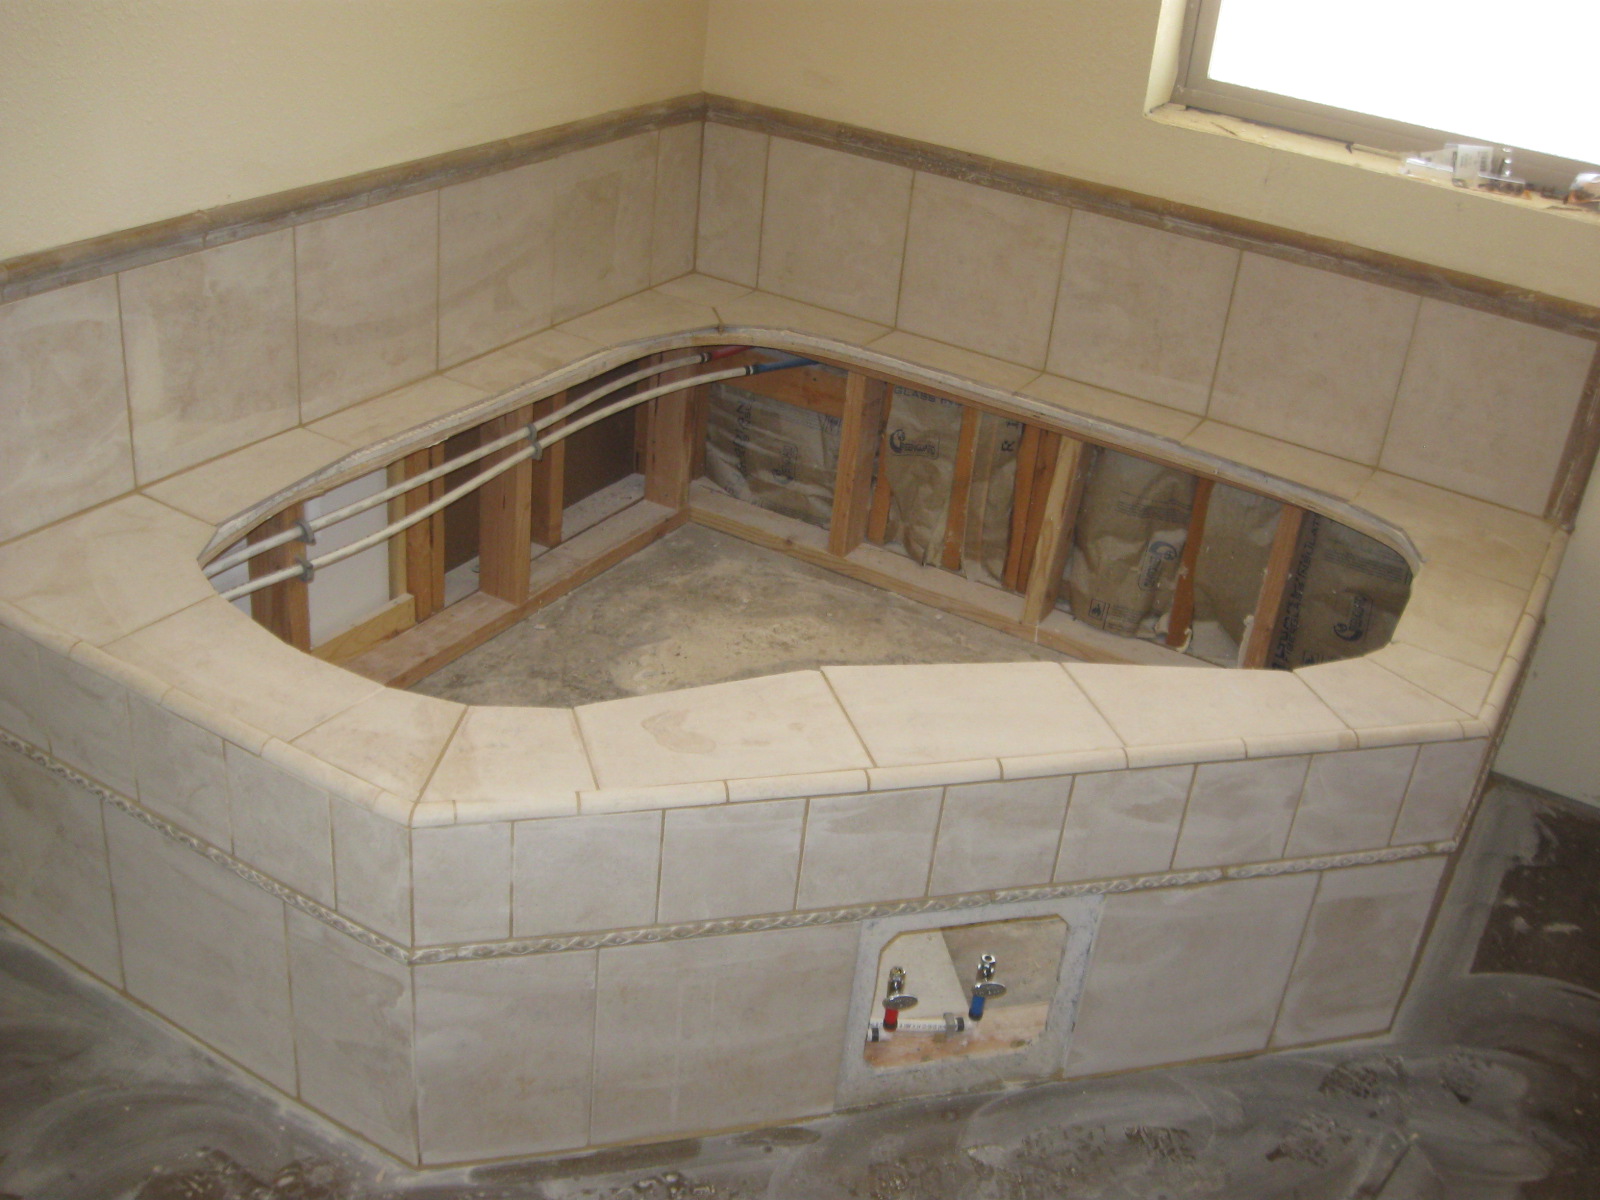
We’ve begun learning to put in the tilework. The first project was the surround for the garden tub. We opted for a fairly neutral color of tile (Briton Bone Home Depot) with accent pieces that coordinate with the stained concrete floor color (Walnut). We chose a grout color of Linen. Here are a few photos…


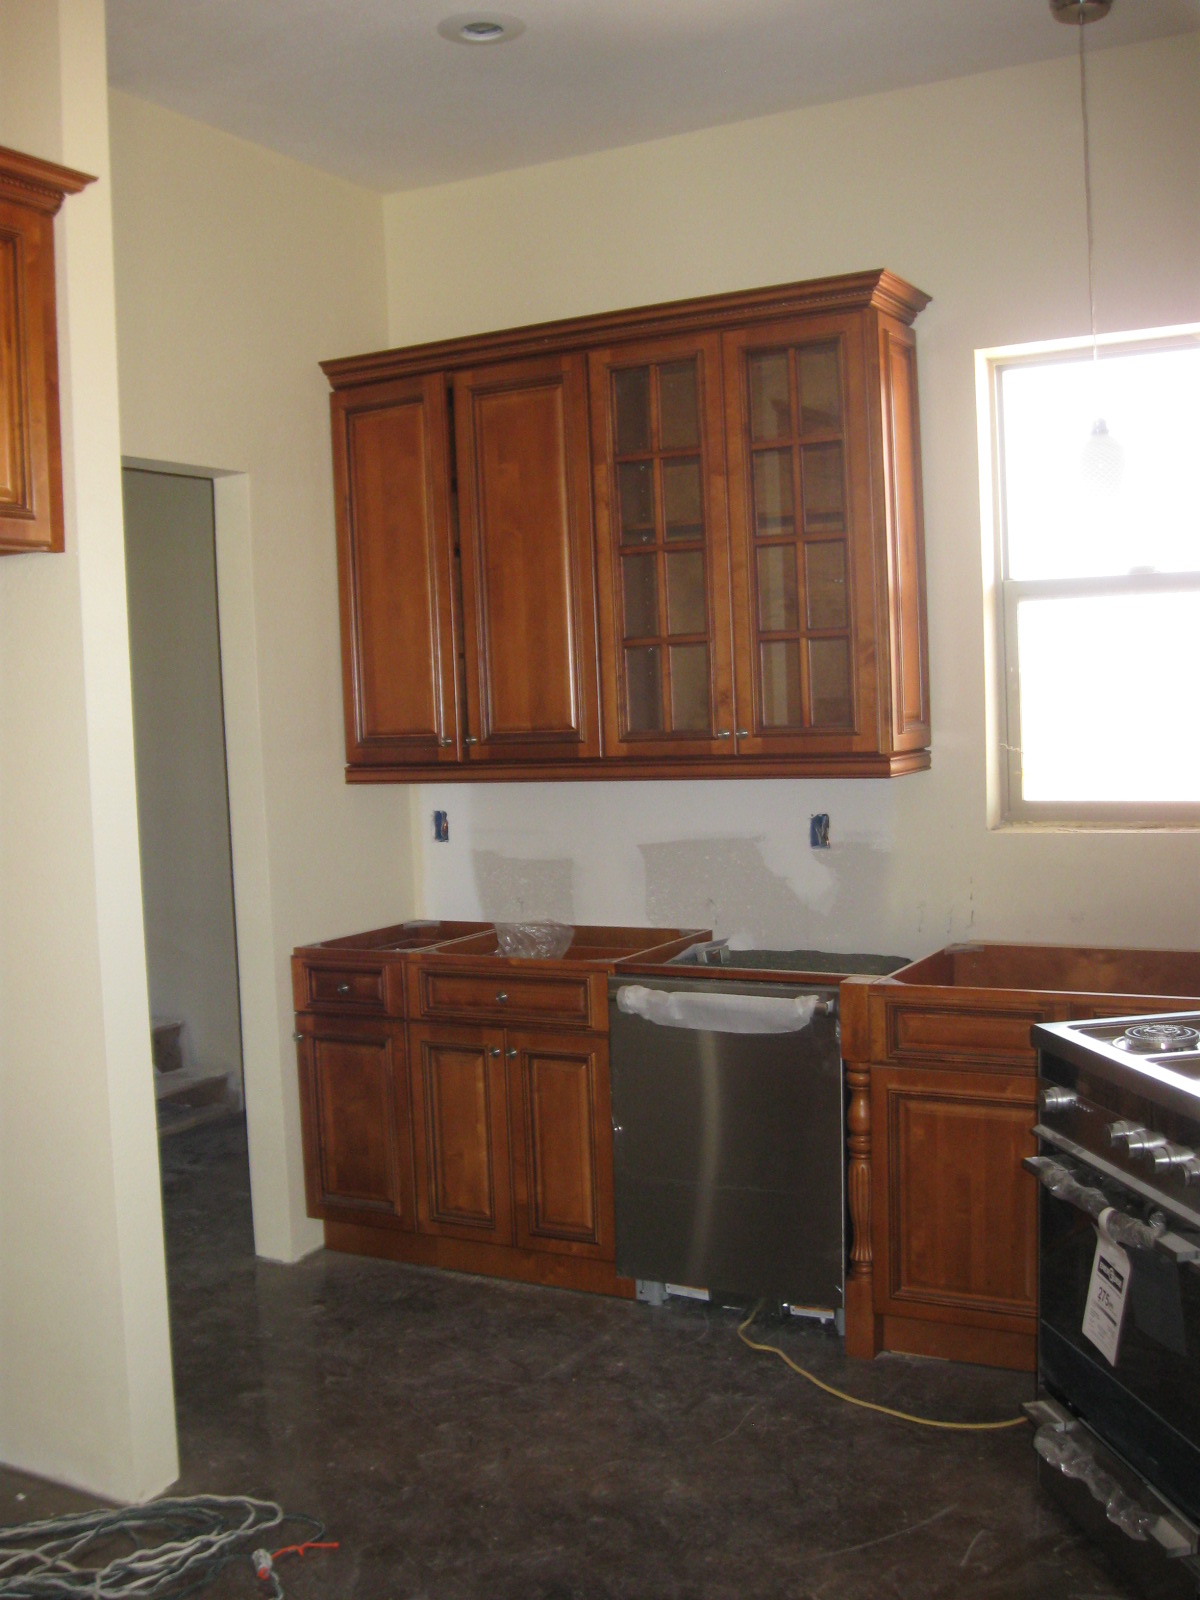
We opted to put RTA (Ready-to-Assemble) cabinets in the house that we purchased from mycabinetplace.com. As I mentioned in an earlier article, the quality of the RTA cabinets is very good, but with huge savings when you assemble them yourself. I documented receiving the cabinets, but realized this morning I had failed to post about assembling and installing them in the house.
We have learned a few things as we passed this milestone that might be helpful to others:
1. The instructions are only a rough idea of what to do…
The hardware mentioned on the instruction sheet may or may not match what you receive with the cabinets, but will work if you just work with it a bit. We found there were some boxes that did not have the same type of hardware as the rest… some missing corner braces, some missing soft close door hardware… extra screws of one type, extra shelf hangers, etc. Overall, we were short some things and contacted the distributor about getting them sent (no word yet).
2. Large shipments tend to have more damages in shipping. We had a pretty large order the first time… and LOTS of damage to the shipment along the way. I documented the damages and we received a second large shipment with replacement pieces. It also was a large order and had quite a bit of damage. Luckily, we could make use of most of the second shipment, placing end pieces with scratches where they wouldn’t show (butted up against another cabinet, etc.). The last shipment (with backordered cabinets) was very small and had no damage at all. I’m sure the distributor would rather get a single large order and be done with it, but my thought is that you could possibly save yourself and the distributor (and, of course, the warehouse) a lot of hassle by ordering the smallest quantity you can at a time.
The company we used had a minimum $2500 order for free shipping. We could have split the order into three separate orders and still had free shipping. In hindsight, I’d do that, grouping like-size items together (all the tall cabinets and long trim pieces in one order, for example).
3. Hang the wall cabinets before you place base cabinets… much easier to work without having to lean over base cabinets while setting wall cabinets in place.
4. Buy the correct screws for installing cabinets… makes the work go better.
Here are some photos of the process and finished product:


I’ll admit it… it took the wind out of our sails to have to scrub paint off of the entire floor surface of the house. We did it, though, and were very happy with the products we bought at thestampstore.com. This time, we tested a small area of the laundry room floor (the part where the washer and dryer will sit) before staining the entire house. After we did this, we were able to gauge how dark the stain would be and whether or not we had cleaned the floors of the paint (Valspar from Lowes) sufficiently to get a good result.

From this, we learned:
1) the stain at a 2:1 dilution rate was a bit too dark for our tastes (we ended up with 3:1 water/stain)
2) We had not cleaned the floors sufficently.
So… back to the buffer rental center we went again. We were getting very good at this process, so it went more smoothly the second time around. We also used a stainless steel scrub brush (bought in the paint dept. at Home Depot) for around the wall edges. Using more TSP (trisodium phosphate) solution, buffer, squeegee, shop vac and mop, we once again cleaned the entire floor. This time we were more satisfied with the amount of paint removal.

Using a simple nonmetal garden pump sprayer, we applied the acid stain over the floors and let it dry completely. After it dried well, we cleaned the acid residue from the floor by applying water (we tried using the pump sprayer, but found it took too long, so ended up dumping water and spreading out with the squeegee), then squeegeed and shop-vac’d. Repeated this until the water was clear.

Then, we used an ammonia solution to neutralize any remaining acid… again applied water to remove all residue and squeegeed and shop-vac’d.

We bought two different types of sealer (on recommendation from the guy at The Stamp Store). The first layer of sealer (the 2500) we applied (using respirator masks — this stuff really stinks) was fairly thin. It was sprayed on and then back-rolled for a nice smooth finish. After it was well dry, we applied the second type of sealer (the 3000), which was much thicker in the same way (again using respirator masks). After both sealer coats had dried well, we applied three coats of Cherry Wax with the 12″ Wooster Lambswool applicator and ended up with a pleasant smell and a very nice finish.
REVIEW of Lowe’s/Valspar regarding the fiasco with their “stain”: After letting the Valspar agents know of the difficulty we had because of the incorrect information given to us by the Carlsbad Lowe’s paint dept. personnel, they were very helpful. Lowes gave us a full refund of the cost of the stain/sealer products they sold us. In addition, Valspar sent us a $300 Lowe’s gift card to repay us for the cost of the rental equipment and cleaning products we had to buy to get the stuff off our floors. All in all, I have to give them a good review on their customer relations.

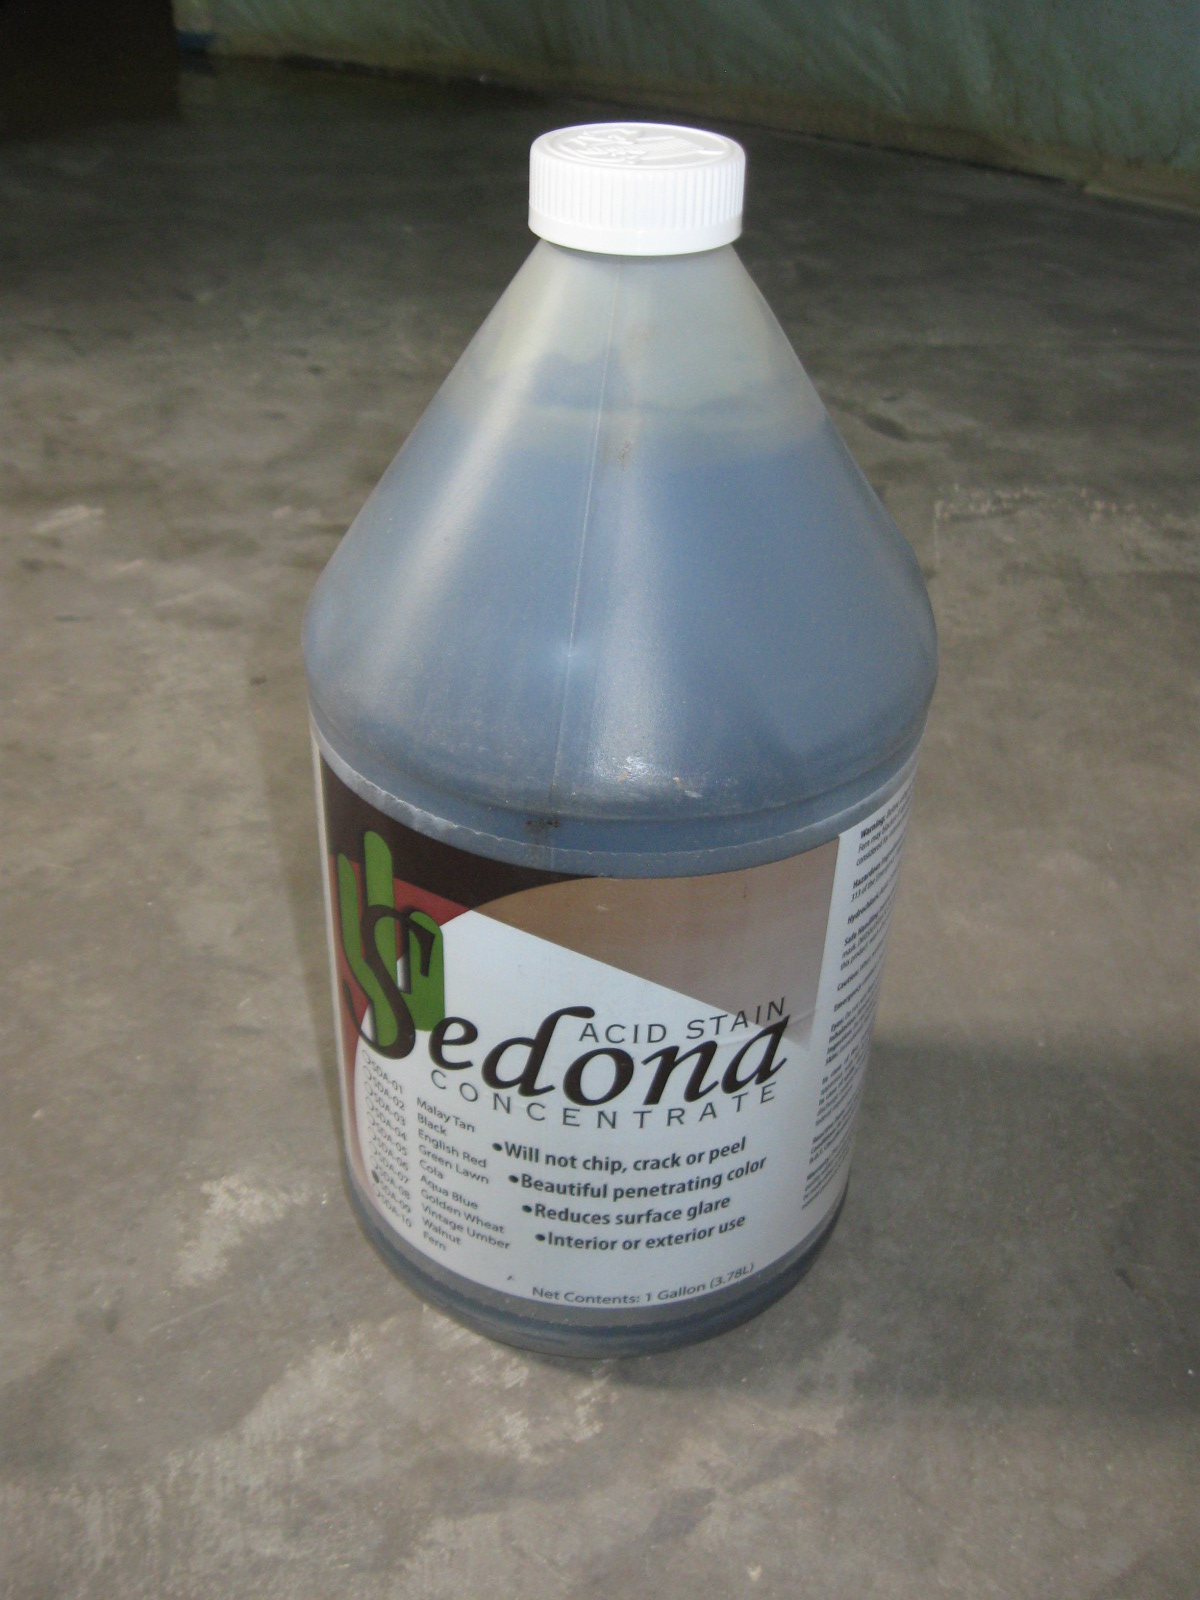
Well, since we finished scrubbing all the paint off the floors, we had to wait for delivery of the new products from thestampstore.com. We ordered:
Walnut Acid Stain
2500 Floor Sealer
3000 Floor Sealer
Cherry Wax
Cherry Wax Applicator – Wooster 12″ Lambswool.
They all finally arrived on Wednesday or so… We were already in the midst of the next project, though, so we continued on with the irrigation system.
Since last May we’ve had a temporary watering system set up for the four pecan, one peach and one nectarine tree that are all planted northeast of the workshop. The new system completely replaces it with a permanent system, complete with automatic valves, underground pipes, etc. The old system was not ideal, since the pvc piping was sitting in the sun (getting more brittle by the day) and occasionally leaked. We have a very large crop of wildflowers all throughout the trees… some of them noxious weeds that I’ve spent a lot of time pulling. We think the new system will reduce the amount of weeds, since the water will only go in the tree wells now. However, for your pleasure, I’m posting a few of the interesting wildflowers we’ve gotten.


Here are some more photos of the garden, back yard area with irrigation system.


We were afraid none of the grapevines we got from a friend were alive, but continued watering them… and now we see that they are starting to grow:


Ok… we have this post as a warning to other would-be concrete floor stainers. We have effectively discovered nearly everything not to do.
Before we began the process, we had looked around online and in local stores to find good products to use. During our visit at the Lowe’s in Carlsbad, the paint dept. manager convinced us that their Valspar products would work very well on our house interior. Well… the etching product seemed to work fine, so we thought all was good.
Yesterday morning, with plans for an easy day, we began early spraying the “stain” on the prepared floors…


Mistake #1: Failing to test a small inconspicuous area before continuing with the rest of the house.
Yes, being generally optimistic and very hopeful, we sprayed the entire house in quick time. As we were checking it out as it dried, we were concerned that the stain didn’t seem to be penetrating the concrete at all… the more it dried, the worse it looked.
Mistake #2: Believing the sales personnel when they said products clearly marked as exterior products were fine for interior use.
When we called Valspar, we discovered (to our dismay) that the products we had just covered our floors with were not suitable for interior applications, even though the sales staff at the Lowes had heartily recommended them.

Mistake #3: Thinking that product labeled “Semi-transparent Stain” would actually be either semi-transparent or a stain. It looks like concrete floor paint, sprayed over concrete in a (very ugly) spray pattern.
Conclusion: We are now in the process of removing all the “stain” from the floors with a rented buffing machine, TSP solution and bristle brushes. This is not an easy process. We are about 1/3 finished with the removal project, and guess we have another 10+ hours of hard labor before we get the floors back to the way they were before our staining adventure.
Tips on Removing Concrete “Stain”:


Needed tools/materials:
Rented buffer
Stripper pads (buy at a janitorial supply place — here it was the Southwest Cash and Carry — at the rental place it was nearly $10 apiece. At the Cash and Carry, they were $14.50 for FIVE)
Squeegee
Wet/Dry Vac
Mop and bucket
Palm Sander
Scrub brushes
TSP (trisodium phosphate — sold in the paint section of hardware stores)
1. Use commercial style buffing machine to remove stain. Use TSP solution (1/2 cup to 2 gallons hot water) to lubricate the buffer.
2. Buff a section, then squeegee the buffed floor to assure complete removal before moving on.
3. Use wet-vac to remove liquid from floor.
4. (VERY IMPORTANT) Mop any remaining drips, residue before it dries. If you fail to do this last step, you’ll find yourself redoing parts of the section again later (Ask me how we know this!).
5. Remove remaining paint around edges of the rooms with hand scrubbers or palm sander.
NOTE: This assumes you have not applied any sealer to the stain. It will require other products and be much more difficult to remove the stain if you have already sealed it.
Going Forward
We have ordered products from thestampstore.com, which we are confident will work better. We spoke to a salesperson at the Okla. location and got his advice on what to use and how much to buy.
And… do you think maybe we’ll try out a small, inconspicuous area before we stain the entire house next time???
As I mentioned in a previous article, Discount Kitchen Cabinets, RTA (Ready to Assemble) cabinets are a cost-effective way to get good quality cabinets at a much lower cost. We ended up ordering our cabinets online from myCabinetPlace.com, a company out of Minnesota. After checking and double-checking final measurements for Kitchen, Laundry, Master Bath, Two bathrooms for the boys and the Powder bath, I made a call and spoke to a very nice and helpful person (with a definite Minnesota accent) at the company phone number. He answered all my questions about specific details and what he could offer for concerns with installation, etc. The company offers free shipping on orders over $2000, plus the no sales tax benefit of ordering out of state. Our shipment was large enough to warrant a freight truck delivery.
Our color choice for the entire house was: Gander Maple

The company’s online description of the cabinets makes them appear very attractive:
“Burnt Sienna” stained baked finish on maple
Completely stained, baked finish inside and out
Exposed sides are stained to match
Greater assortment of cabinet sizes and accessories provides high end design without high end price
High Quality All Wood Construction
Face Frames: 3/4″x 1-9/16″ Mortise & Tendon Construction
End Panel: 1/2″ Plywood
Top and Bottoms: 1/2″ Plywood
Shelves: 3/4″ thick Plywood edge-band on front
Back: 1/8″ Plywood, Sink base cabinets may have an open back or may require holes to be cut in the back for plumbing
Hang rails for wall cabinets: 1/2″ Solid wood
No particle board!!!
Doors and Drawer Fronts are Solid Wood, 5-Piece construction with raised panel
Drawers are Solid Wood Dovetail Construction with full extension under mount self soft-closing drawer glide system
Six-way adjustable fully concealed, European style hinges
Full Overlay Doors and Drawers
As we passed through the local Home Depot, I happened to look at their in-stock cabinets for comparison… at similar prices, their cabinets were made up of particle board primarily. These RTA cabinets, while requiring assembly, are much higher quality.
Just for a comparison, I looked up what HD had to offer that would be of similar quality. Their RTA cabinets are almost entirely made up of particle board, so I didn’t think it was a fair comparison. Their Home Decorators Online Cabinet line seemed of similar quality, although they arrive fully assembled. So, to do a quick comparison, I looked up the cost of a Base Cabinet, 24″ in their Lewiston Toffee Glaze. Their price (which will also have the additional sales tax added) for this base cabinet was $469. The cost of the same cabinet from myCabinets.com was $166 when I ordered it. The pricing of their other cabinets and accessories was similarly different for the rest. In short, we were able to get everything we need for 42″ high wall cabinets, crown molding, under cabinet light rails, decorative posts, etc., etc., for the entire house for a price of only $9626, delivered. I think we would pay nearly triple the price for a similar product from HD, or any other cabinet company locally.
Note: Since we ordered our cabinets, our particular color has been discontinued. The Kingston maple cabinets are similar.
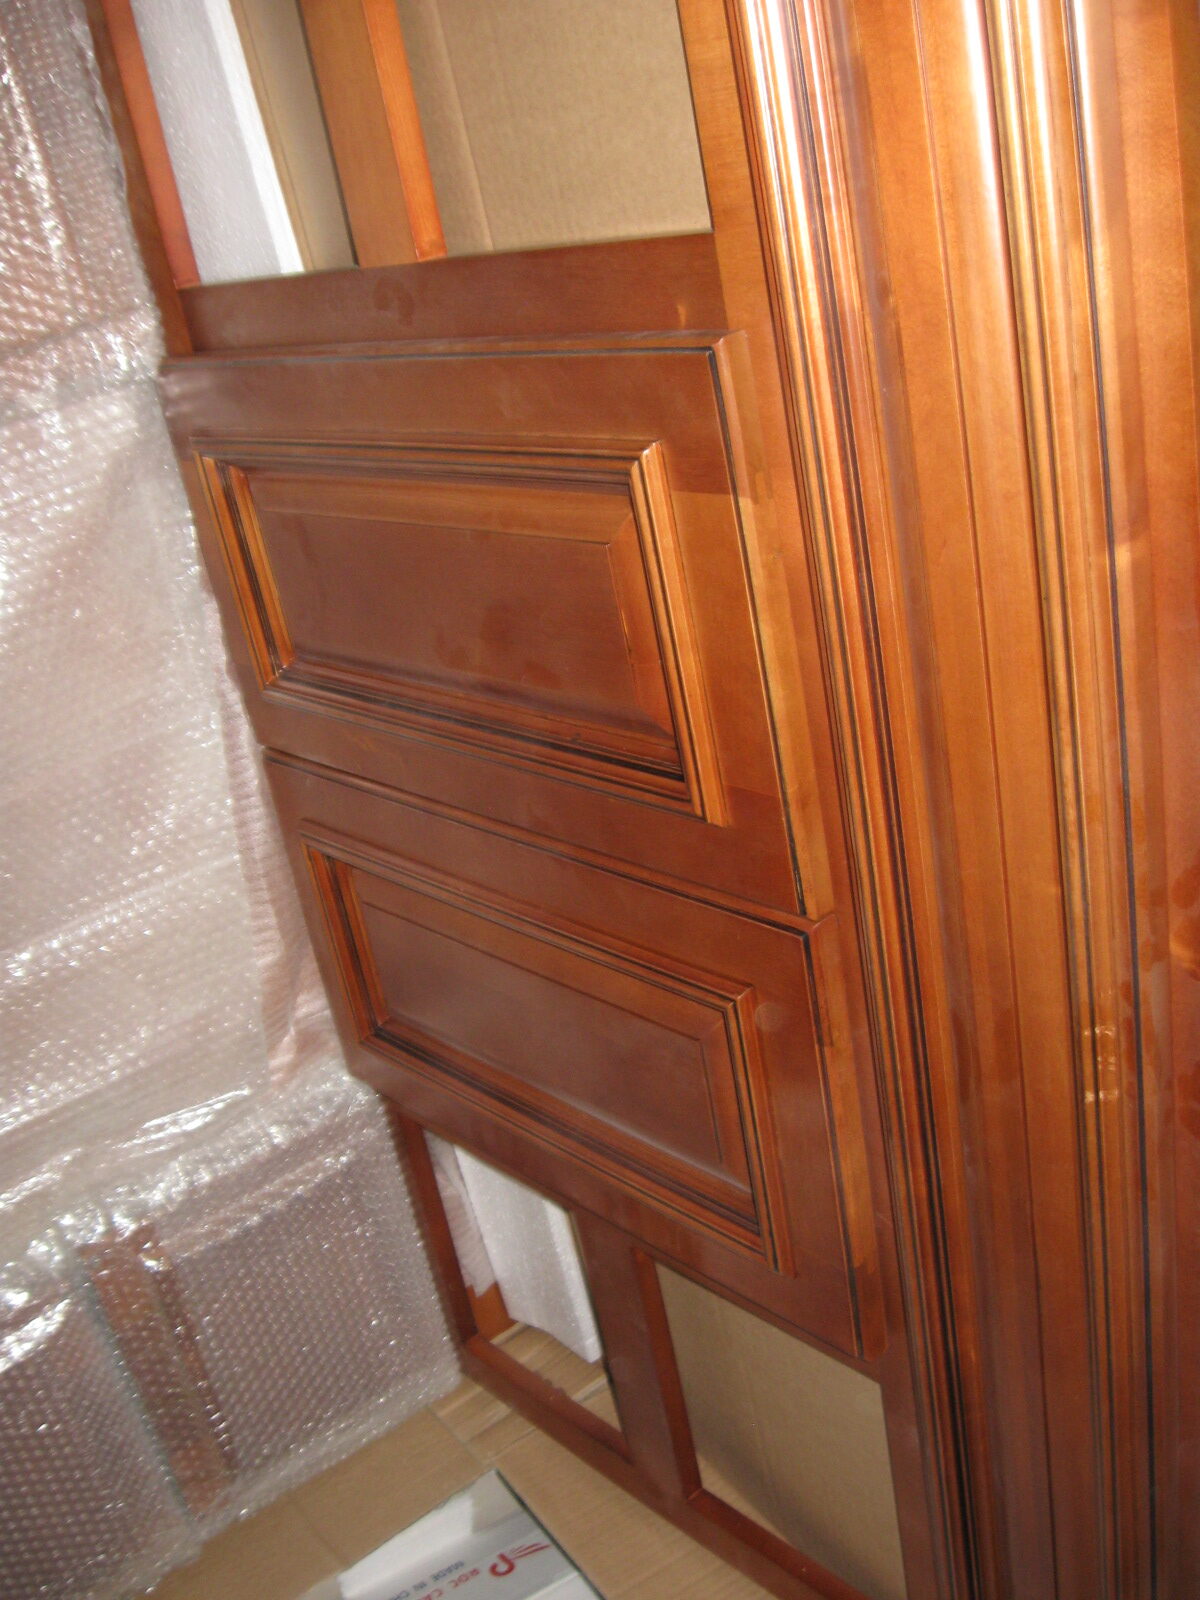
So, the cabinets came in, delivered by a freight delivery company. Unfortunately, we had bad luck with the delivery. Out of the two double pallet shipment, we had 16 boxes with visible damage (scraped, crushed, forklift driven into it) and, upon opening the boxes, lots of unseen damage was found on the cabinets due to the rough handling (dented cabinet fronts, etc.).
One thing to keep in mind when you order RTA cabinets is that you are responsible for documenting any damage when you get them and working with a long-distance company to get the issues resolved. It took me a good couple of days to go through every box, looking at all the individual pieces to assess the damage. While I was doing it, I had to keep in mind that the boxes had to be re-packed (like a puzzle) so that the carton could be returned if necessary.
I made a complete listing and have submitted it to the company, requesting replacements of some of the worst damage and touch up paint for the more minor scratches.
All that being said, I love the cabinets and am very impressed with the high quality of the construction. Had they not been damaged in shipment, I would be ecstatic.
I still think this is a great way to get high-quality cabinets for less… but it isn’t without its costs in time. More to come as we wait for the replacement parts… Here are a few pictures:


We decided early on that we wanted to have stained concrete floors throughout the bottom level of the house. For one thing, the finish is beautiful and durable. For another thing, we really do not like wall-to-wall carpeting at all. Lastly, it is a very low-cost alternative to ceramic tile and easy to do relative to other alternatives.
To prepare for this, we asked our concrete guys to give the foundation a machine finish after it was poured. It has a very nice glassy finish already on most of the house (along the edges of the foundation, there are a few less-smooth spots, but nothing bad).
Also, since we knew this was the plan, we tried very hard during all phases of construction not to get it dirty with building materials, etc. Particularly once we started the mudding and taping, followed by paint, we covered the floor with tar paper (a much less expensive alternative to the expensive cardboard rolls they sell in the hardware stores) throughout the house.
However, as hard as we tried, we still had a lot of work to prepare the concrete for staining. We spent a good two days cleaning the floors, sweeping, vacuuming, scraping off any bits of drywall mud, removing the drips and overspray from the paint process. and finally mopping every inch of the house. After that, we had to mask the lower parts of all the walls to protect them from the stain and etching compound. That was not a pleasant job, but not a difficult one.
To mask the walls, we cut 18″ strips from the roll of painter’s plastic (10 feet wide) that we used to mask during the texturing and painting processes. After cutting the strips, we taped them around the walls and woodwork, using blue tape on the tops and on any woodwork and regular masking tape on the bottoms of the sheetrock, where the woodwork will eventually be installed.
One thing that helped with paint removal was using brush cleaner (for latex paint). By painting it on the overspray or drip, and then scraping after a few seconds, the job was made much easier. This was a relatively inexpensive product. We only needed 2 quarts for the bottom floor our house (2600 sf to be stained), at a cost of about $7/quart.
After the floors were relatively clean, it was time to use the cleaning/etching product we bought to prep the floors to accept the stain. We looked around online and at the local paint store, as well as our local Home Depot. We ended up going with the Valspar products sold by Lowes. We found some very knowledgeable staff at the store down in Carlsbad, who were able to clearly explain just how their products worked and what we would need to get to have all the tools at hand for the process.
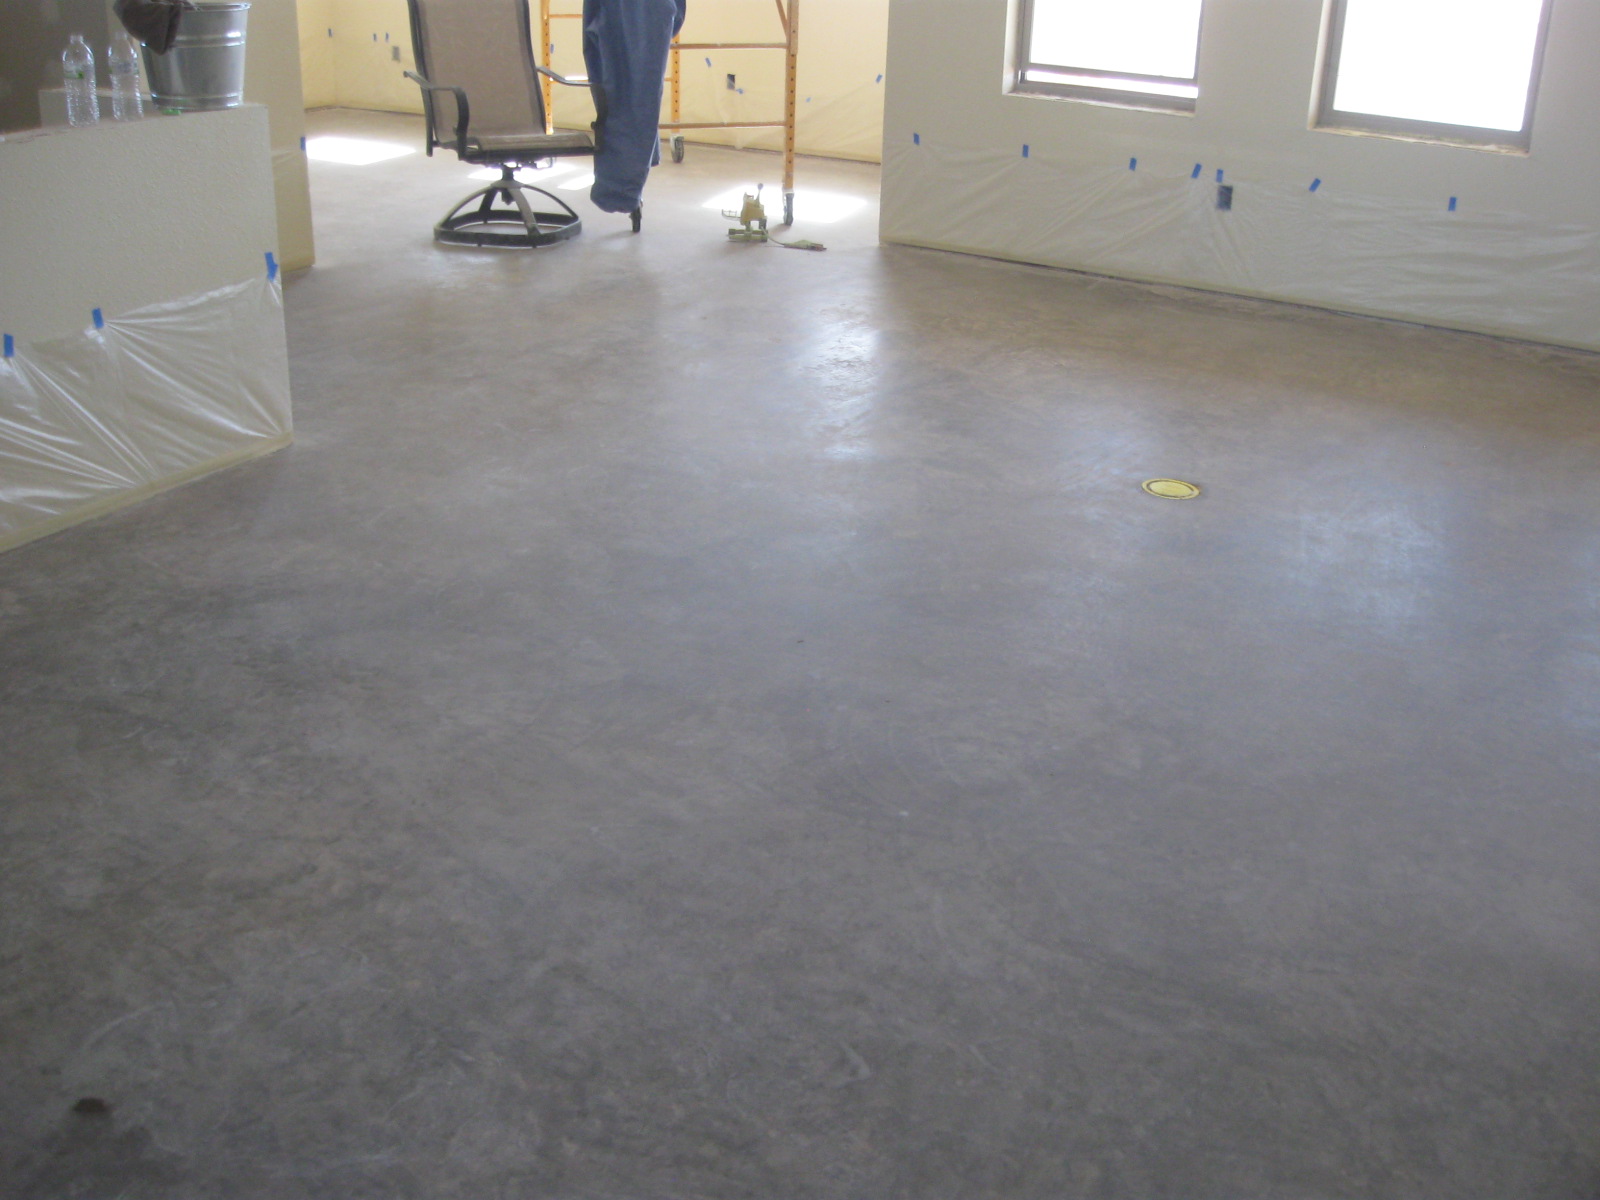
Today we finished the etching process for the entire project.
The process is simple:
Dilute the solution 1:1. Wet down the floor first (we did this with a mop and bucket). Spray (using an all-plastic pump sprayer) the surface well. Scrub into the surface with a natural bristle brush on a broom handle. After the fizzing is done, mop the floor several times to remove all the residue. (We found three times to be about right). Use proper protective equipment (goggles, facemask, gloves, shoe coverings or rubber boots, and optional protective suit).
That is basically it… Here are some photos:


A few more views of cleaned floors:


Tomorrow we stain the floors!
