A short post with photos of the pillars and corbels that Oz is installing before they start the soffits:
Beams and Corbels Going in...Looks Pretty...Staining needed on short piece...Corner plumb line...Not bad planning for a rookie.
We think the stain looks great… still have more to do — probably another coat on all the pillars and then the clear coat on top. We were trying to hurry to get as much done before the pillars and corbels were put into place as possible… but we didn’t want to delay the guys who are putting on the trusses, decking and soffits.
In case you are interested in stains, chinking materials, deck protectors, etc., check out Mountain Home Building Products — excellent service and fast delivery.
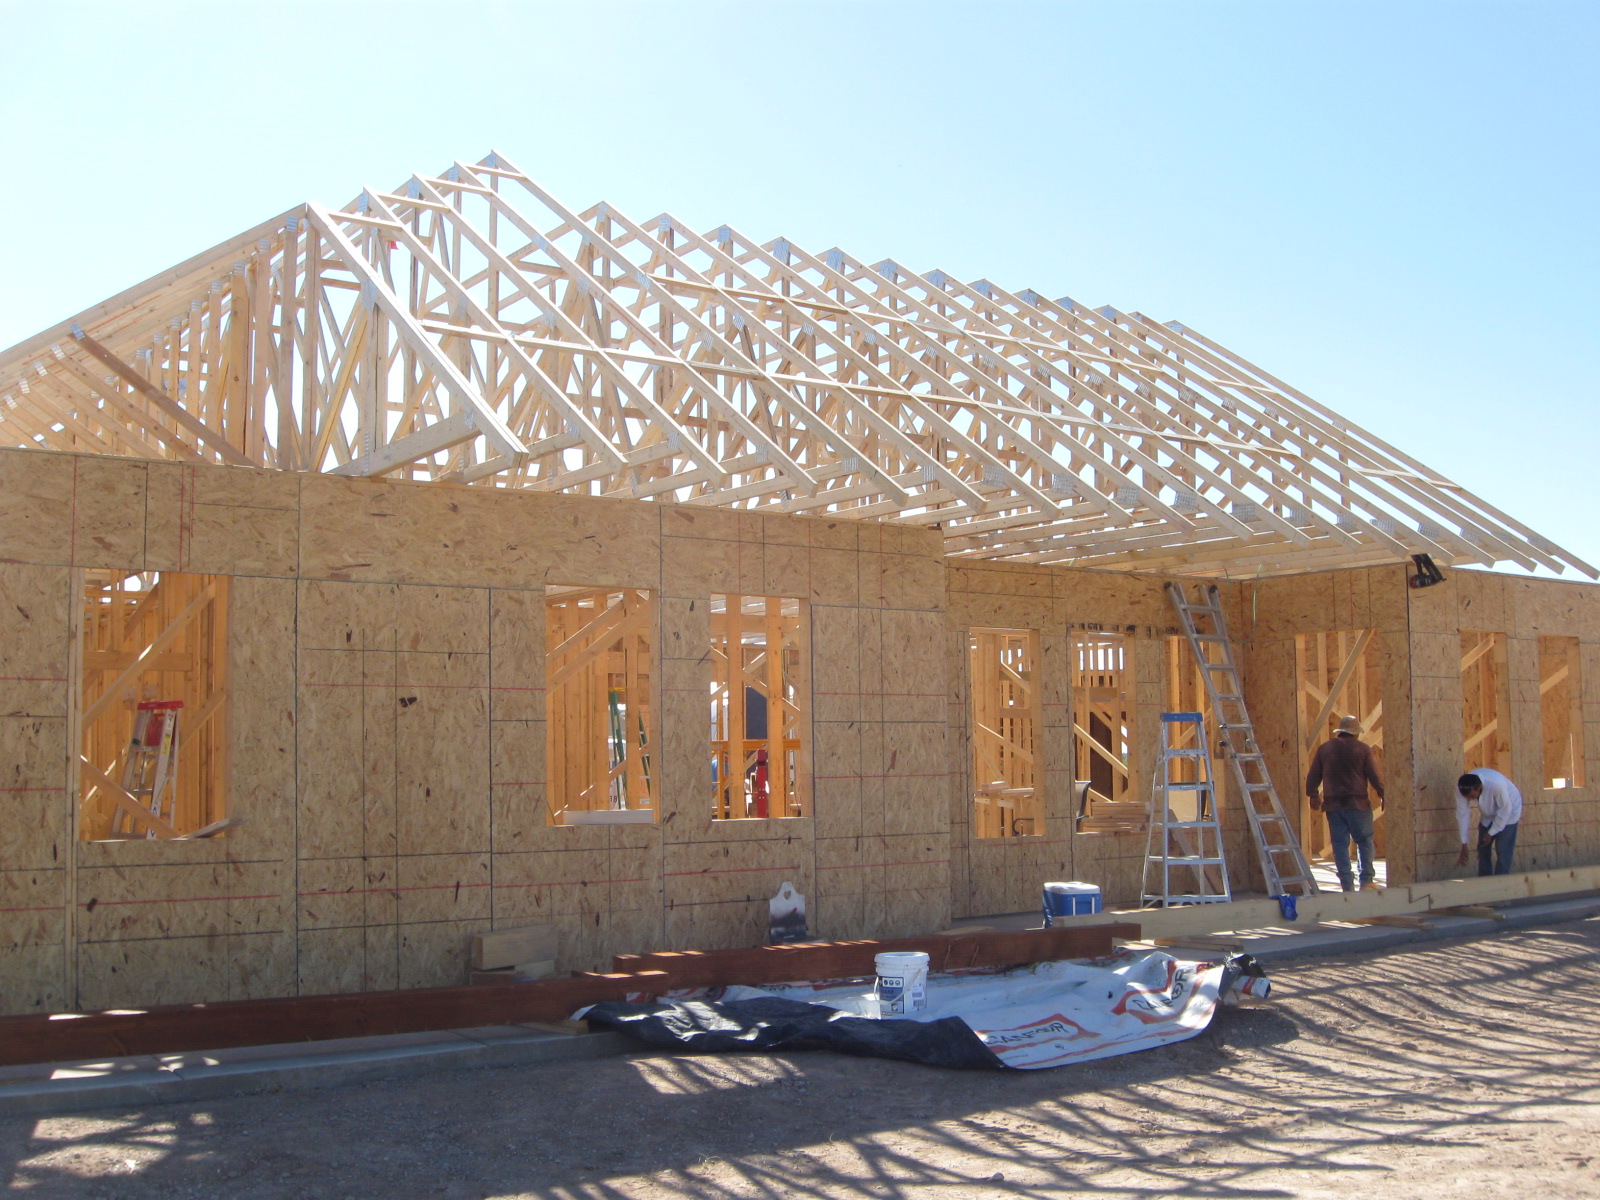
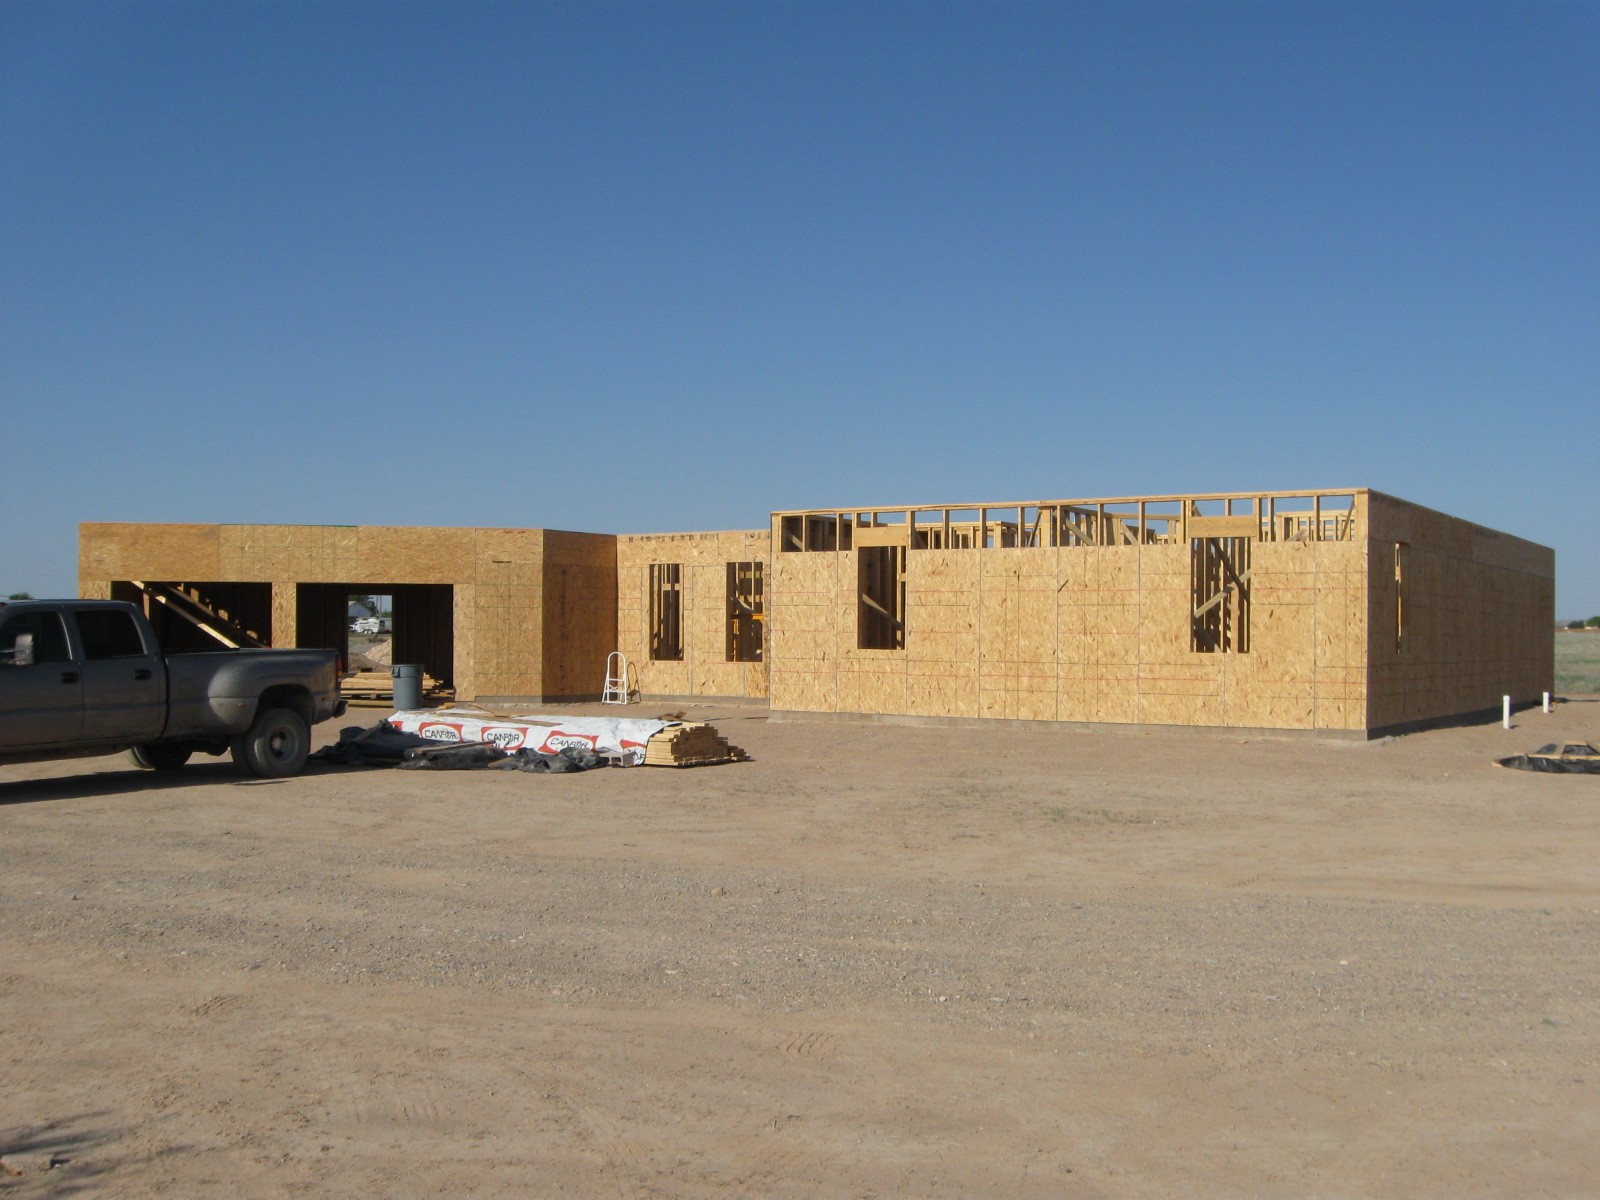
As the work continues on setting the trusses, the shape of the house and how the roofline will look is becoming more clear. I was surprised that they were decking the portion of the roof that will have rafters above, but that provides extra stability and provides structure for setting those rafters. I took a few photos:
View from front
The work of setting trusses, decking the roof and framing the bonus room above the garage is being done by G.N. Construction, LLC. Freddy and his crew have been doing a great job here. You can contact them for work in the region by phone at (575) 914-0018 or (575) 420-3194. View from the north side
Placing the beamsView of back porch
End corbel and beam...Freddy Nasarallah (GN Construction LLC)Lifting a BeamAdjusting the Beam's position
We received our stain from Mountain Home Building Products very quickly and were able to get the beams stained on the ground before they were lifted into place. We like the look of them very much. We were very pleased with the stain and with the quick shipping. If you missed our post on choosing which stain to use, you can find it here.
The first few photos are of the first truss being placed yesterday afternoon… After that, you can see the great progress that has been made since. It is a fairly complicated roof design, with a steep (8:12) pitch to the main part of the roof, and 10:12 over the garage, so we are very glad to have G.N. Construction, owned by Gaby and Freddy Nasarallah, doing the work for us.
Lifting the first trussPlacing the 1st Truss1st Truss in PlaceNailing Truss to Top PlateSteadying the 1st TrussTruss Progress - Front ViewNice and Straight Wall...North Side of House View - Before Stick-built tie-inBack side viewBack Porch OverhangFreddy & Gaby Nasarallah, Construction
To contact Freddy about all types of construction projects in the Roswell, Ruidoso, Artesia, Carlsbad area, call them at: (575) 914-0018 or (575) 420-3194.
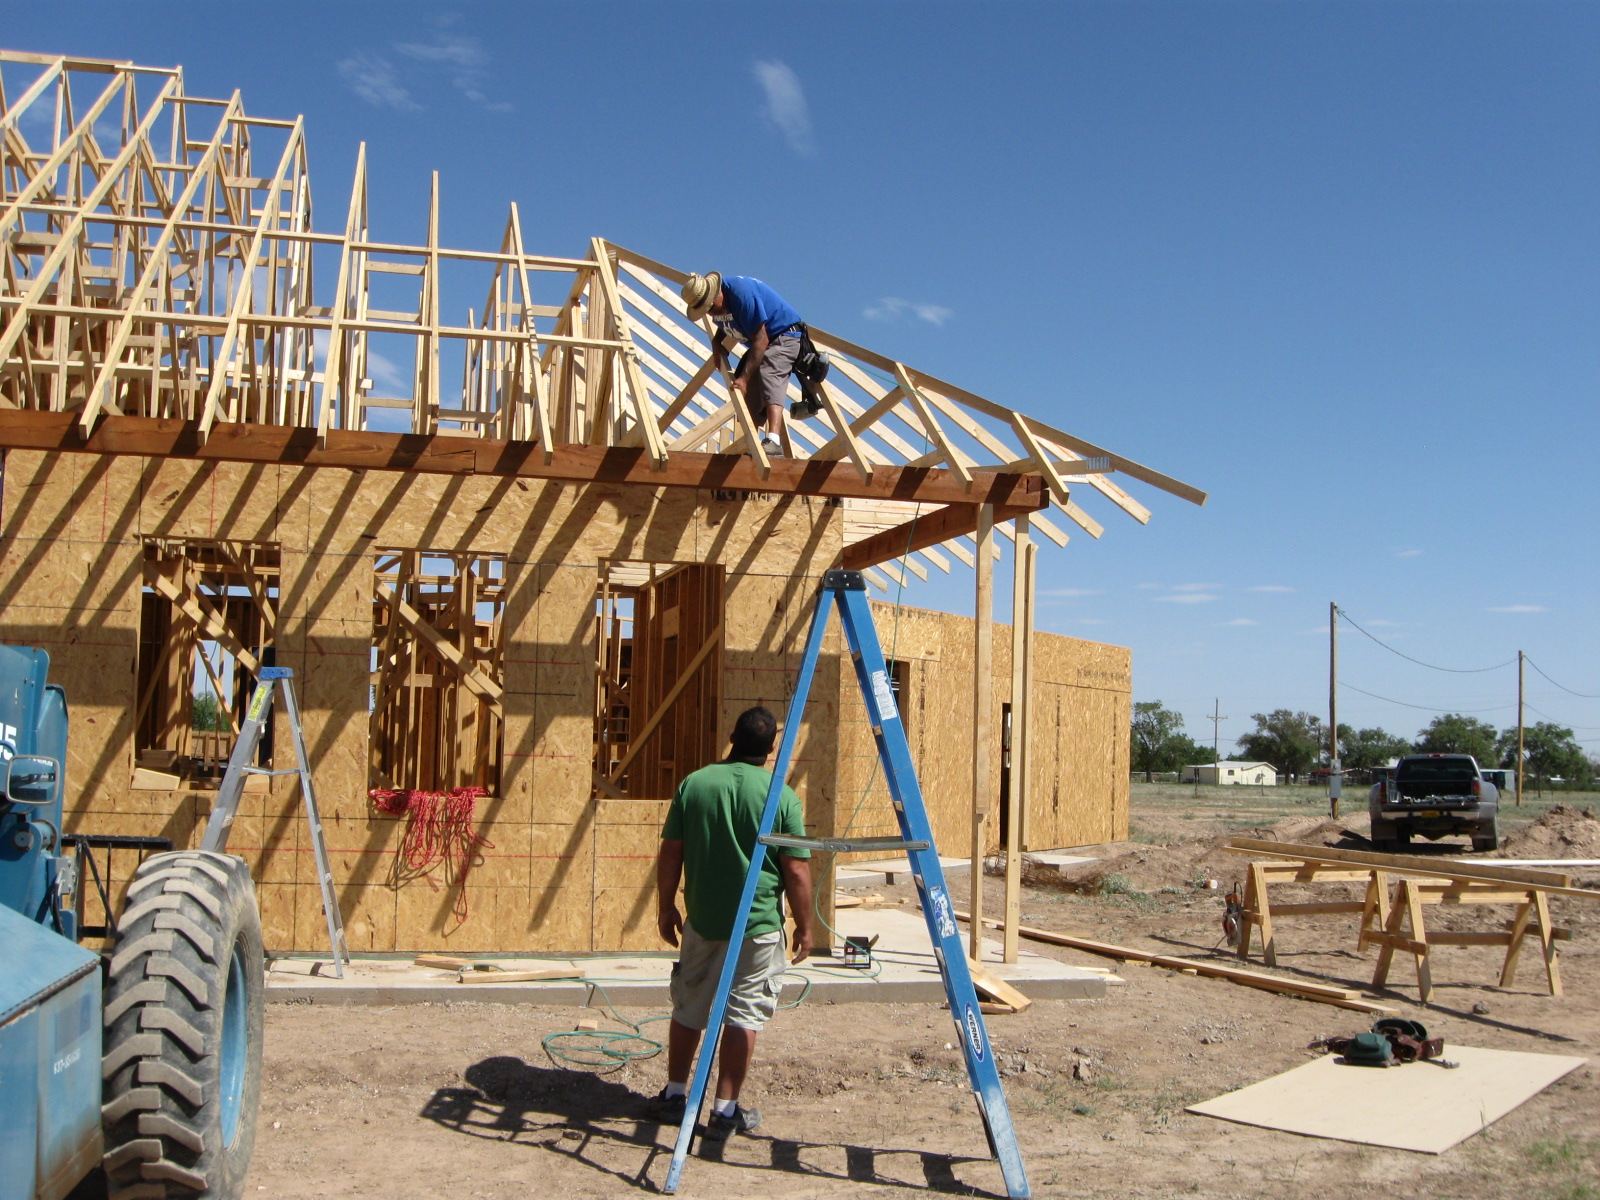
At a little after 3 pm the work is finally begun on setting trusses. I was amazed to see one of the framers walking around the top of the framing like a balance beam… quite a good balancing act. He was walking along the top plates marking truss locations. The wind has kicked up a bit and it would make me more than a little nervous. Marking truss locations
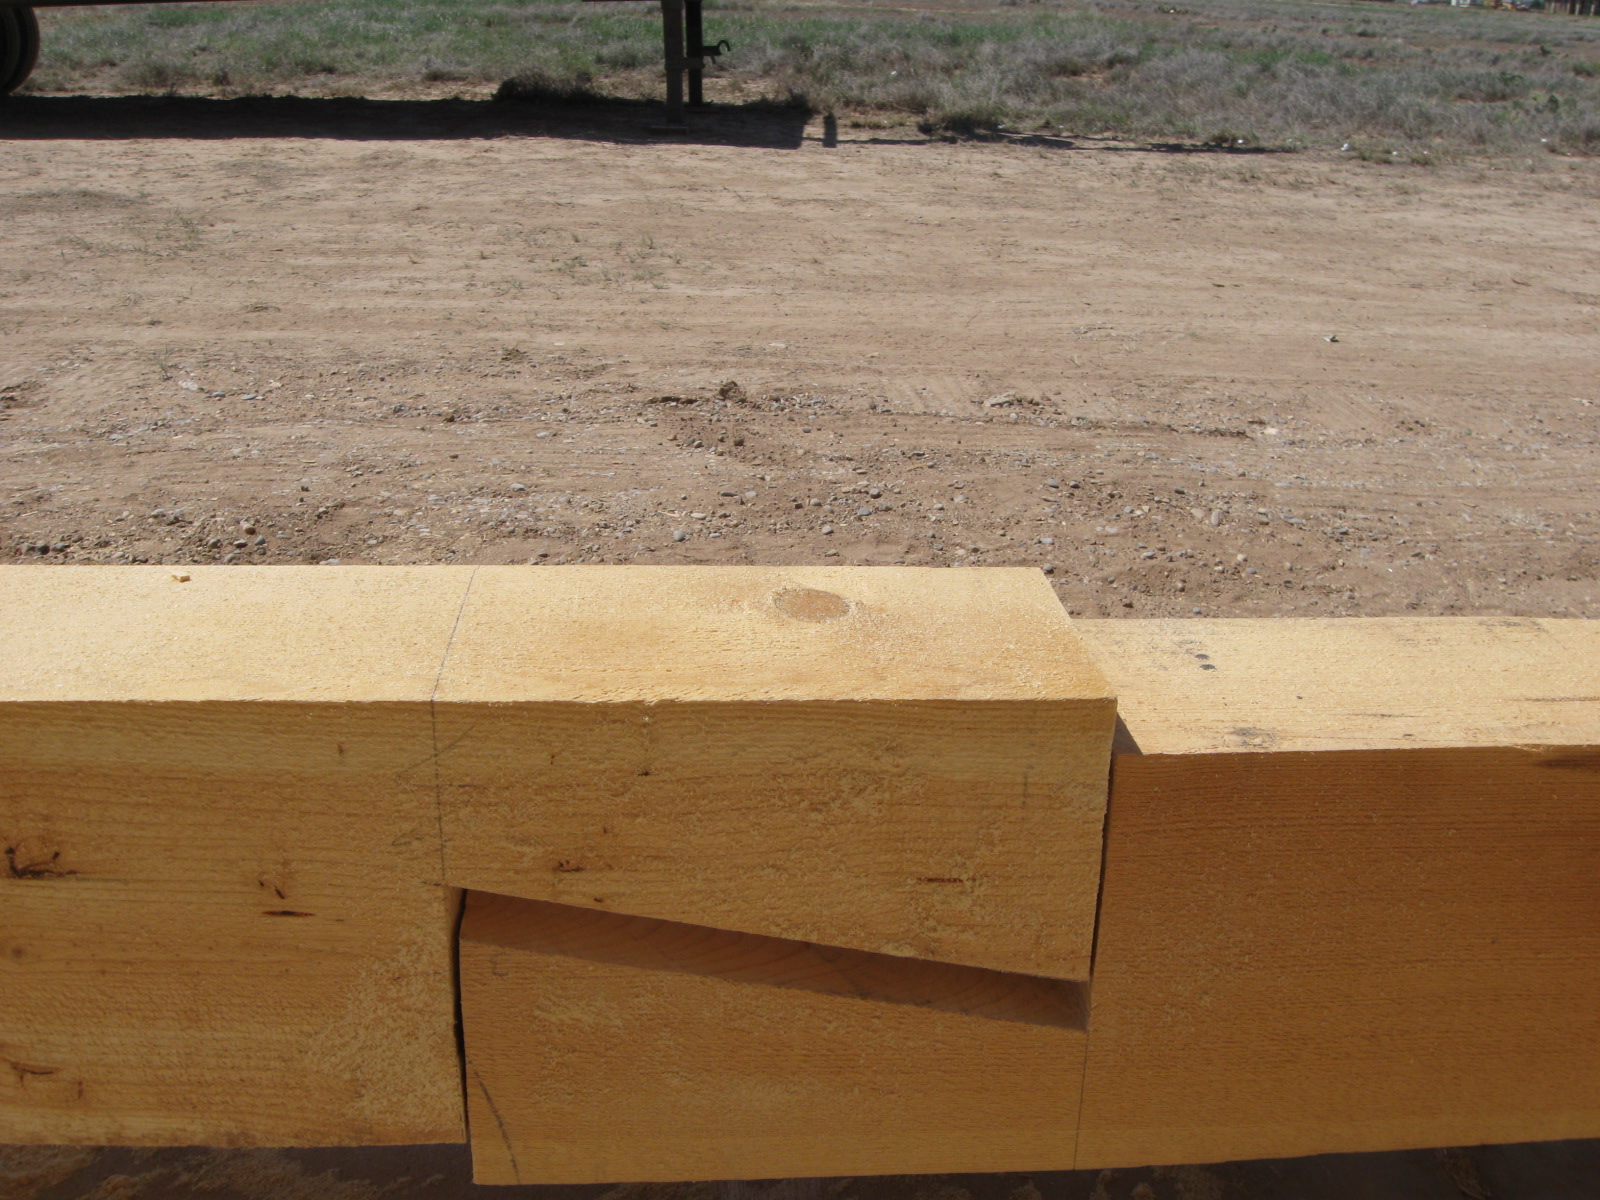
The last job we had planned in preparation for the framing crew was to get all the porch support beams notched and ready for installation. The framing contractor has a lift that will allow putting them in place easily, so having them fitted and ready for installation was the plan.
After laying them out in place, they were cut to size. At each joint, a pillar with corbels will be placed below. Using a circular saw to start the cuts, and a hand saw to finish them (due to the massive size of the beams, the blade couldn’t reach the complete depth), the job was done.Closeup of joint between two beam sections
Beams laid on on the length of the back porchCorner jointImagine these beams in place about 10 feet up...
While I was busy in town (haircuts, canning and lawn-mowing), Oz was able to get the interior beams and posts into place. He used a standard drill, the impact drill, hand saw, circular saw, scaffolding and our fondly named “T-Rex” modified engine lift. Again, it proved helpful in getting the beam lifted into place without back strain or injury. In preparation for the project, the beam was cut to size and then notched so that it fit into the interior framing. After the notch was prepared on each end, the beam was attached to the corbels using 10″ wood screws. Support framing was built to fit into the interior framing to support the beam.
Tools Used for the job…Notched Beam and Corbel
T-Rex was then used to lift one side of the beam to the height of the scaffolding.
T-Rex lifting the beam
After the first side was set onto the scaffolding,
One end propped on scaffolding
the other side was lifted into place into the wall. Support framing was put into place beneath it. The process was duplicated at the other end, again using T-Rex.
Lifting top into place1st end in placeFinal lifting on other end…Vertical Box beam support in place
Once both ends of the beam were secure, the posts and their corbels were attached to the beam. Still to be done: drilling anchors for the posts into the concrete and covering the bolts with wooden dowels and sanding to match the surface.
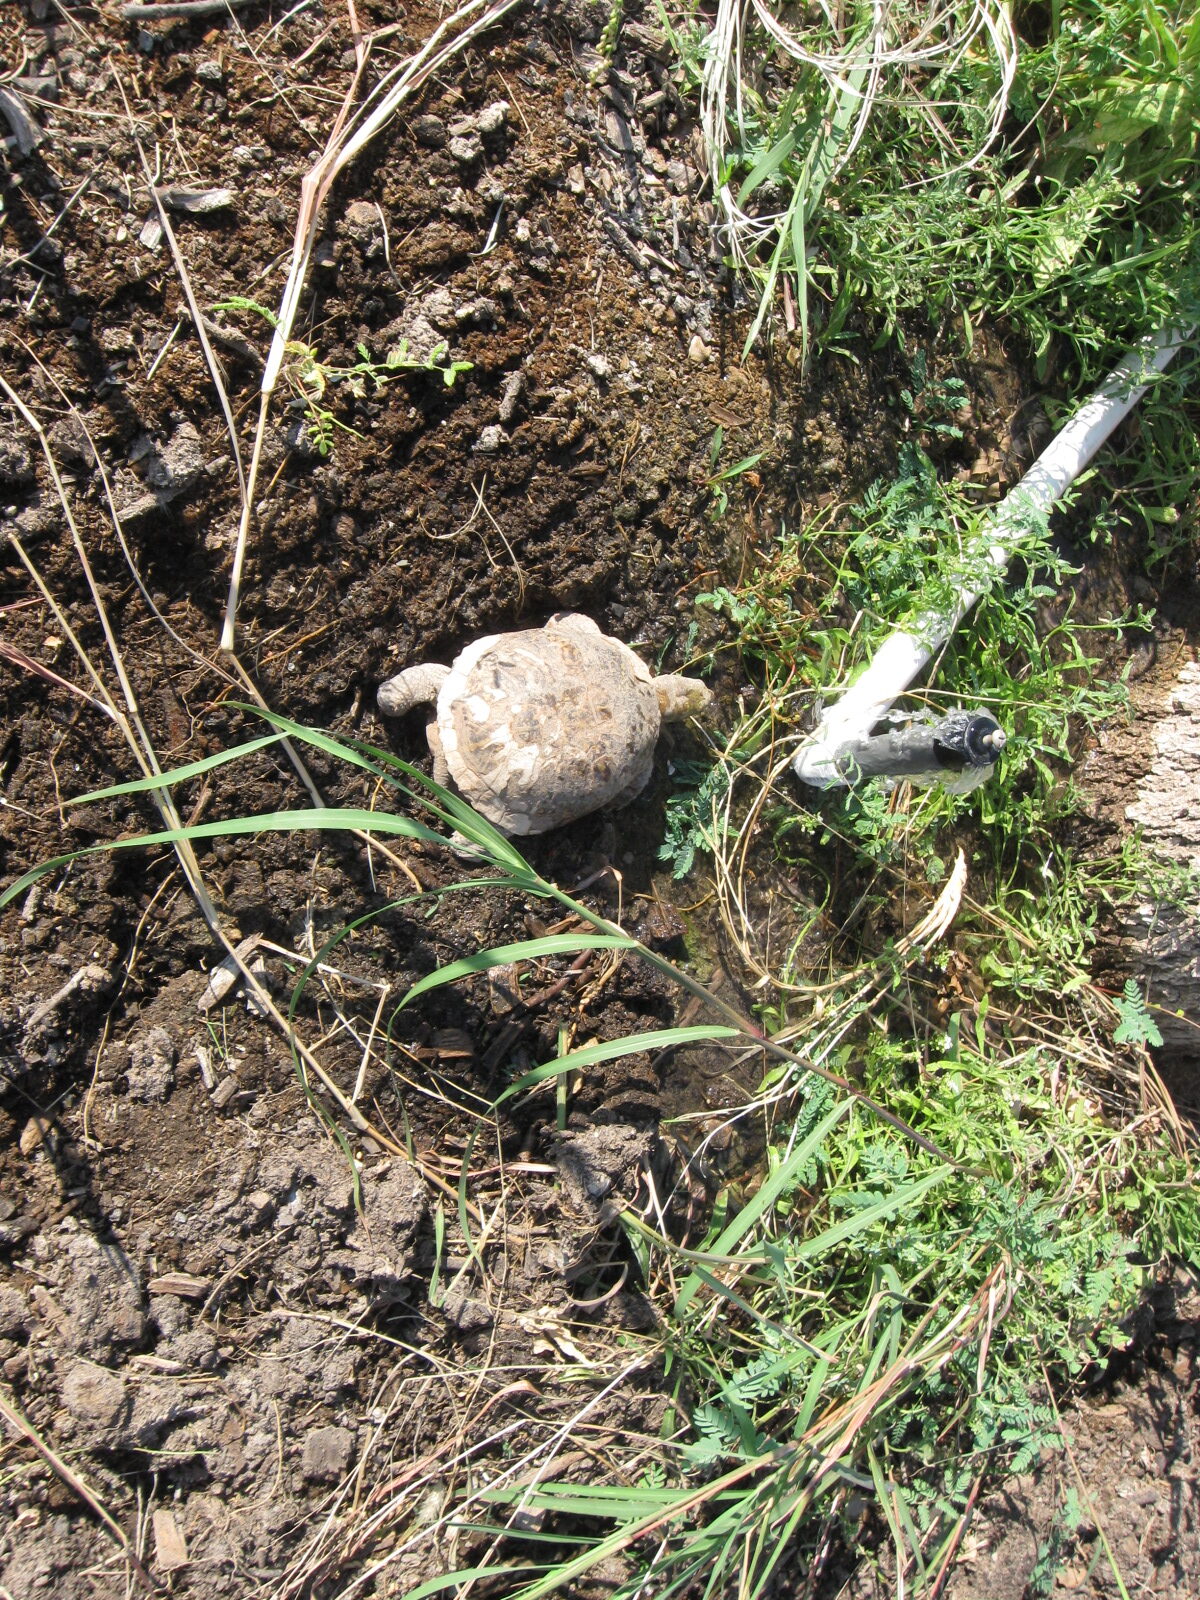
As I walked out to admire the view from the family room windows this morning ( in my jammies), I spotted a creature plodding toward the back porch. After the family was alerted, the little guy was given a fresh drink of water by the pecan trees. We hope he will make a home here… and eat lots of bugs.
Thirsty turtle...Wow! A running stream in the desert... paradise!
Unfortunately, he isn’t showing good judgment so far… after drinking deeply at the pecan tree spring, at last report he was near the southern boundary of the property. Perhaps he is searching for more members of his species…
Right on schedule, we finished up the last bit of sheathing that we can do before the roof trusses are set in place. With just a bit more internal bracing, we’ll be ready for the hired crew to put the trusses in place starting on Wednesday. We had hoped to have the trusses ready by Monday, but the truss company has been running behind due to high demand lately. The earliest they can have our trusses ready will be Tuesday afternoon.
Using cargo straps and the bumper of the dually, Oz was able to get all the walls pulled into plumb before placing sheathing on the framework. We are very happy with the nice, straight walls on the house. It is really taking shape. Here are a few photos of the progress:
Front viewView from the north, looking at the back porch area...Back porchView looking out family room windows to the west.
We have planned to have large exposed beams supporting the back porch area, near the front entry and inside the house foyer. With the intense sun in SE New Mexico, it is important to protect the wood. Thus… choosing a stain color for the wood.
Luckily, we were able to get stain samples from Scott McCain of Mountain Home Building Products. After a phone conversation with him, he sent us several samples of their products that will offer good UV protection to the wood. After receiving them, mixing well (apparently the pigment tends to settle in the bottoms of the jars) and brushing on some of the type of wood we have for the beams, pillars and corbels, you can see the results after the samples dried:
UV Guard Clear, UV Guard II SantaFe Sun, UV Guard II ClearUV Guard Light Brown, AmberUVGuardII Teakwood, UV Guard HoneyBrown, UVGuard FawnUVGuard Ii Rustic Timber, UVGuard II Cedartone
Although the stain from the Honey Brown ran into the Fawn a little bit, we were still able to see the clear distinction between the colors. We are leaning toward the Fawn color… Really, though, they are all really attractive colors, so we’d probably be happy with any of them.
Scott encouraged us to choose a stain with some pigment to better protect the wood. Since the beams will be largely under the porch and will have some protection, we could use the clear or the very light Santa Fe Sun, but we are thinking more color would be better in the long run.
What do you think?
In the spirit of full disclosure, I have to say we are a bit partial towards working with Scott and Mountain Home Building Products, since he is family, but I would encourage anyone to give their products a try. Check out their site using the link in our blogroll.