Well… it has been a hectic month. We have driven over 4500 miles, criss-crossing the southern U.S., hauling our belongings, pets, kids and selves from Georgia to New Mexico.
The first leg of the trip began on Easter. After playing and directing the choir for Easter Sunday Mass, we loaded up the kids, dog and lizards into the two vehicles and started out. Behind the dually, we had the gooseneck trailer hitched (loaded with 2 bulldozers); the Tahoe pulled a rented U-Haul trailer with the WWII Harley WLA motorcycle strapped inside. We stopped in West Monroe, LA for the first night.
The next morning, we were able to stop for coffee and have a short visit with friends in Bossier City, LA (where we lived for a few years — two moves back). Then, we headed north to Okmulgee, OK to pick up the third bulldozer. {Let me tell you, this bulldozer collecting can become addictive}.
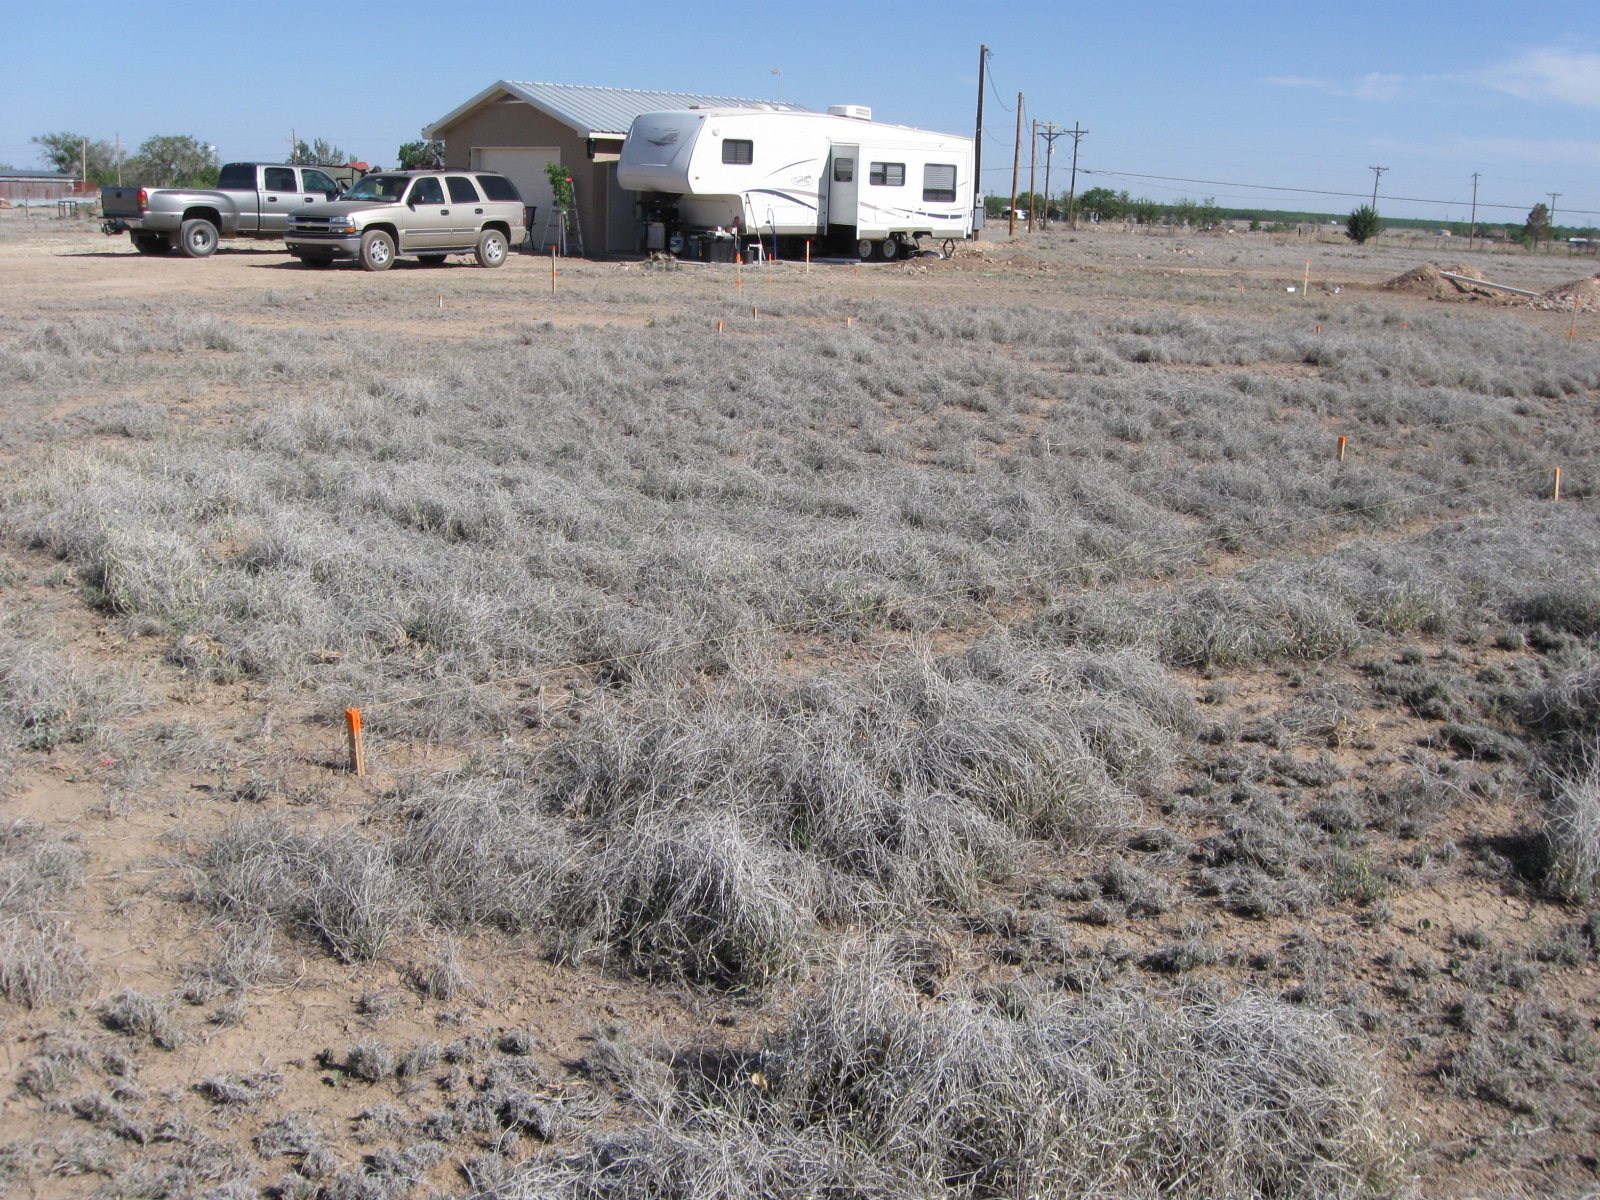
After stopping in Clinton, OK for the night, we made the final push into NM and onto the homestead on the 3rd day. We dropped off the gooseneck trailer with the bulldozers, quickly unloaded the motorcycle and boxes from the other trailer and turned the U-Haul trailer in. We were all very happy to see the progress that had been made on the workshop and seeing Mom and Dad, where we left kids, dog and lizards during the next part of the move.
After a short stay, DH and I loaded up on April 12th and drove the dually (with some bulldozer parts to be delivered to College Station, TX), continuing on to Beaumont, TX, where we stayed the night. The next day, we stopped off in Metairie, LA for lunch with friends (we used to live in Belle Chasse, LA before Katrina). Continuing on, we made Warner Robins that evening.
Saturday, April 14th, we picked up the 26′ U-Haul truck in preparation for the packing up of the rest of our stuff (we ended up needing an additional pull trailer to fit everything, as it turned out). It was a relatively relaxed weekend, spent packing up any last things, cleaning house and having dinner with friends on one evening.
Monday morning, the real work began. We had scheduled a 3-man crew to load the truck for us from a local company — ReadytoMove… well only two guys showed up, and one was apparently hungover and was nearly worthless. About 1/2 hour after their arrival, we was tossing his cookies in the front bushes and then made a mad dash for the bathroom…
Seeing the hours slipping away, DH and I got busy helping with the carrying, loading, etc. We got done in about 5 hours, sending them on their way. We were still very happy that we had help for the heavy stuff, but were less than impressed with the company, even though they didn’t charge us for the extra time.
We scrubbed down the quarters, passed our inspection early on Tuesday morning and hit the road.
It was an easy and uneventful drive across the southern states and into NM, with a pleasant stop on the way to see more friends in Azle, TX.
Arriving in NM, we had a 2-man crew to help with unloading (they were excellent and finished up in quick time — thanks to American Moving and Storage) Everything miraculously fit in the workshop… the RV was moved to the pad and hooked up with water and power… life is good.
COST UPDATE: After talking with the driller, we found out that all the drillers in the region have a minimum fee for drilling that is about $2500. Apparently, even though it was not quoted to us, it is the going price for the work involved in hauling out all the equipment, setting up, etc. We are still thrilled with the fact that the well came in at only 40 feet, but would caution folks to ask what the minimum charge will be in a case of this sort so that they are not surprised.
Based on my research online, this seems to be quite a bit higher than some areas (it ended up being $62.50/foot). I don’t understand it, but based on the results we had of talking to several other drillers in the local area, it seems to be standard. Since we just had a well drilled in New Mexico not long before, in a similar situation and region, we were surprised.
I know in New Mexico the quote we received was done differently. The fixed costs were charged as separate line items (mobilization (if charged), gravel pack, cement surface seal (if required by state law), well cap, steel surface liner (if required due to formations), permit), and the cost per foot varied at a lower rate including drilling and casing. The cost for drilling and casing in NM was $21/foot, with the other costs being fixed. I think this is a much more fair way to quote without surprises.
In Colorado they all seem to quote at the standard $34-$36/foot, regardless of depth. They have a minimum which tends to make the break-even point at about 75 feet. After that depth, they make a lot of profit.
Example 1: Based on a 300 foot well:
NM rates for a 300 foot well:
Drilling/casing @ $21/foot $6300.00
Gravel pack, surface seal, cap, steel surface liner $797.50
Total cost: $7097.50 (not including tax)
Colorado rates: $34/foot including everything: $10,200.
Example 2: Based on a 40 foot well:
NM rates for a 40 foot well:
Drilling/casing @ $21/foot $840.00
Gravel pack, surface seal, cap, steel surface liner $797.50
Total cost: $1637.50 (not including tax)
Colorado rates: minimum charge: $2,500.
In both states, the permit charge was about $125 from the state.
Knowing what we do now, I’d probably ask for the quotation to be done differently for the Colorado well. (As they say, hindsight is 20/20). It appears to me that the Colorado drillers are overcharging a bit. (Or, at least, I haven’t been convinced that the pricing is fair). It does seem to be standard in the area so far. In all fairness, our driller wasn’t charging much more than the others in the region. He even matched the lowest minimum price for us.
The driller we worked with was Scott Heersink, out of Alamosa, Colorado.
We have thirty-five acres in southern Colorado, which we bought a couple of years ago. Some of the photos we have posted here on the site are from that land. It is absolutely beautiful and is where we plan to spend free time once we have finished building the homestead in southeastern NM.
The acreage in Colorado has a trout stream running through one corner of the property, so water was available already. However, when we bought the land, the previous owner had already applied for and been granted a homestead well permit for the property. We decided to go ahead and make use of the permit and get a well dug and capped for future building.
Obviously, we are not currently in urgent need of the well, so we told the well-digger to put us on his schedule when it worked best for him and sort of put it to the back of our minds.
This morning he called and told us the great news: We have a well!
Originally, when we talked to him about the job, he told us that other wells in the general area were drilled from 100-180 feet in depth to get a good supply of water, so we had prepared ourselves for that cost (hoping it wouldn’t go much more than 100 feet). At $36/foot for the drilling cost (not including a pump or any accessories — just the digging and capping) in the area, we were expecting a hefty bill to be due.
We got a wonderful surprise… the well only needed to be drilled to 40 feet in depth. He said the water level is only 8-10 feet below the surface, so we are very happy. Instead of a potential cost of $6480, we think the cost will be about $1440.
(with all the bulldozer purchases, we need all the savings we can get!)
With only 40 feet in depth, we have a lot more options available to us on the type of pump we use. Even a hand pump (like the photo) would work for this well. We have a wide range of choices… manual pump ($99 – $1000, depending on quality and features — the Bison pumps are pricey), solar pump and tank (investigation still needed). We don’t plan to have the pump left on-site when we aren’t there for the time being. Too much temptation for a would-be pump thief.
Well… as the infrequent postings have given testament to, the family has been very preoccupied with preparations for the big move to NM. We are packing up belongings in cardboard boxes, finalizing plans and routes, and getting more and more excited about it.
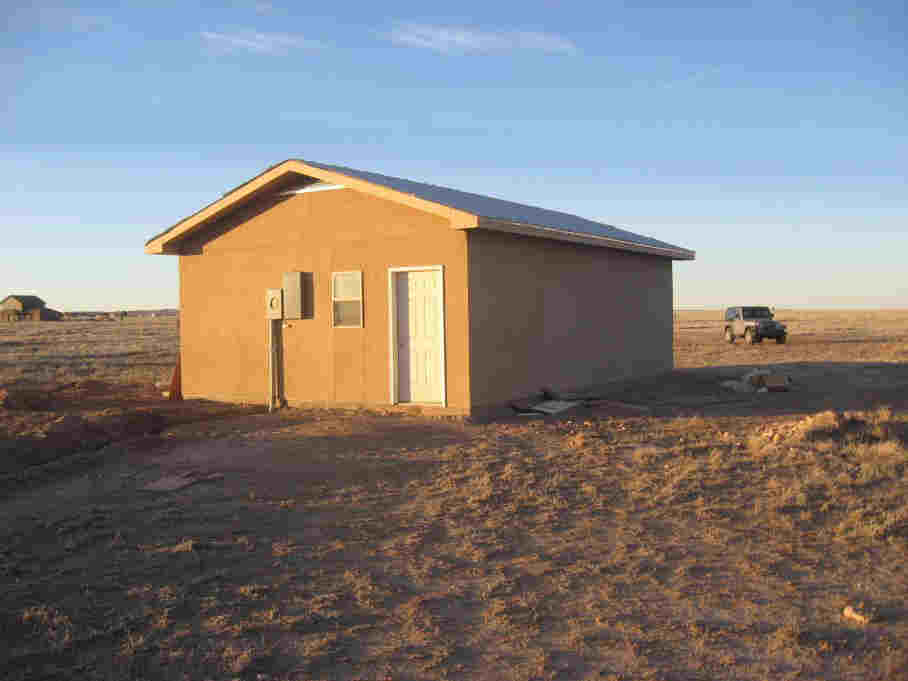
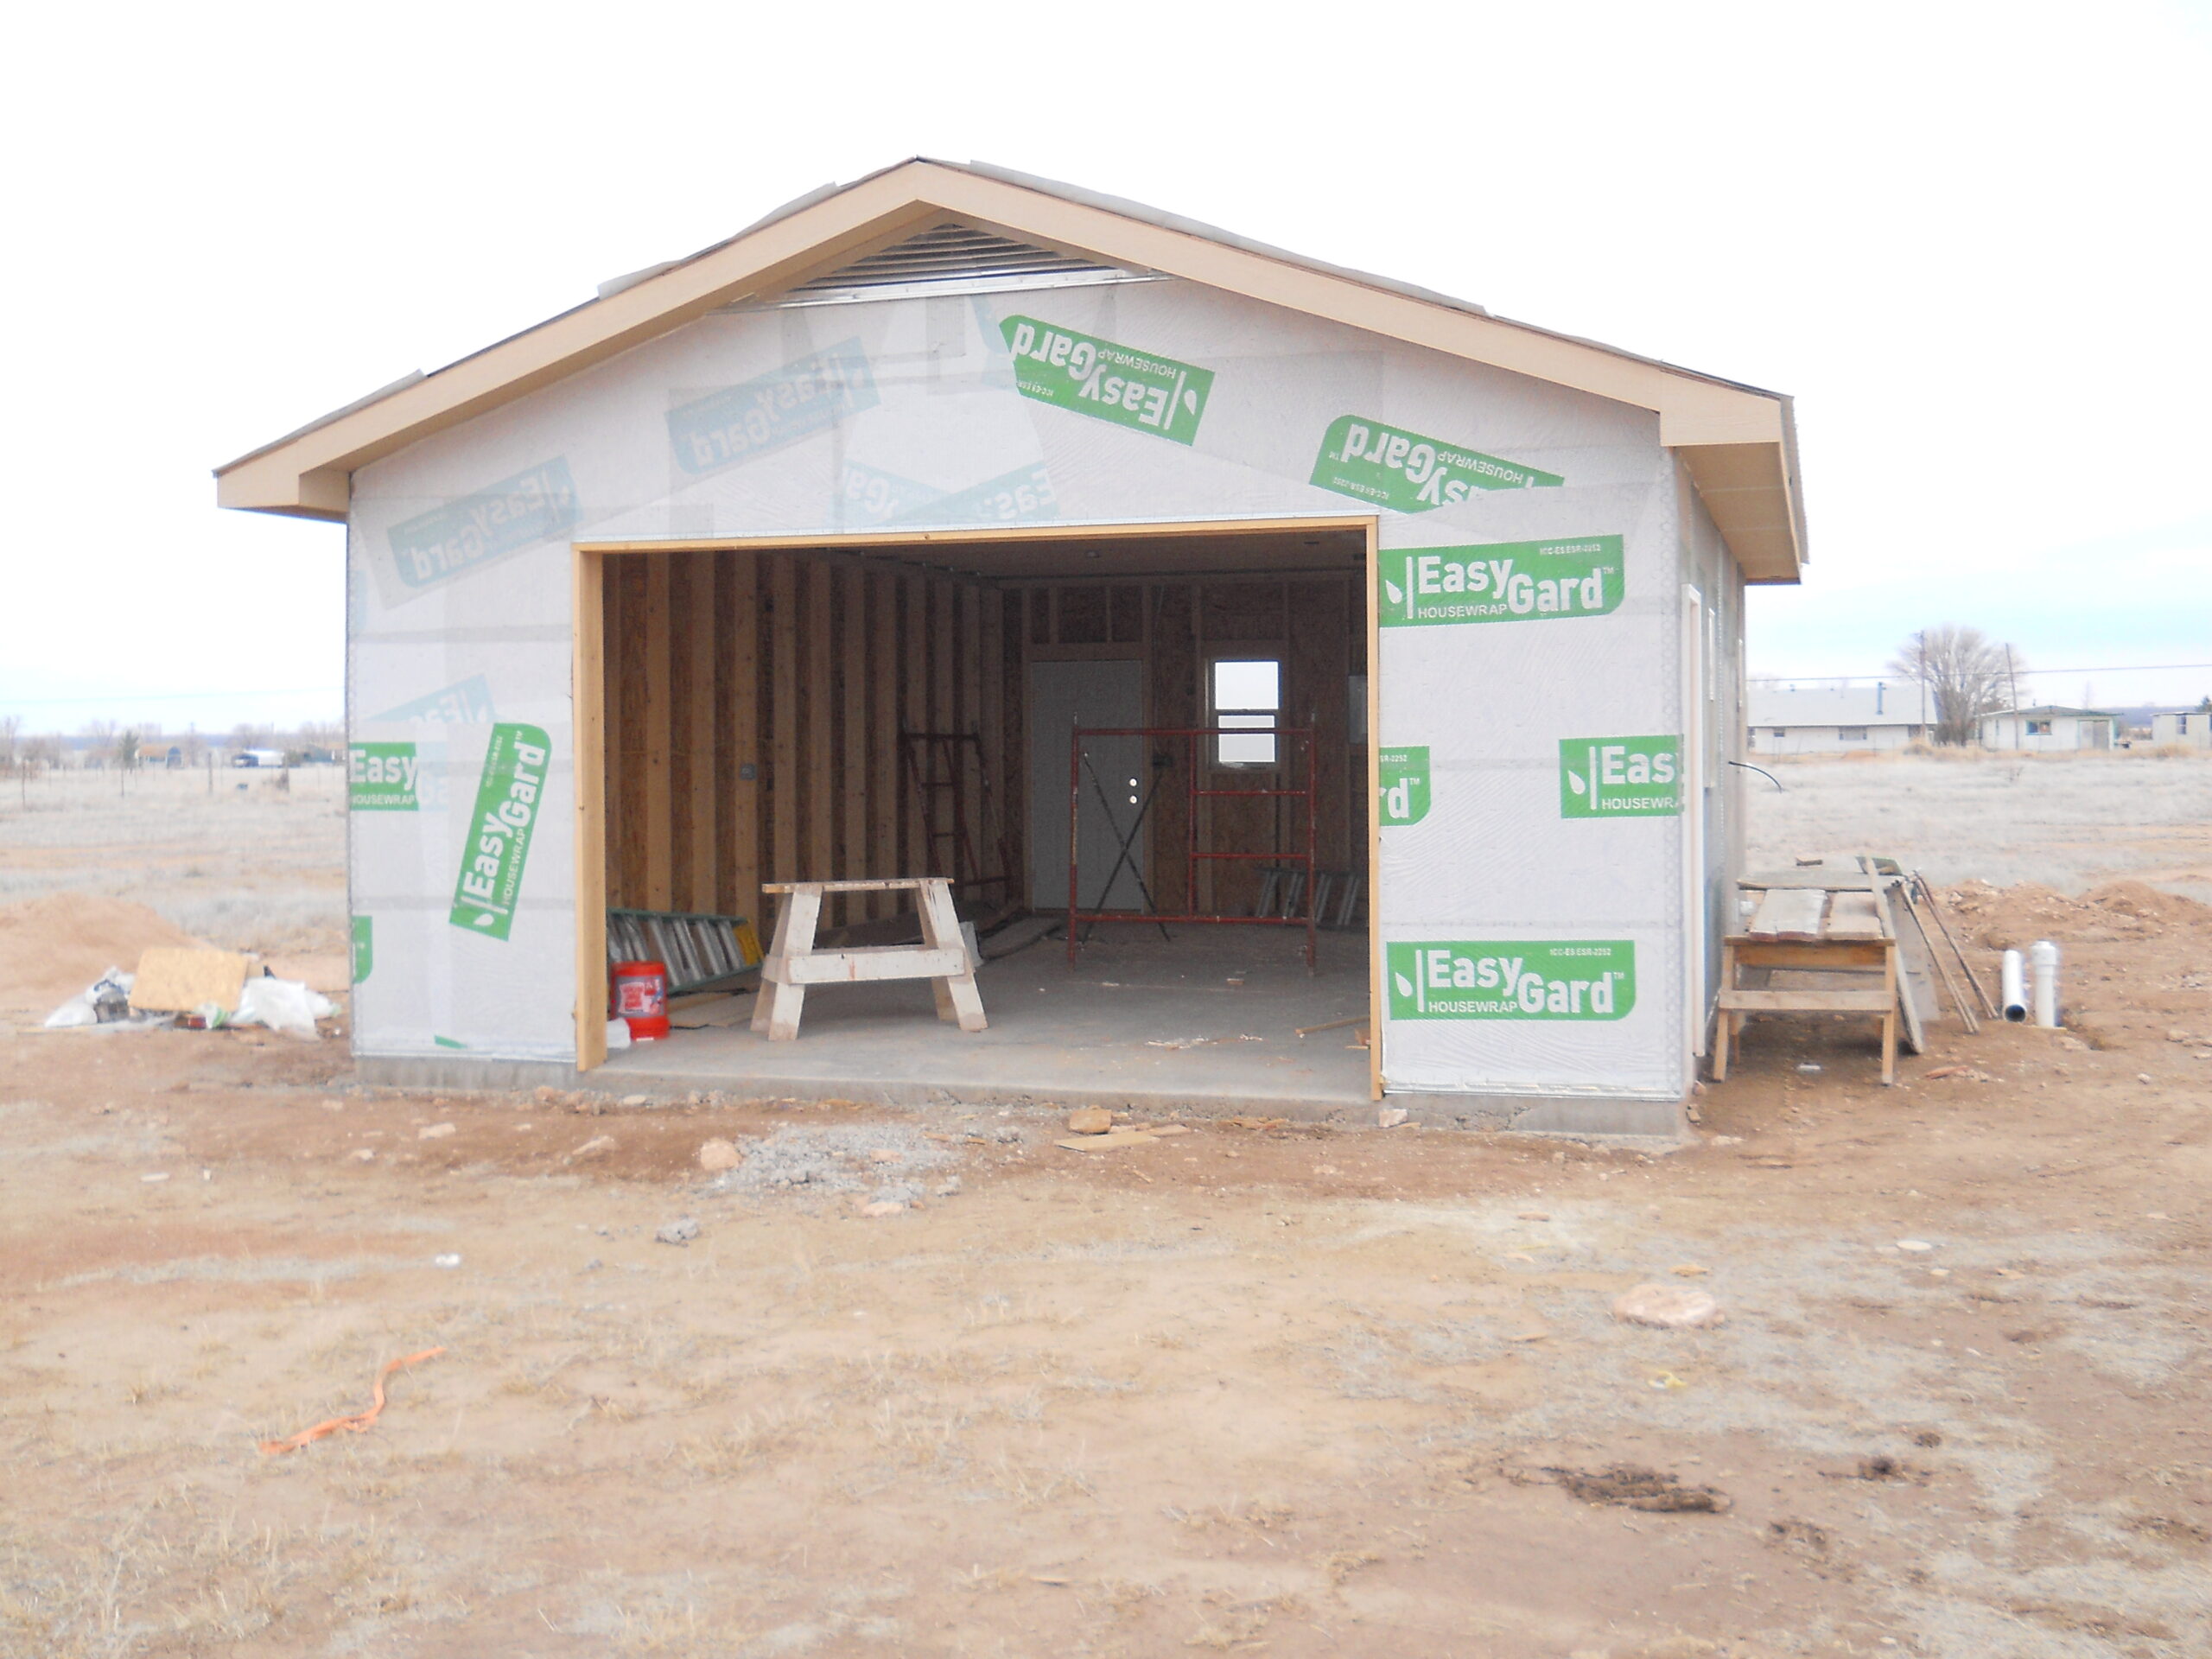
The workshop is nearly complete and we are very happy with the progress. We’ve had a nice driveway finished with stone and a small concrete slab poured at the workshop entrance. The interior is nearly complete. The job was made a bit more difficult for the subcontractors since hooking up the water and electricity are about the last things to happen. It no doubt made the cost higher since a generator had to be used for power, but it seems to have gone very well.
All that remains is the final plumbing hookup to the septic system, the installation of the pressure tank and pump for the well (as well as plumbing and wiring for that system) and the final installation of all electrical fixtures.
Here are a few photos of the progress as of this past weekend:
First, a view of the wall with water heater and laundry hookups. The pressure tank will be in the corner next to the water heater.
Next, a view of the interior of the garage looking toward the bathroom:
The photos were sent to us by my Dad, on a pdf. I’m sorry the quality of the resolution isn’t better, but it still gives a very good idea of the overall appearance.
We will have a somewhat circuitous route in our travels as we make the first trip from Georgia. We will be driving in a northerly route through Oklahoma so that we can pick up a second Clark Airborne bulldozer there. It takes us a bit out of the way, but is still much less time required than to make an entirely separate trip. We’ll be driving a caravan of sorts on this trip, driving both vehicles — the dually with the gooseneck trailer and two bulldozers plus parts and me in the Tahoe pulling a small U-Haul with the WLA motorcycle and bulky items packed to the gills.
{Can you notice the heavy emphasis on military vehicles that are featured in our belongings?}
The guys did a very nice job on the bathroom, adding in a fully tiled shelving area. The glass shower door is still to be installed.
Once those tasks are complete, we’ll have the pad for the RV poured so that convenient living can happen while we build the house.
The move will require us to make another cross-country trek to haul all the belongings. We’ll return with just one vehicle and use a rented truck to load all the rest of our furniture from the house in Georgia back to New Mexico for the final trip.
{Did I mention that we’ll be making another detour on the trip back to Georgia in order to drop off some bulldozer parts in Texas along the way… just thought I’d mention that…}
Annanasnaja arguta kiwi
Did you know that kiwis have 10 times the amount of Vitamin C in lemons? There are several different types of hardy kiwis that can grow in many different zones — some as far north as zone 3. The female kiwis, with their beautiful vines can produce up to 25 lbs of fruit each year when mature. Since the kiwis need a male for pollination, and the male can pollinate up to 8 different female vines, I’m thinking we might as well purchase several different varieties to see which produce best for our area and to give us extra fruit for trade and wine-making.
The arguta kiwis produce smaller fruit than the fuzzy fruit we are accustomed to seeing in the grocery stores. Rather, these fruits are smaller, perhaps the size of large grapes, but with the same distinctive kiwi flavor. Without the fuzzy skin, these can be eaten out of hand without peeling. Apparently, they are even sweeter than the grocery store kiwis (and easier to eat, I’m thinking).Ken's Red arguta kiwi
Since they are vines that will need support, I’m envisioning trellises for the outside sitting area in the style of a pergola. Not only will the framework provide support for the vines, but the vines will provide additional shade during the hot summer months.
My plans for using the kiwis (in addition to eating them fresh) include jam-making, juice making and wine-making. Perhaps I can can them for use in pies… I can see that there will be room for experimentation with this fruit that many folks never think of growing in the backyard.Michigan State Hardy
According to what I read about them at the Raintree Nursery site, it seems most varieties are ready to harvest in either September or October. Apparently, you can store them for a very long while in the refrigerator, setting them out on a countertop for softening when you want to eat them.
Since the arguta kiwis are recommended for Zones 5-9, I think we’ll be smack dab in the middle of their ideal growing climate. With first fruit expected in 2-5 years, and an expected life of 50 years, I can see that we have many productive years ahead.
This book is a sort of gateway book into the world of permaculture. With a brief description of the core principles of permaculture, you can get an idea of how to begin thinking the way a permaculturist would in the design of your garden/food forest. Hemenway lays out the basic ideas of permaculture without going into great detail… enough information to be useful, but not so much that you become bogged down in minutiae. Once he lays out the general ideas of the underlying theory, he proceeds to give real-life examples of how the ideas have worked in various locales.
Using permaculture principles in determining garden layout, harvest/storage of water and sunlight, plant biodiversity, a home garden can become less labor intensive and more productive. This book gives many useful ideas for making this happen in your own back yard.
I particularly loved the examples of garden layouts showing non-traditional designs. By using a keyhole gardening bed, you can minimize the space needed for the garden path and maximize growing space (while making the garden more interesting and appealing as well). The herb spiral is another idea that will add beauty and usefulness to the beds right outside the back door.
The theory of zones and how they impact the permaculture design is also discussed, with examples illustrating the ideas. He even shares a zone layout example for a typical 1/4 acre suburban lot that is highly productive.
From design of the space, he moves on to helping with building up the soil. I plan to use his sheet mulching system when setting up our gardens in New Mexico, and will no doubt be referring back to his book often when planning and laying out the garden there.
From plant recommendation, to orchard planning… from attracting helpful insects and birds to chicken tractors, the author puts forward many applications of permaculture principles you can implement at home. The book offers a wonderful appendix with excellent resources including plant suggestions for the various permaculture layers.
This book is a very excellent book to introduce the ideas of permaculture and sustainable food production. I highly recommend it, especially to those who are unfamiliar with permaculture principles. It’s easy to see why this book continues to be a best-seller.
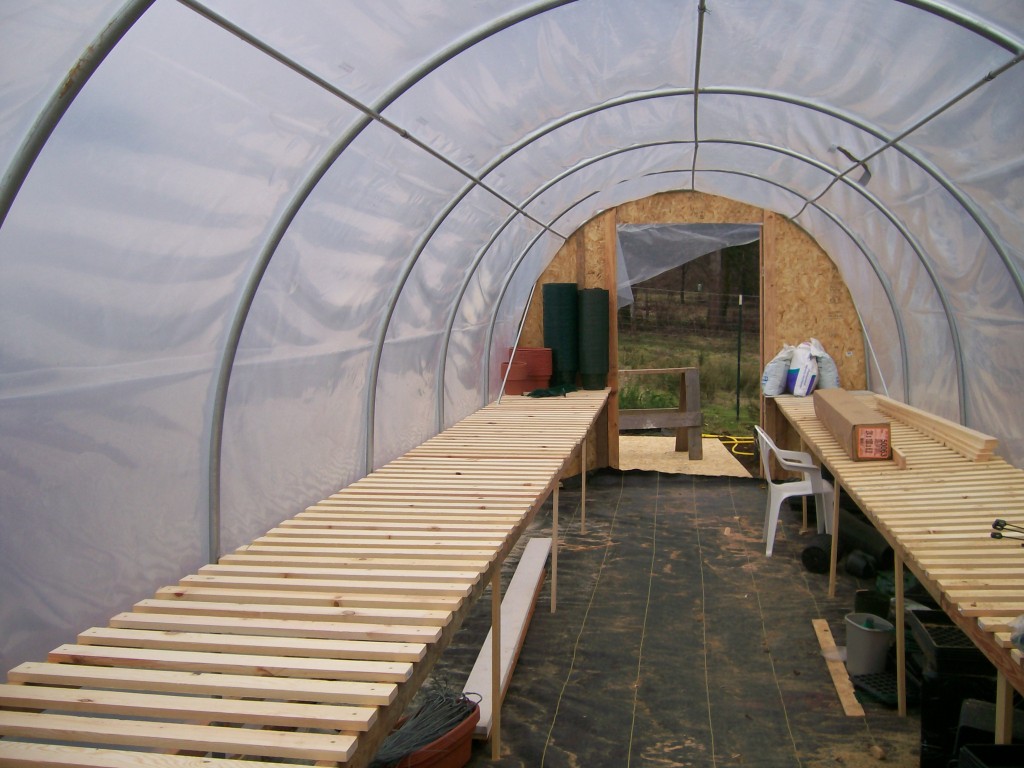
One goal for the homestead will be to establish a greenhouse on the property. By establishing a greenhouse, we’ll be able to take advantage of the space we have available and get a head start on gardening each winter. I have tried starting plants from seed inside during the wintertime and have had mixed results. Since we didn’t have a grow light for the plants, they tended to be very ‘leggy’ due to the lack of proper sunlight. Many of the plants did fine once we transplanted them into the garden, but it wasn’t really ideal. Since we intend to have a much larger space available outside for the garden in New Mexico and will need a great many more starts, it makes sense to establish a place to grow them with plenty of light and space.
It is blazing hot in New Mexico in the summertime, so I know we will need to use shade cloth and roll up the sides for ventilation during the hot months to prevent cooking the plants. However, in the southwest, summertime comes so quickly, it will be wonderful to have a sheltered space to start plants before the last frost to help the garden get a headstart during the winter months.
10' x 15' Greenhouse
I found out about a very nice greenhouse kit by seeing a Youtube video made by Jack Spirko about his newly constructed greenhouse and became very intrigued by the kits sold by Steve at Steve’s Greenhouses.
Additionally, since following Steve’s blog over at http://thegreenhouseguy.com , I’ve become inspired to see if it would be worth it to start more plants than we need for trade or sale. I like his commonsense approach to it and the way he shares what has worked well for him. He sells kits for greenhouses at his other site: http://stevesgreenhouses.com/ His kits offer affordability and ease of construction, I think. For about $1000, you can build a 10′ x 20′ greenhouse (using his basic kit costing $685, plus your own materials for the wood end parts, doors, windows and concrete for the support posts). That is a lot of growing space for the price. He offers ideas for heating and ventilation on his blog, too. According to information at his site, the double-layer plastic should last 6-7 years before requiring replacement and seems to be able to withstand snow and wind very well.
I did a bit more looking around online to see what other options are out there. For some other homebuild kits, I found another site — the Greenhouse megastore — that had a fairly good range of sizes and prices. Even the least expensive model was similar in cost at about $945 including free shipping, but offered much less space for growing. It is a very attractive little greenhouse, though and might be a bit more permanent than the design by Steve. This greenhouse would most likely be approved by many strict HOA’s, so would be a good choice for a family living in a neighborhood and without a huge amount of growing space.
For larger and more permanent designs, I found another site — Greenhouses.com — where there were many options including Cedar and Glass designs, etc. Those kits could run into several thousand dollar costs, so are a bit out of the range of our interest. However, there were many very attractive designs, including the Juliana Gardener (36 sq m = 383 sq. ft) for about $8500.
Juliana Gardener 3600
In my internet searching, I even came across a site where the cost per square foot is more than we plan to spend on our home! Check out the fabulous designs at Gothic Arch Greenhouses. While I cannot see one of these designs giving a return on investment anytime soon, they are very impressive. Let’s see… for a 10′ x 20′ greenhouse of this type, we’d be looking at $20,000! But hey… it looks great and would also give a suburban home the possibility of producing food in winter! You could even refer to it as “The Conservatory” and serve afternoon tea amongst the orchids.
Gothic Arch Greenhouses
I also found a great site at Frugal Living Freedom with designs for building your own greenhouse. This is also very intriguing, so we’ll be considering something of this sort as well. I particularly liked the #2 Design that featured using chain-link fencing top rail material for the structure. It is a very attractive design, too.
Have you ever had an exterior door lock mechanism fail? In our last home (a builder’s spec home, as we discovered after buying), we had not only one, but two different exterior door locks fail. After disassembling the locks, we discovered that pieces of the lock mechanism had simply broken and were not repairable. Now I’d never heard of a lock breaking from normal use in only 6 years’ time before this. Our guess was that the locks were very inexpensive locks — perhaps the cheapest the builder could find. They looked nice — had that stylish antique bronze finish that was very popular — but were obviously not robust.
So… we headed down to the local Home Depot (or Lowe’s — I forget which one) to buy replacements. We discovered a wonderful new invention: Kwikset Smartkey sets. Basically this type of door hardware is a middle-of-the-line quality knob set with a unique feature. You can re-key the locks to match your other locks. That allows you to keep the same exterior housekeys from your remaining locks without the expense of paying a locksmith to re-key the new locks.
I had another thought as we were matching the locks to the keys at the old house… if the entire house had Smartkey hardware, we could change the locks on our doors if we ever felt the need all on our own. You could even change them temporarily, say, if you had a housesitter for a particular period of time. This video demonstrates the method:
Since each door hardware set comes with its own key, you already have as many different possibilities as you have keys to begin with.
As we plan the details of our homestead, I am planning to look at Kwikset Smartkey door hardware for the exterior doors. By planning ahead and watching for specials, I should be able to do much better than paying retail locally. If I can find smartkey systems for similar pricing to other similar-quality models, it will be worth the effort. If you are just in the market for a replacement set, this might be just the ticket for you.
I found very reasonable prices on attractive Handlesets at the www.handlesets.com site.
Most recently, Tiff has shared the fruits of her study on the subject of alpacas. Being a knitting fanatic, she is always interested in various types of fiber – wool and alpaca especially. Since they are planning to buy a place in northern Idaho, they are thinking of the types of animals they will have on their place. A ready source of knitting materials sounds very attractive.
They have recently added a Great Pyrenees dog to their family and included great photos and even a very charming video of the litter of pups in action. Atlas will be a good help around their homestead as he grows to full-size.
Rich also recently posted a 2011 retrospective, with hopes for a better 2012.
Tiff is a wonderful site designer… I get inspired every time I visit over there.
The workshop is taking shape...There’s no doubt a lot of money to be saved by doing some or all of your home construction yourself. There are some simple ways of deciding how to sort that out. In some cases the requirements are governed by law. You may encounter the need for specific equipment, and finally there may be levels of expertise or physical abilities that make it impractical for doing the work yourself.
Building a house is a series of linked projects. Assuming you already own your land the project begins with research , learning all there is about the land, the type of home, construction materials, building codes and permitting procedures. From there it progresses to the design phase. The design phase encompasses everything from the house plans, the plot plan, the interconnection of all utilities, design of landscaping and any supporting infrastructure needed to prepare your homestead. The design phase never really ends. Changes are made up to, and in some cases, well after you move in. The more effort you put into the research and the design phases, the less problems and cost overruns you will encounter due to changes and oversights. You also have the permitting process. This requires lots of time and effort to get your well permit, septic permit, building permit, electricity run to the site, and cable/phone hook up.
The projects continue with excavation/site preparation, foundation work/masonry, , rough-in plumbing , framing, roofing, rough-in electrical , more plumbing, installation of HVAC system, , insulation, drywall installation, exterior finishing, , painting, flooring, bathroom/kitchen installation, finish plumbing , finish electrical, miscellaneous items, punch-out list (completion of all minor items needing touch-up/attention) and a final inspection . Each of these phases (and this is not a complete list) impacts the other. Some can be done concurrently, where others must be completely done before moving to the next phase. If errors are made in one phase, they will compound themselves with each subsequent phase until corrected. That costs time and money. The projects that I’ve highlighted in Blue above are the ones I will definitely do myself. The ones in Red will be subcontacted out. The ones in Black are undecided. As you can see from the list above, we should be able to save a significant amount on labor and project management fees.
The Law
Each state is different. In some portions of the state of New Mexico, a person, who is not a licensed contractor, can act as their own Owner-Builder. We are building in a region where you can perform your own plumbing work. Any electrical work requires that you be a licensed electrician. I suppose you could study and sit through the test and get a license, but there are a lot of aspects relating to electricity that are, in my opinion, worth allowing a professional to handle. One could also make the same argument for allowing a licensed plumber to do the work, but in my case I am going to do that work myself. Legally, in the county where I have submitted my application for my building permit, I am allowed to do everything except electrical work.
Equipment
Some jobs require a minimum of equipment to perform. Installing rolled insulation is one of those. You need to cut the rolls, you need a staple gun to secure them, and you need a ladder, or in some cases a small section of scaffolding to comfortably and safely reach the high spots. You will also need eye protection, respiratory equipment, and a set of coveralls to minimize the intrusion of the fiber material into your drawers! Other phases of the construction require a significant outlay of equipment. Some of the equipment can be purchased and retained for later use on the homestead, whereas others can be rented. Depending on how experienced you are with the equipment, the rental costs could exceed the cost of the tool itself if you keep it rented for 2 weeks! I am comfortable renting trenchers and small tractors, but anything else I plan on buying unless I do not see any utility in having that tool on the homestead. We plan to install a metal roof. Some of the bending and long cutting tools can be expensive; unless you plan on doing sheet metal work on the homestead they are not practical to buy. I’m not sure where you would rent those tools either. Based on tools, I do not plan on doing any of the metal roofing work myself. I will also leave the concrete pouring and finishing to a subcontractor. For most of the rest of the jobs, I have set aside an equipment budget to purchase or rent the hand and power tools needed. Then, after the homestead is built, I will have a suitable variety of practical tools for other projects. It’s also a nice excuse to buy more tools!
Sweat of your Brow and Know How
I’ve never built a house before. I’ve acted as a subcontractor on a home, closely supervised the construction of another, and lived in several other homes ranging from new construction to one built in 1893. We’ve moved 18 times over our 30 year marriage. My level of expertise is wide, but not deep. I have a lot to learn, and I have to gain a lot of experience to get it right so that I save money and build a safe house. Three things will help me here; research, reading and good friends who know what they are doing. The friend is not to ask to do the work, but to ask for advice and guidance. In our case we have such a friend and we are making it a business proposition as mentioned in an earlier thread. The combination of his advice, my back-work should result in victory. There are some things that I feel uncomfortable with. Roofing comes to mind. I know absolutely squat about metal roofing, and as mentioned before I do not have the tools to do a proper job. I’m planning to leave that up to a subcontractor. Stucco is another one of those areas that I consider an art. I could probably learn how to do it over time, but there is a reason why underlings apprentice for awhile before being turned loose. We’ll sub that out also. Things like painting, trim work, installing insulation, installing cabinets, sheet rock installation, tile work, I feel comfortable that with a little guidance and some basic tools, I can do those things myself. Framing is an area that I have not made up my mind on. I think I could frame a custom house, but I think it would take me 5 times as long and in the process I might waste the savings of not using a sub on mistakes and re-work. The home I’ve designed has a rather complex roof line, that if not done properly can be costly. Not to mention, a 10:12 pitch roof is tall and that is not something I can do myself. A final thought on framing is I can probably get the house framed and the roof dried in within 2 weeks before the heat of the NM summer kicks in if I subcontract that portion out. After that, nearly everything else will be done in the shade with a breeze blowing through the open walls.
I suppose time becomes the final aspect of deciding what to do yourself. In our case, I am retiring, so my “retirement job” will be building the house. Rather than paying a general contractor to do all of the coordination and scheduling, I will do that myself. If time is a factor and you do not have everyday free to work on the house, it will either take you much longer to finish an owner-builder home, or you will have to subcontract nearly everything out. As far as the time value of money; many of the Owner-Builder books discuss the saving as being in the 10-15% area for this alone. For a $200,000 house, that is as much as $30,000! When you add up the costs of all of the other labor, the amount subcontactors add on to projects for ordering and delivering the materials it could add another significant amount to the savings. The more you do yourself, the more you save. I estimate that the house will be built for a cost that is approximately 60-70% of a turn-key purchase. For a $200k house, that’s a savings of $60-80k.