More Clark Airborne Dozer Stuff

Making your own metal fuel lines: Part 2
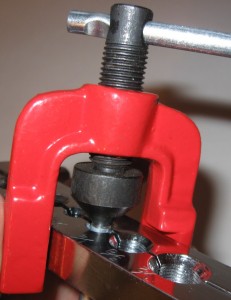
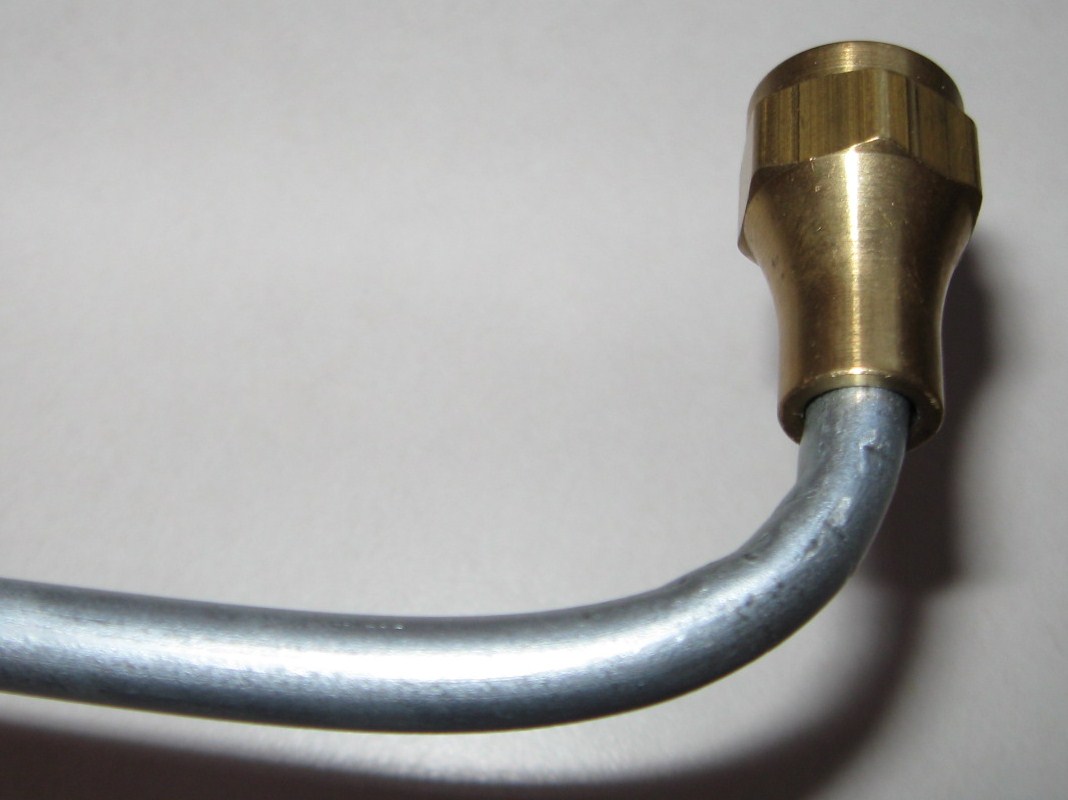
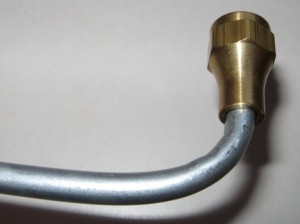
I wrote a previous blog article about making my own fuel lines for the Clark Airborne Tractor restoration project. This is the second part of the article which deals with making the flared endings for the tubes. I am using 37 degree flare tube fittings to seal my fuel lines. The components you are trying to mate together are; the beveled screw, the beveled cap and the flared tube. Each of the mated surfaces is beveled at a 37 degree angle (45 degree for higher pressure lines) so that when the cap is screwed against the flare of the tube and presses it up to the beveled screw end the mating of the 37 degree angled surfaces seals the line. If you create your flares properly and torque the cap and screw down properly, the fuel line will be sealed with no leaks, and no need for sealers or gaskets.
Making the flares is relatively easy as well, but takes some practice. Use some scrap tube and work several until you are comfortable. I am using the single flare. What you do is simply flare the pipe out to a 37 degree angle so that it can seal up between the screw and cap. The process involves the following steps:

1. Cut your pipe end to size.
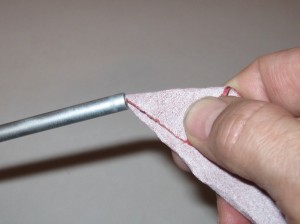
Prepare the pipe end

2. Use a small file and de-burr the inside of the tube to ensure it does not crack or split when being flared outward. You may also want to use some fine sandpaper to clean the edges up a bit. The smoother the metal is, the less chance there is for splitting.

3. Insert the cap fitting on the tube with the threaded ends toward the end of the tube. This is easy to forget sometime, and if you start the flaring process without the cap you’ll have to bend a new piece of tube, because once both flares are made, the cap will not slide on the end over the flare!

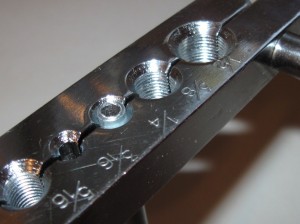
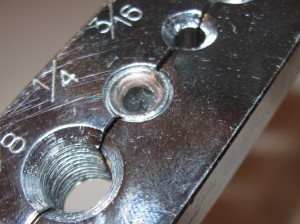
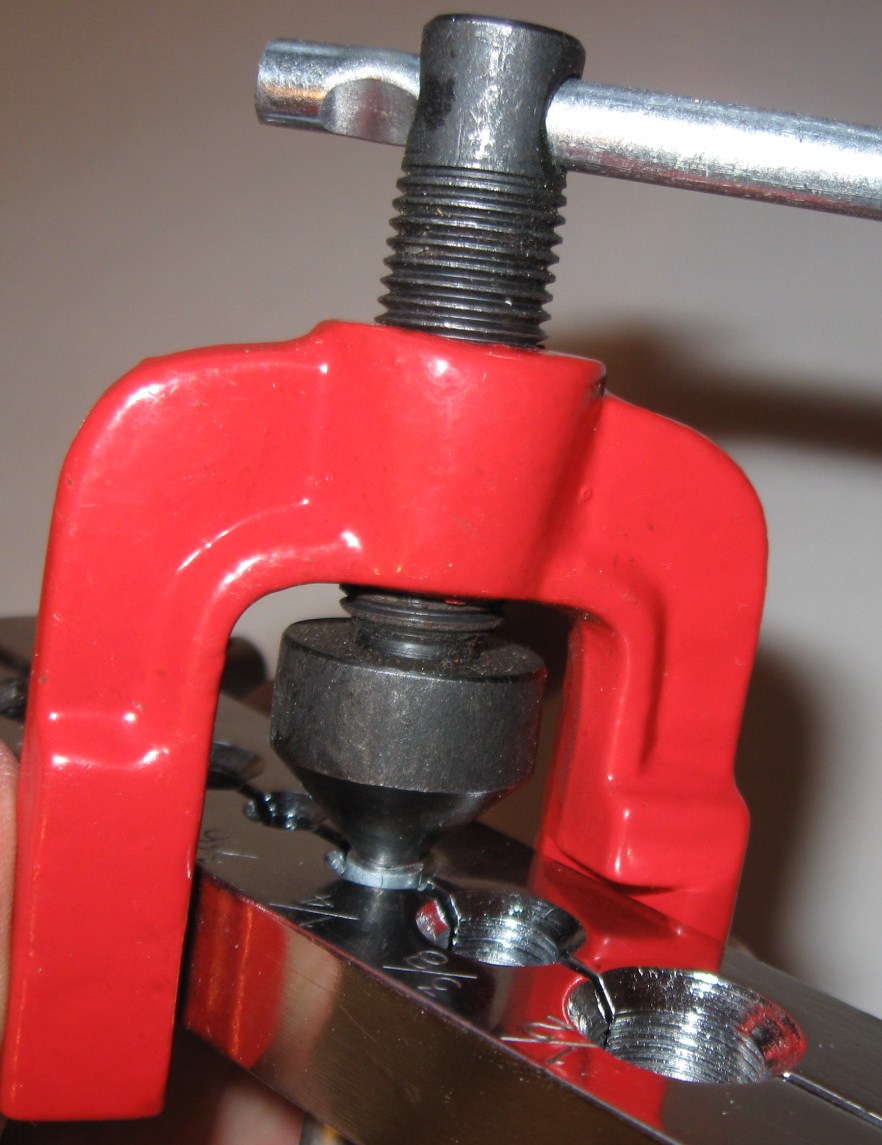
4. Insert the tube to be flared into the proper diameter hole of the vice exposing a very short length of the tube. If you expose too much of the tube, your flare will be too big for the cap. Clamp the vise closed

5. Put a light coating of oil on the end of the pointed flare tool to aid the process of expansion of the flare.

6. Insert the beveled end of the flaring tool using the vice and screw it gently down until the flare is shaped

7. Inspect and clean

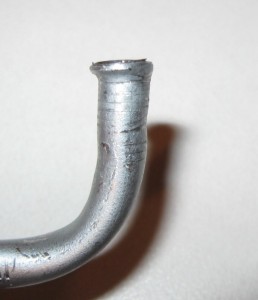
Here are some examples of my various previous attempts.
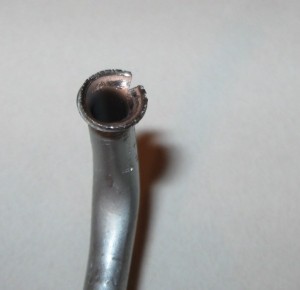
Oops!

The first one shows an off-kilter flare. It will not seat properly and the line will leak. This was caused by not clamping the tube fully down or by having the flare wedge off centered when screwing it down.

The second tube has split. This is usually because too much tube is exposed above the face of the clamping bar. It should be almost level with the top, or slightly above the top surface of the clamping bar.
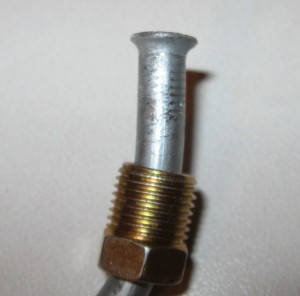
Success.

The final example is fairly decent. It should hold pressure and provide a good seal.

If you liked this article, you’ll probably be interested in my previous post on the subject that you can find here: Making Your Own Metal Fuel Lines.

Home Mechanics – Making Your Own Metal Fuel Lines

More Clark Airborne Dozer Stuff:

Making Your Own Metal Fuel Lines Part 1


Metal Fuel Lines


During the rebuild of the Clark Airborne Dozer it was apparent that the rubber fuel lines were not original to the vehicle. The TM (Technical Manual) for the dozer specified metal fuel lines. I am trying as much as possible to restore the vehicle back to how it would have looked when the Airborne Engineers used it in 1944-45. The TM has a few sketchy/grainy diagrams of the routing of the fuel lines from the carburetor to the fuel sediment bowl (also missing). The lines are depicted in the BW photos as a light colored material, so I am assuming they are steel fuel/brake line material common to the era. The fittings are also a light color material and are either brass or some other metal. Restorers like to see original items built for the particular vehicle and were packaged years ago but never opened (called NOS, New Old Stock). Since the company manufactured all of their own parts and most of the fittings in 1943-44, there’s not much NOS laying around.

I’ve decided to use steel fuel line and brass fittings for the rebuild, and I’m going to have to make them myself, since the prospects of finding NOS fuel lines and fittings is extremely low. I suppose if I did find them they would be outrageously expensive. As a comparison, I needed a small metal lever type switch for the lights. It’s essentially an on/off switch specifically made for the Clark Bulldozer. It was $71 on the internet, but more importantly, it was probably the only one listed for sale in the last 6 months!! Keeping costs down is another reason to do it myself.

Tube Bending

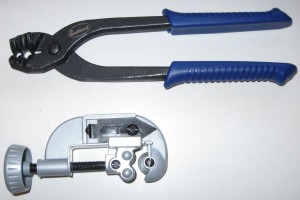
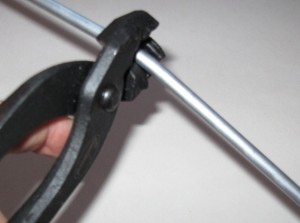
Following some basic research I settled on purchasing a hand-operated bending tool and a flaring tool. The bending tool is used to shape the metal line to the configuration needed. The TM shows a few bends and curves in the line, so I want to match those as close as possible. The hand-held tool that I have is essentially a set of pliers which grasps the fuel line for bending. The channel of the pliers has a groove which matches the diameter of the line. The channel is angled so as to create a supporting platform to “mold” the bend without kinking the line. It distributes the bending force equally along the side walls of the line so that it resists kinking. It is quite simple to make rather complex bends of varying angles and radius with the simple tool.

The particular model that I chose is easy to use, but it has one flaw. The “closure” that holds the tube firmly in place as you exert the pressure is made with a sharp edge and as it grips the tube it leaves a bit of a crimp/kink in the line which I do not like. It is essentially not a clean bend. There are other designs of hand held bending tools which may do a better job than the one I purchased. I assume that other types would not leave the tell-tale “crimp” marks as does the tool I purchased. The downside of that I think would be the bend is limited to a radius which matched the size of the bending wheel. Some of the models are relatively cheap, and there are more complex ones available that probably produce superior results. If I were going to bend a few thousand yards of line, I’d probably upgrade mine. For the simple jobs I have to do I am relatively happy with the results. I purchased my tools from Eastwood Company. The shipping was fast, price reasonable and the tool worked as advertised with the exception of the minor crimp marks which may be operator error: http://www.eastwood.com. I would recommend the following procedure for the type of pliers I used:
1. If you have an existing pattern, you can lay your straight tube alongside the bend pattern and make marks with a sharpie where you need to bend. With no pattern, you can eyeball the bends needed by taking a coat hanger and bending it “on-site” to match the bends you need with your tube. Use the actual components on the vehicle, bending the coat hanger by hand from the carburetor to the fuel sediment bowl in whatever configuration you need to fit the line. The coat hanger will bend easily and you will not need any tools. From this you have your pattern.
2. Place the tube in the pliers with the gripping orifice at the point where you want the bend to start, and the tube extending out along the angled channel.
3. Gently apply pressure on the piece of the tube that hangs out from the pliers along the pre-formed channels of the pliers. This will begin the bend at the prescribed angle.
4. You may need to move the pliers along the tube in the direction of the bend if you are making a more radical bend that is a tighter radius and more degrees of bend. This will prevent the line from kinking over.
5. With every minor bend, continue to compare your work to the pattern you made until the radius and angle of the bend match closely.
6. Once the tube has been bent to the prescribed configuration you can cut it to length with a standard pipe cutter, and then make the flares which will be discussed in part 2.

Cutting Tool

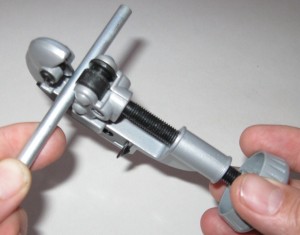
Using the cutting tool is quite simple. Place the tube in the cutting tool vice between the cutting wheel and the rollers. Screw down the rollers until the edge of the cutting wheel contacts the tube with slight pressure. Rotate the cutting tool around the tube for 1-3 revolutions. This makes the initial score in the tube. With every 2-3 rotations around the tube, tighten the clam down about ½ turn to score the tube deeper. Eventually the series of scores get deeper and deeper until the tube is fully cut. Resist the temptation to ‘cinch’ the clamp down tight as you will only crimp the tube and make a rougher cut. Be patient and make a clean cut.

In Part 2, I’ll cover the process of Tube Flaring.

.

Reloading

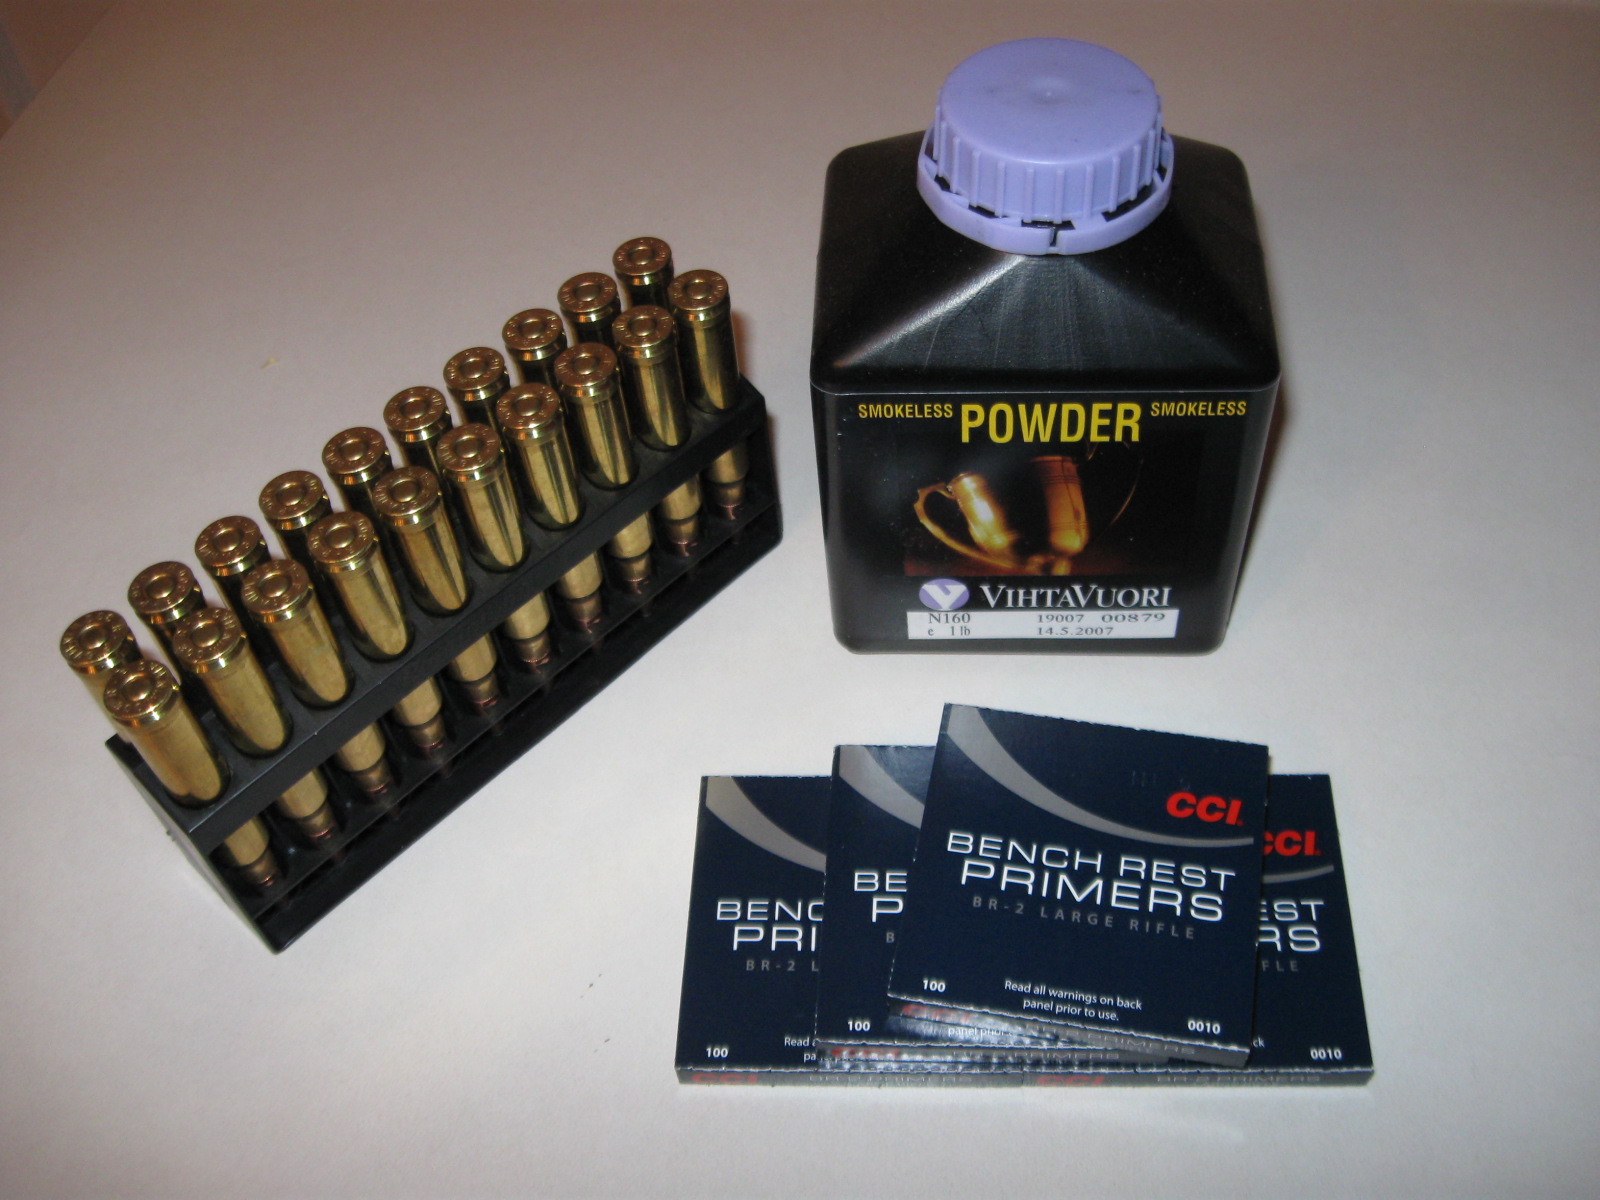
Bullets, Powder, Primers

Several years ago I was heavily into research on precision rifles. I was interested in having a suitable long-range rifle built because I sincerely enjoy marksmanship. I enjoy the challenge of accurate shooting at ranges beyond 500 meters. I read a book called, The Ultimate Sniper by John Plaster. It is an excellent source for learning about long-range ballistic, principles of shooting, the effects of atmospheric variables on accuracy and a host of other shooting related principles. In my opinion the book provides one of the best overviews of long-range marksmanship even though it is from the perspective of a military sniper.

While reading the book, I was intrigued by the nature of the discussion on caliber and bullet weight. I suppose this is why we see many long-range shooters evaluating and many even selecting the .50 caliber as the platform for supreme long-range accuracy, although I would suspect that foot/pounds per second at the point of delivery is probably the deciding point for many of those selections. There is a healthy discussion on the merits of the 168 grain 7.62 mm standard NATO round. It definitely has its merits when match grade ammunition is used, but the bullet performance past 5-600 yards begins to suffer. Since that was on the lower range where I like to shoot I decided to focus on one of the magnum rounds; the .300 Winchester Magnum. The size of the casing, the hefty number of grains of powder, and the versatility of numerous different bullet weights to choose from solidified the decision for me. The combination of superb muzzle velocity and bullet weight made this an ideal 600 yard plus shooter. The problem was the cost of match grade ammunition. At the time I had my rifle built, a 20 round box of match grade .300 WM ammo was over $40.00. At $2.00 a shot there was not much shooting to be done on a fixed budget with a house, two cars and two young boys in the home. That is where I branched off into reloading ammunition.

Reloading afforded me the ability to load ammunition at tolerances which exceeded factory match grade loads and at about 25% of the cost, if you don’t factor in the cost of the reloading tools. I figure any tool added to the house is just part of the deal and we don’t talk cost. I’m glad my wife agrees with me on that point. I purchased a basic RCBS Rock-Chucker Master Kit, manual press with a few extra components. I did not choose a progressive loader which somewhat automates or speeds up the reloading process because my focus was on pure quality, not quantity. The versatility of the progressive system will be for reloading our 9mm, 5.56mm, and .45 cal ammunition. For the .300 WM I am strictly a manual guy. The purchase of such a complete kit provides the novice reloader nearly everything needed to begin reloading except three things; reloading components, a set of reloading dies and most important, knowledge.

I took my kit home and spent nearly a month reading, studying, talking with other reloaders and surfing the web. When I was satisfied that I was ready to start “building bullets” I set myself up in a quiet area of the house and began reloading precision rounds. I cannot emphasize enough the need to study and learn, because although reloading can be fairly straightforward, there are many hazardous pitfalls that can be ”catastrophous” (as we used to say in the Army) while reloading or on the range. Be careful, follow the rules, ask for guidance, and take your time. Do not reload when there are any distractions around, because breaking your chain of actions might result in you double loading a casing with twice the powder following a 30 second interruption by a family member.

The components for match grade reloading are also very important. I select only premium grade components for precision shooting; match grade casings, match grade primers and match grade bullets. I am convinced that you can get a far better load than factory, machine loaded, match grade ammo provided you are consistent in your measurements, procedures and care. Another thing that allows me to precisely control the accuracy of each round is to manually inspect each component by hand. I use a micrometer to measure the length of each 180 grain Boat Tail Spitzer round, reserving only the bullets that meet the tightest of tolerances and show no deformity in the tip. Any minor variation can change the coefficient of ballistics of the round or the total weight and at 1000 yards a very minor variance is compounded into a healthy miss distance. Each case is carefully inspected and once again measured with a micrometer and trimmed to exact case length before reloading. Cleaning and sizing the primer pocket seems innocuous, but that, too, can have an impact of the speed at which the powder charge ignites in the casing. Ummeasurable variations in ignition timing can affect the bullet’s velocity. An additional variance is the overall case length. The depth at which the bullet is seated in the casing can also affect the velocity. This too must be precisely measured. Many times I will load a test round with no powder or primer to validate the overall case length before proceeding. Differences in reloading temperature and humidity will also impact accuracy. Rounds loaded at 68 degrees and 20% humidity will perform differently at 1000 yards than will rounds loaded in 85 degrees and 80% humidity. Although this is not an all-inclusive list and is not is it intended to be a lesson in reloading, it does provide a basic perspective on getting started. Remember, the key is knowledge…so read as much as you can before you start.

It’s Knitting Weather

... a pile of socks!

Wintertime is my time for knitting. Every year (or almost every, I should say) about the time it starts to get cooler I begin wondering where I stashed that bag of yarn I found on sale. The yarn slips through the fingers so nicely in the cooler months… plus there is that feeling of wanting to wear some nice, warm socks, gloves, scarves, hats… I’ve almost run out of sock yarn in the past few weeks… the picture is a pile of the socks I’ve made recently.

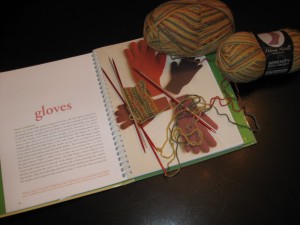
I’m currently working on a pair of gloves (not a beginning project, but really fun on double-pointed needles for the more experienced).

Gloves in progress...

I learned to knit from a neighbor lady, Mrs. Easton,  who lived across the street from our home when I was about 7 years old. Having attempted to teach a 7-year old to knit, I can now fully appreciate the patience that dear lady must have had. For several weeks in a row, I’d go over to her house at a specified time and learn the basics of knitting.

She taught me how to rewind my skeins of yarn into nice, round balls of yarn with the starting thread sticking out from the middle. It is ever so much nicer to pull from the middle so that your yarn doesn’t roll across the room with every pull as you are knitting.  I’ll admit that I tend to dig around in the skeins and find the “pull from the middle” thread without rewinding usually, but I know how to do it if need be!

Then, she taught me the basics of casting on using the “Knitting-on” method. Using a burgundy maroon wool yarn and size 8 needles, we began making a (very lovely – you can imagine how the first project made by a 7 year old looked) potholder.

I found a nice YouTube video demonstrating this method here:

It is an excellent method of casting on, leaving a nice finish on the edge, while remaining stretchy. This is the method I use most often even still, after all these years.

Next, Mrs. Easton taught me to knit using the “Knit” stitch. Another YouTube demonstration showing this method is here:

When each row is knitted using the Knit stitch only, you end up with a pattern called the Garter Stitch. This gives a sort of horizontal ribbed pattern to your knitting.

She also taught me how to knit using the Purl stitch. This stitch is the opposite of the knit stitch. Using this stitch on alternate rows creates what is called the stockinette stitch. Alternating knitting and purling within a row can create a vertical ribbing and is commonly seen at the edges of projects like sweaters, mittens, gloves, etc. I found an online video demonstrating this stitch as well (she also demonstrates how to bind off using a purl stitch method).

She also taught me the proper way to hold my thread to keep a steady tension. Now at that point I had no idea there were so many different ways to hold the yarn… Pinky wrap (that’s the method I use), continental, throwing… and many variations on each. This  video gives a reasonable explanation of the method, although it is not the favorite of the person demonstrating… feel free to investigate other methods and find what suits you. I find my knitting to be of very even tension and matches the knitting gauge pretty closely using this method, so I’m not changing!

Finally, after many weeks of struggling with dropped stitches (she helped me fix the mistakes, but still there were a few “holes” where my errors were evident), gaining the coordination to knit row after row… I had an almost 8” square knitted potholder. The final thing was to learn to bind off. This video gives a very simple demonstration of that technique.

With these simple techniques, you have the basics of everything there is in knitting. Everything you find in patterns will be these skills or a variation of one or more of them. This was the full extent of my toolbox when I began. By buying knitting magazines, or some books with beginner patterns, you can start from here and learn to knit anything… color combinations, knitting on double-pointed needles, felting… the world of knitting is fascinating and useful.

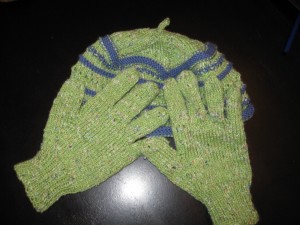
A project from last year... hat and gloves

I buy yarn when I find it on sale, most often. I’m always thinking about projects for the next winter and looking whenever I’m in a fabric or craft store. I also love buying yarn online from www.KnitPicks.com . I think they often have yarn at a very good price and have a great selection of colors and types of yarn.

Over the years I have accumulated a pretty large collection of books that have many different methods and stitch patterns, as well as methodology for creating your own patterns using various types of yarns and needles. I once had the great good fortune to buy a lot at an auction of things gathered by another avid knitter of a previous generation. I have a huge collection of knitting needles in varying sizes from that great find.

Really, knitting is a wonderful skill to have on the homestead. I highly recommend you investigate it (or renew your interest in it).

Check out my friend Tiffany’s lovely knitting project here: Alpaca Mitts – really beautiful. Tiffany is much more adventurous on intarsia knitting and does some really complex patterns… I’m hoping for more of her projects to be posted over there.

There is also an entire community of knitters sharing ideas, projects, photos, etc. over at Ravelry.com. I don’t post much over there, but have been very amazed and impressed with some of the beautiful work submitted by members.

Restoring a WWII Clark Airborne Tractor aka Dozer

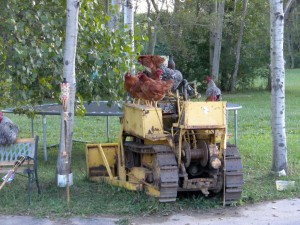
Used as a chicken roost by the former owner...

Why the heck would I want to do that? I have been doing research for a book I am writing on the 139th Airborne Engineer Battalion. They were the combat engineer element of the 17th Airborne Division who fought just west of Bastogne during the Battle of the Bulge, and they rode in gliders during Operation VARSITY as the 17th Airborne Division invaded Germany on 24 March 1945.

As I pored through the archival material at the National Archives I came upon an entry that said simply: “AIRBORNE CLARK TRACTOR damaged by mine. Operator injured.” It was 4 February 1945. For some strange reason I had to have one of these things. It’s not logical or practical, it just is. Since I am an avid collector of all things associated with the 139th it seemed logical to me!

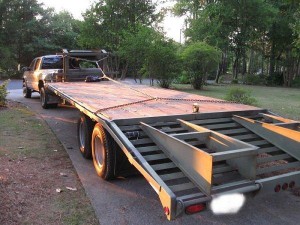
Gooseneck trailer with winch

A two month search uncovered a suitable project just south of Buffalo NY. I scheduled a pickup date, and I and one of my sons drove with a friend from work who wanted to visit his father in Buffalo. We arrived after a 928 mile trip. It took us exactly an hour to inspect, and winch the dozer onto the 20’ gooseneck trailer behind the Chevy Dually. I was impressed with the efficiency of our loading/safety team. The Dozer is not running, but free-wheeled nicely and the winch and pulley system tugged it right onto the trailer. I secured it with 4 heavy duty class 80 chains and 4 ratchet binders and off we went.

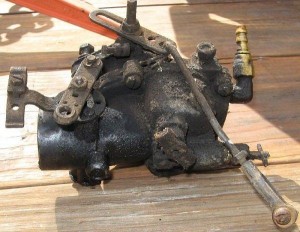
Since I am still three months (93 days, 4 hours and 27 minutes) away form the move to our homestead, I cannot disassemble the big parts. I still have to move it on and off of the trailer to get it to NM. I am able to work on small things such as distributor, generator, carburetor and a few other components. The time I have now has been used diligently to do research, find missing parts, connect with others who are doing the same (and there are dozens of other folks rebuilding Clark Airborne Dozers!!) and to learn more about the project. I filled the fluids, checked the basics and charged the battery. I have found that a recharged battery will turn the engine over, but there was not spark or fuel. I checked the compression and had between 90-99 psi across all 4 cylinders. The TM (Technical manual) calls for 85 psi minimum with no more than a 10psi difference between cylinders. I think I have a solid engine which needs some TLC.

Dirty Caburetor
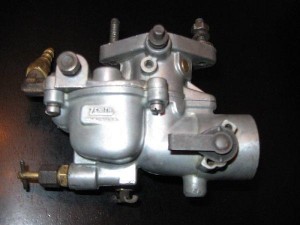
Clean Carburetor

So far I have rebuilt the distributor, found and had a generator rebuilt, worked on the carburetor, and am tending to minor details. It’s a fantastic project and when we get the home built, the boys and I will have a blast resorting this thing to fighting condition.

The value of what we are learning is immense. I see and appreciate the practicality of a non-electronic ignition system and an engine that you can reach all the components for and do not need ANY special tools to do all of the basic work, and much of the advanced repair. Hand tools, a manual, a source of spare parts and some confidence will allow me and the boys to tackle the

Used as a chicken roost by the former owner...

project. I know there will be some pitfalls and parts disappointments, but each of those will be challenges that will mold the young men into future problem solvers. You can follow the progress at the following sites:

A forum thread on the restoration progress here, and for information on parts, another thread devoted to that topic here.