Door Hardware -Kwikset Smartkey

Have you ever had an exterior door lock mechanism fail? In our last home (a builder’s spec home, as we discovered after buying), we had not only one, but two different exterior door locks fail. After disassembling the locks, we discovered that pieces of the lock mechanism had simply broken and were not repairable. Now I’d never heard of a lock breaking from normal use in only 6 years’ time before this. Our guess was that the locks were very inexpensive locks — perhaps the cheapest the builder could find. They looked nice — had that stylish antique bronze finish that was very popular — but were obviously not robust.

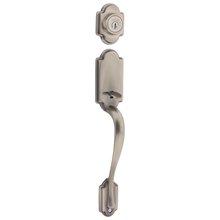
So… we headed down to the local Home Depot (or Lowe’s — I forget which one) to buy replacements. We discovered a wonderful new invention: Kwikset Smartkey sets. Basically this type of door hardware is a middle-of-the-line quality knob set with a unique feature. You can re-key the locks to match your other locks. That allows you to keep the same exterior housekeys from your remaining locks without the expense of paying a locksmith to re-key the new locks.

I had another thought as we were matching the locks to the keys at the old house… if the entire house had Smartkey hardware, we could change the locks on our doors if we ever felt the need all on our own. You could even change them temporarily, say, if you had a housesitter for a particular period of time. This video demonstrates the method:

Since each door hardware set comes with its own key, you already have as many different possibilities as you have keys to begin with.

As we plan the details of our homestead, I am planning to look at Kwikset Smartkey door hardware for the exterior doors. By planning ahead and watching for specials, I should be able to do much better than paying retail locally. If I can find smartkey systems for similar pricing to other similar-quality models, it will be worth the effort. If you are just in the market for a replacement set, this might be just the ticket for you.

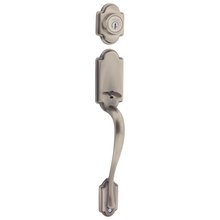
I found very reasonable prices on attractive Handlesets at the www.handlesets.com site.

Living in an RV?

Home, sweet home...
Call it counter-cultural. Call it crazy. We have decided to take up housekeeping in an RV while we build our home. We do have a history of RV-living. Since we lived in the New Orleans area when Hurricane Katrina hit, we found ourselves living in a trailer for several months. We have done it before and know how it is.

Why do it?

In 2005, when Katrina hit the Gulf coast, we had no idea initially just how long it would be until we could go home. Only a couple of days after Katrina passed through New Orleans, we could see that it would be awhile before things returned to normal. We had several motivations that made the purchase of an RV seem a logical choice:

1. We had two kids and a large dog and were completely sick of hotel living. At least at a campground, we would have plenty of outside space and room for the kids and dog to run.

2. With the huge number of evacuees in the area, short-term apartments were in short supply.

3. We had no idea how long we would be evacuated, so were reluctant to sign a long-term lease.

4. If we were able to return home, but had no power, water, or sewer service, a trailer seemed like a very self-contained solution to use while working on home repairs.

5. Since my husband had to remain in the city where the evacuated military aircraft (from the New Orleans area) were positioned, even if allowed back home, he would have to stay with the aircraft, so the idea of staying together as a family unit was more appealing.

6. The idea of family camping trips in the future sounded like fun.

As it happened, we ended up living a total of 4 1/2 months in that RV… We learned a great deal from it and look back on it as a happy time. Since we had a overall good experience that time, we decided it would be a good thing to consider again during our construction… with a few changes.

We lived on-base at a very safe campground during our evacuation. There was a central bath house and a coin-operated washer and dryer at the campground. The boys had many a pleasant evening with a campfire and marshmallows at the campground. We became quite adept at preparing meals in our little trailer and learned many of the tricks of RV living. The boys continued right on with school at the little dining table.

Two things would have made such a huge difference in the standard of living. Better bath facilities and our own washer and dryer. It doesn’t seem like those two things would be so crucial. After all, we did have in our trailer a lovely shower/bath/toilet combo and separate bathroom sink. The laundry facilities were only a short walk away. I think I am just a bit spoiled to whine, but there it is.

We looked at our options for the build of our own retirement home. We could have chosen to rent a small house in town or even accepted the kind offer my parents made for us to stay with them. In the end, we decided to modify the design of the workshop to accommodate our needs and make things a bit more comfortable so that we could live on-site.

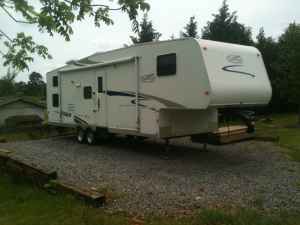
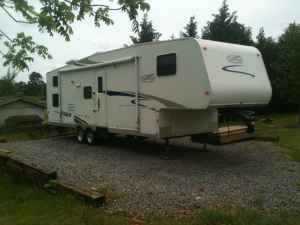
At first, we thought of actually building a living quarters at one end of the workshop and keeping it as a guest quarters later on, but couldn’t really justify the added cost when we looked at how little we expected to actually need guest quarters after the home was finished. We came upon the idea to just put in a finished bathroom with shower, sink and toilet and equip the workshop with a washer/dryer hookup. With those two things and our 5th wheel RV, we’d have all the comforts of home.

Cost-wise, it works out very well. We figure the extra cost of adding a bathroom to be fairly minimal and a useful bonus to our lives after the construction was complete. It will allow us to eliminate the cost of a rental house and rented storage units during the build time and also to protect our materials by living there.

It will be another adventure (but even better… this time we’ll have better plumbing).

Homemade Fast Food

I’m one of those people who buy a lot of long-term storage food for the pantry. I have dried beans, rice, wheat berries, dehydrated vegetables, spices, baking supplies… you name it — if it can be stored for a reasonable amount of time on the shelves, I probably have at least a small stockpile of it.

But let’s face it. If you want to whip up a quick batch of chili for lunch, doing it with dried beans is not the answer. I discovered pressure canning a couple of years back and was reminded once again today why it is such a great idea. Since I had previously pressure canned my own jars of beans, I could just quickly throw the ingredients together and have lunch ready for my family with very little muss or fuss.

Why to pressure can…

There are several reasons why it is a great idea to learn this skill. The cost of a bag of dried beans is still really reasonable, usually $1.00 or so per pound in the grocery, less if you buy in bulk. From that pound of beans, you’ll end up with about 4 pints of canned beans, about $.25/jar. Even if you add on the cost of the canning lid, the cost is very reasonable. Once you have the pre-cooked, canned beans in your pantry, you can whip up a bean soup, minestrone, chili, or other bean dish in just minutes.

Sometimes people who stock up on staples like beans find they are difficult to cook to a nice, soft texture after they’ve been stored for a few years. Pressure canning takes care of that and softens up even the toughest beans. You’ll be a lot more likely to use those stored foods in your normal food rotation if they are tasty and easy to use.

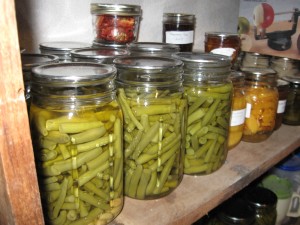
Pressure canning is also great for the abundant harvest from a garden. This summer, my Mom and I canned 30 quarts of fresh green beans. There was no way she had room in her freezer for that much, so canning was a great way to preserve them for yummy winter meals.

Summer's Bounty on the shelf

How to Pressure Can beans…

Before beginning, you need to buy or borrow an actual pressure canner. I have a 16 qt Presto model that works fine for me. Follow the instructions with the pressure canner very carefully to insure safety. You’ll need to know your locale’s altitude to determine what pressure to use. The key thing is that for any low-acid food (beans are a low-acid food), you need to process them at 240 degrees Fahrenheit for the time required in order to assure safe processing. Since (obviously) 240 degrees is higher than the boiling temperature of water, pressure is needed to achieve that. At higher altitudes, a higher pressure is required to reach 240 since the air is thinner.

Since I have the weighted gauge type pressure canner, it is really pretty simple for me to make the determination about how much weight. For altitudes 1000 ft and below, I can use the 10 lbs weight. For anything else, the 15 lb weight is required.

Now… to the super simple, easy-as-pie, dry beans canning recipe (that I learned from Jackie Clay’s blog, by the way), here is what you do:

Put 3/4 c. dry beans (your choice of type) into a clean pint jar (or 1 1/2 cups into a quart jar)
Fill the jar with boiling water, leaving 1″ headspace at the top of the jar. Place previously-simmered lids on top, firmly tighten the rings.
Process the jar (following your canner instructions) for 75 minutes for pints, 90 minutes for quarts at the pressure required for your altitude.
If you wish, you can add 1/2 tsp salt to pints or 1 tsp. salt to quarts.

Quick Chili for lunch

Now my recipe is really nothing fancy, but it is hearty and easy to do…

Brown 1 lb. ground beef in a big pot. Drain off excess fat if necessary. Add in 2 Tablespoons of chili seasoning mix (I mix this up myself using NM ground red chili), 2 8-oz cans of tomato sauce (or 2 14-oz cans of tomato puree), 1 quart jar of canned beans. Add water if needed. Simmer for at least 15 minutes… serve with cheddar cheese.

Sometimes a prepared food is a good thing.