Amidst a bout with kidney stones, extremely hot and windy weather, we finished our building pad and foundation lay out. I started by staking out a general layout of the foundation, placing corner stakes for the foundation in the location that we wanted the house to sit. This was not an exact layout just a general one done with a tape measure, stakes and string lines. Since we sit on 5 acres with no required set backs and no easements, I was not concerned with citing the corner of the house +/- ¼”. It was sorta a “looks about right” placement methodology. Had we been building in a subdivision, I would have used surveying equipment to place the foundation exactly in accordance with the plot plan.
With my foundation line in place, I used a Bobcat and removed the top few inches of top soil under the foundation and scraped away the vegetation around the foundation for several feet. The solid material under the pad has been undisturbed for millennium and we are about 16-24” above the first rock layer. My footers will extend, in most cases, through the soil and rest on the rock. Combined with rebar, 3000psi, fiberglass impregnated concrete; I think we will have a very solid foundation.
I then placed corner stakes for where I wanted the pad built up. I placed them 5’ on the outside of the foundation perimeter. That will give me a good buffer to work with when doing the trenching for the footers, and provide material to create a suitable run-off grade sloped away from the foundation. I then used the CST/Berger 800’ Dual Beam Rotary Laser to set a perfectly level string line at 6” above the highest grade. The lowest point on the pad was 6” below the existing ground layer.
I ordered more than 200 tons of fill dirt and with a Bobcat I moved layers of dirt around the pad, using the string lines as both a perimeter guide and a height guide. As I moved the dirt I ensured I compacted as I drove the Cat in reverse with a majority of the weight of the machine on a nearly level bucket. The weight of the Cat and bucket being drug across the dirt aided in compaction. It is essential to compact between layers (4-8” recommended depending on soil quality) rather than filling completely and then compacting. Such a manner will result in only the top 6-12” being compacted and the bottom layer rather “fluffy” Over time the ground will settle resulting in foundation complications.
After the boys finished school, the assisted me in getting a fairly level pad (+/- 2”) by running supplemental string lines across the pad. Wherever the string touched the pad it was too high so I removed some dirt. Where the string was above the pad, I added fill and compacted. I was surprisingly able to build a fairly level pad using this method. During the evening and into the next day, we sprinkled the pad heavily allowing the water to trickle down into the layers as best as possible to aid in further compaction. I rented a walk behind vibrating roller and ran across the pad at least 4 times resulting in an even greater compaction.
I waited for the top of the pad to dry somewhat to prevent the caking of mud on the rollers. My concrete sub and a very seasoned home appraiser both were impressed with the work. Since I had never built a pad before I wanted a few folks to look at it.
The next step was to accurately (+/- 1/8”) lay out the exact perimeter of the foundation so that the footers could be trenched and the form boards could be placed. I purchased the CST/Berger 800’ Dual Beam Rotary Laser to do the work. I figured rental on the device for as many days as I would need it for the pad, the foundation, interior work, etc. would begin to add up. It thought it would be well worth my time to buy it. It took me a while to learn the nuances of the device and make sure I was taking accurate readings and properly setting up the level. In the end I will have a lightly used, well cared for device that could be sold. I am certain this is a cost effective decision.

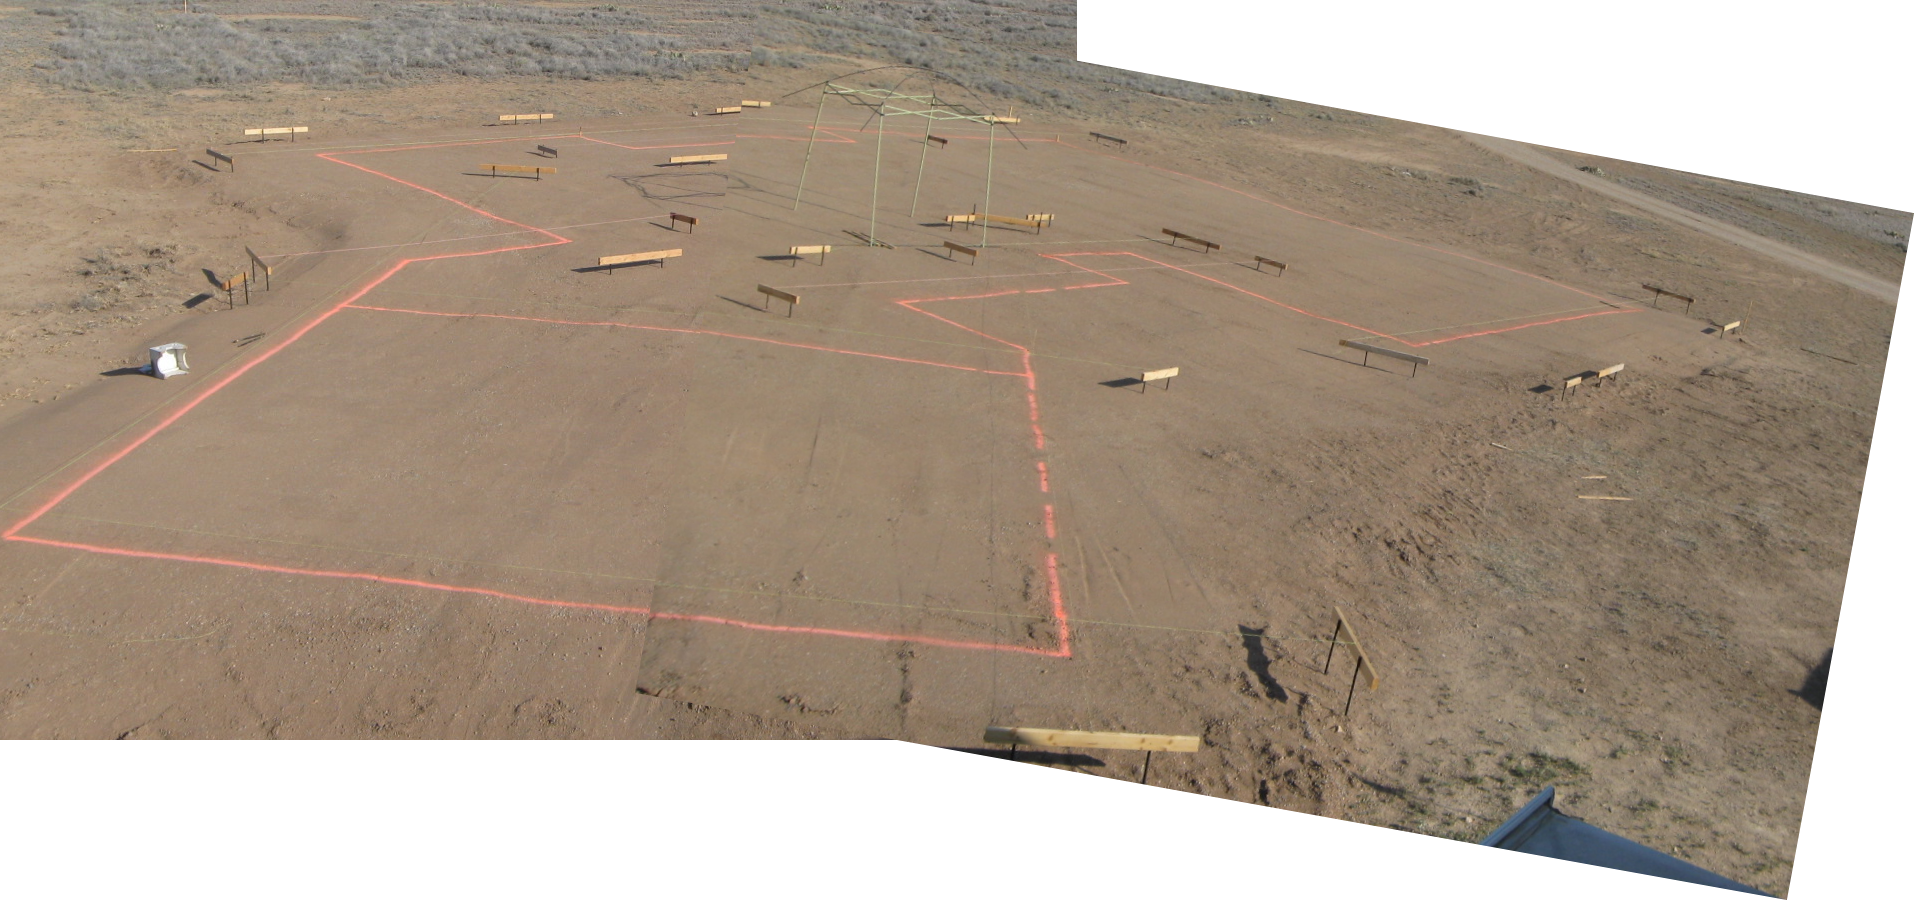
I established a system of string lines and batter boards which defined the entire perimeter of the foundation. I used conventional methodology for this task, relying on 36” steel stakes rather than wooden stakes, given the density of the ground. I took several diagonal measurements where possible to ensure everything was square. Given the dynamic nature of the perimeter, with lots of corners and 45 degree angles, taking the diagonal measurements was not easy. My worst measurement was 3/8” over a 60’ length. I was striving for ¼”, but moving one stake impacts several others. It’s not as easy as squaring a rectangle with four corners. I think I will leave well alone and refine the “square-ity” in the framing stage. Once I was pleased with the work, I used line marking spray to trace the outline of the foundation, which you can see from the image. The next phase will include trenching the footers and placing the form boards, followed by rough in plumbing.

