Most recently, Tiff has shared the fruits of her study on the subject of alpacas. Being a knitting fanatic, she is always interested in various types of fiber – wool and alpaca especially. Since they are planning to buy a place in northern Idaho, they are thinking of the types of animals they will have on their place. A ready source of knitting materials sounds very attractive.
They have recently added a Great Pyrenees dog to their family and included great photos and even a very charming video of the litter of pups in action. Atlas will be a good help around their homestead as he grows to full-size.
Rich also recently posted a 2011 retrospective, with hopes for a better 2012.
Tiff is a wonderful site designer… I get inspired every time I visit over there.
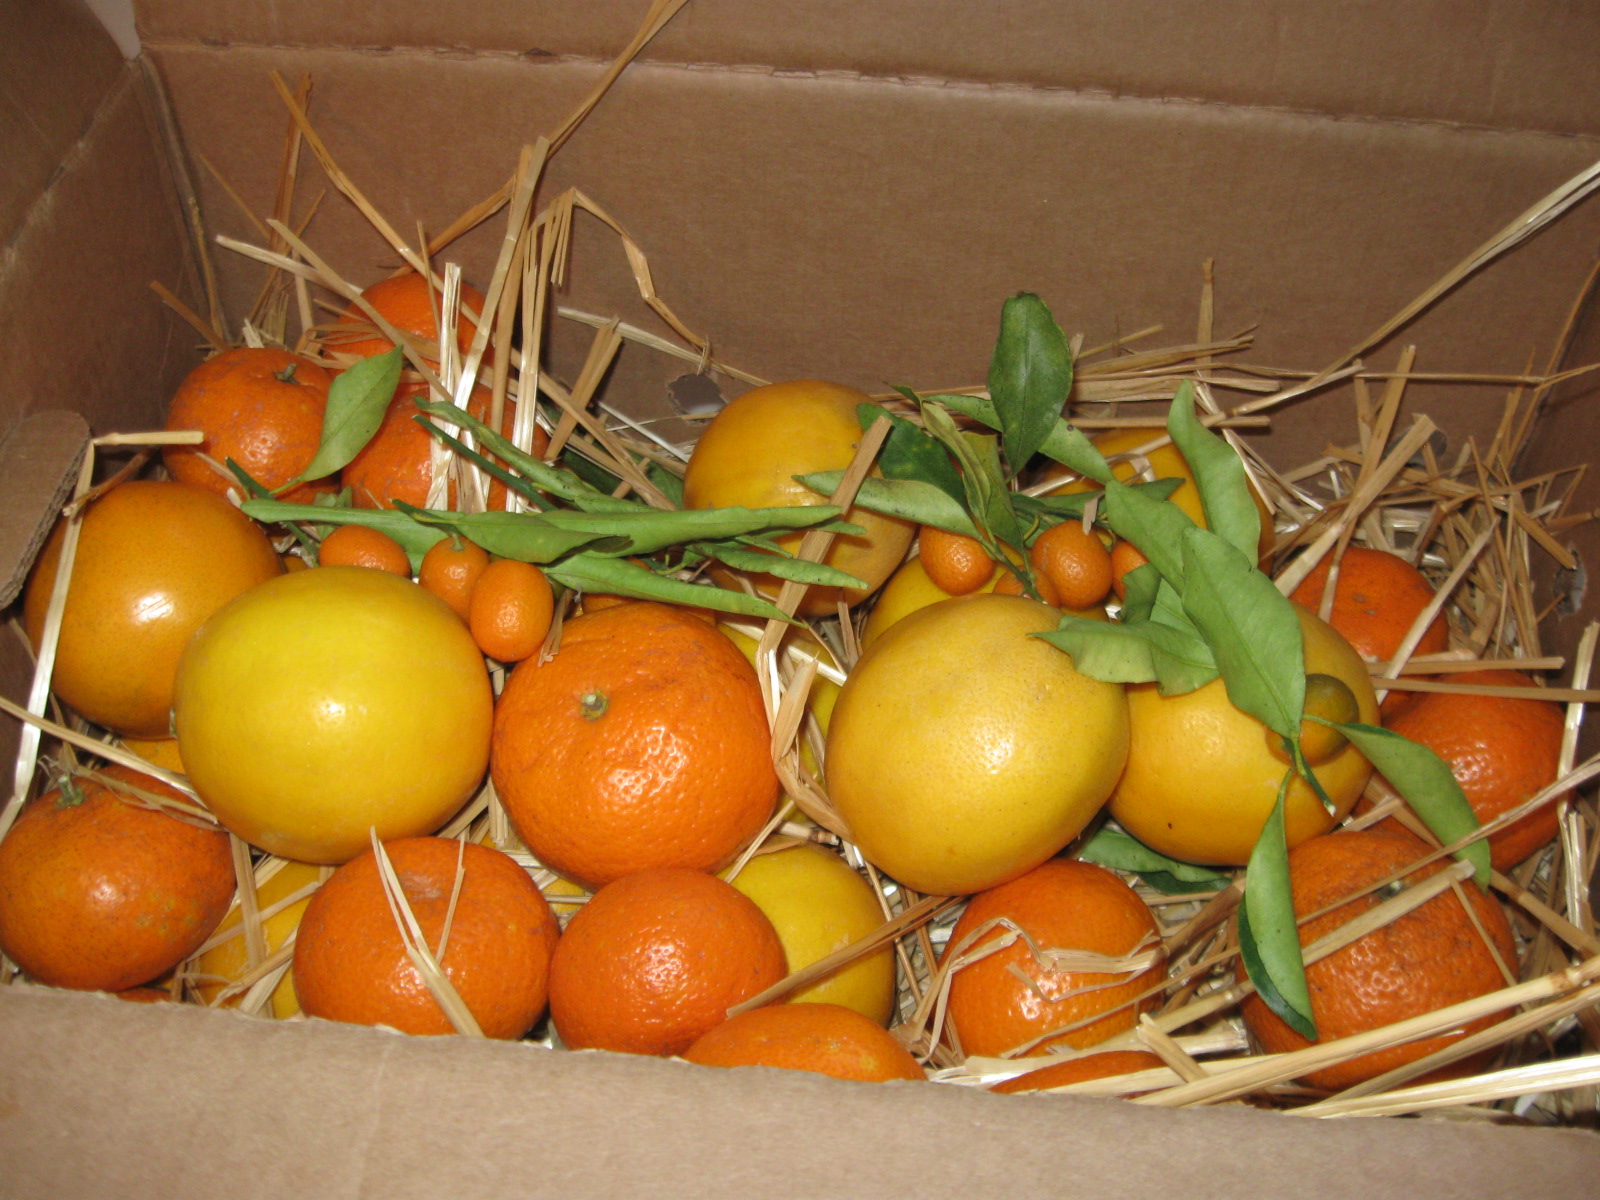
Satsumas, kumquats, Sweets and Lemons!We received the most wonderful package in the mail today…good friends from Louisiana sent us a care package with amazingly delicious citrus.
Satsumas are grown in the Placquemines Parish region of Louisiana and became a favorite of the whole family when we lived there. They don’t have the characteristics that make them good for storing well and shipping to other parts of the country, so many folks who never lived where satsumas grow have never tried them. Unless you live in Louisiana or Texas (possibly Alabama) you probably rarely see them in your local grocery store. Many of the locals have trees in their own yards and have enough for themselves and for sharing. For those that don’t, many local families sell them at local fruit stands, etc. Our favorite fruit stand was in Belle Chasse, Johnny Becnel’s (You can find them at: 8134 Highway 23, Belle Chasse, (504) 392-0534.)
Those huge yellow fruits in the photo that look like mini grapefruit are actually lemons! I couldn’t believe how gorgeous they were. I know we’ll have difficulty using them all while they are still fresh, so I have started freezing the juice in cubes for use later on. Just one of those beautiful lemons yielded me almost 2/3 cup of fresh lemon juice. Amazing.
Kumquats are another favorite of mine. I had never even tried them before we lived in Belle Chasse. Imagine my surprise when I was instructed to eat the entire fruit, skin and all (minus seeds, of course). Since the rest of my family has not discovered the wondrous joy of eating kumquats, I claim all the kumquats from the package for myself. The kumquat is another fruit that doesn’t travel well. I’ve bought them in stores far from the orchards and have often been very disappointed at how quickly they spoiled. Now that I realize this, I don’t wait around for that to happen… In the Belle Chasse region, there were two distinct type of kumquats that were sold. The almost-round variety… these were very, very sweet — and the more oblong type, which were sour. I do love the sweet type, but have never seen them in stores since leaving New Orleans.
Naval oranges and Louisiana Sweets are also wonderful treats from the area… since they are picked at full ripeness, they seem to taste much better than the oranges you get in stores.
OK… enough already on what a happy day this was. Donnie and Lettie really spoiled us!
Shortly after I began learning about dehydration I found a great deal on Potatoes – $1.99 for a 20 lb. bag. With this being such an excellent value, I decided this would be my next experiment. Little did I know that this would become the all-time family favorite dried food.
Potatoes must be blanched* before they are dried, so drying potatoes is not quite as carefree an operation as with tomatoes.
I’ve put together a little picture tutorial on the method…
Ready to go...
*Any vegetable that must be blanched before freezing must also be blanched before dehydration. This is a good rule of thumb. Any decent all-purpose cookbook with instructions on freezing food will give you a guide for this.
The blanching method:
After peeling (optional) and dicing or slicing, blanch the potatoes in boiling water until cooked sufficiently to heat up clear through. How long this takes will depend on the thickness of your slices or dices. I found that about 3-4 minutes was usually sufficient. After a batch or two, you can tell by looking at them whether they are done enough. It’s a bit of an art…
I soon discovered that, if improperly blanched, the potatoes were no good… the parts of the potatoes that were not blanched properly turned black when dried.
After blanching, cool immediately in an ice-water bath.
Arrange on dehydrator trays and dry at about 120 degrees Fahrenheit overnight. The potatoes should be completely dry all the way through for proper storage. Slices should snap when broken in two. Cubes should be dry completely to the center.
The potatoes reduce greatly in size during the drying process and store very well.
To save freezer space, you can also take dehydrate frozen hashbrowns. Since they have been prepared for freezing, you don’t need to blanch first. You can just dump a package of frozen hashbrowns right onto the dehydrator trays and dry them. These are another favorite…
After dehydration, potatoes can be easily used in soups, stews, pot pies and the like. However, our family’s favorite way is to fry them in butter to add as a side dish to a meal.
Rehydrate the potatoes by placing in a bowl, pouring boiling water to cover and let soak for 15 minutes or more.
Drain well, fry in butter until nicely browned… salt and pepper to taste and enjoy.
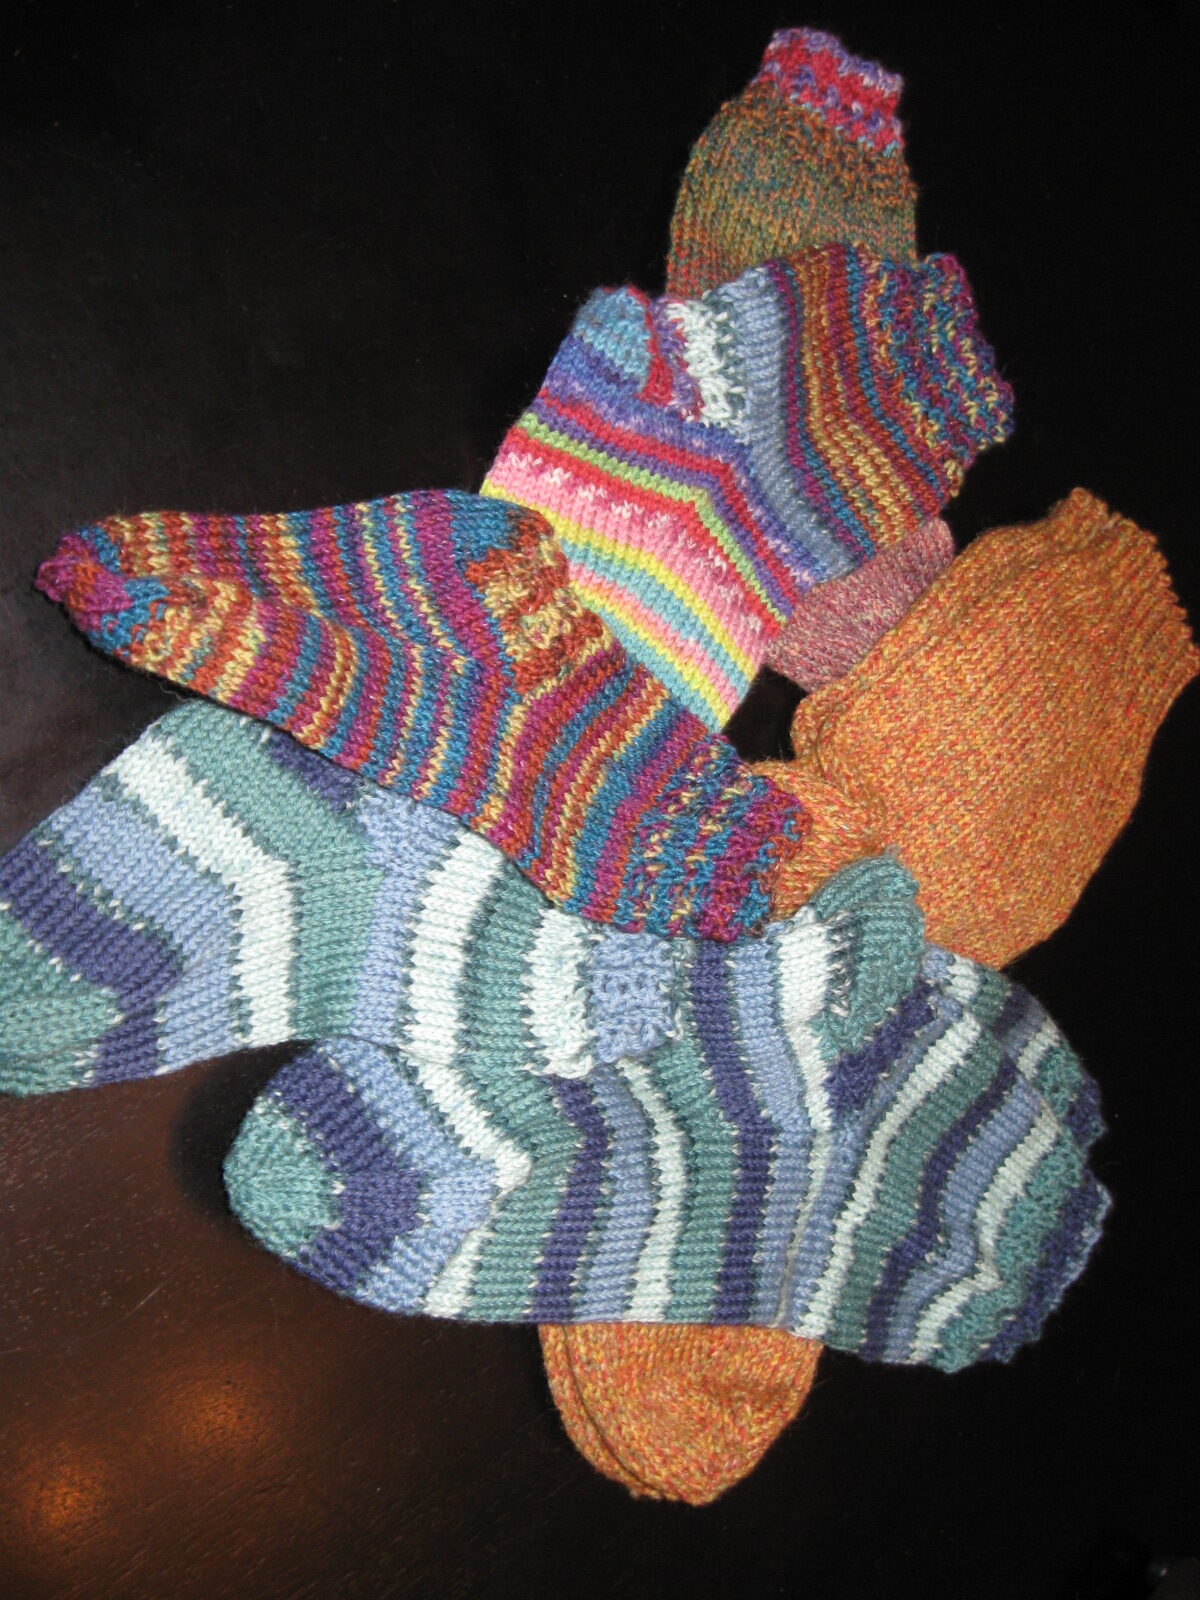
Wintertime is my time for knitting. Every year (or almost every, I should say) about the time it starts to get cooler I begin wondering where I stashed that bag of yarn I found on sale. The yarn slips through the fingers so nicely in the cooler months… plus there is that feeling of wanting to wear some nice, warm socks, gloves, scarves, hats… I’ve almost run out of sock yarn in the past few weeks… the picture is a pile of the socks I’ve made recently.
I’m currently working on a pair of gloves (not a beginning project, but really fun on double-pointed needles for the more experienced).
Gloves in progress...
I learned to knit from a neighbor lady, Mrs. Easton, who lived across the street from our home when I was about 7 years old. Having attempted to teach a 7-year old to knit, I can now fully appreciate the patience that dear lady must have had. For several weeks in a row, I’d go over to her house at a specified time and learn the basics of knitting.
She taught me how to rewind my skeins of yarn into nice, round balls of yarn with the starting thread sticking out from the middle. It is ever so much nicer to pull from the middle so that your yarn doesn’t roll across the room with every pull as you are knitting. I’ll admit that I tend to dig around in the skeins and find the “pull from the middle” thread without rewinding usually, but I know how to do it if need be!
Then, she taught me the basics of casting on using the “Knitting-on” method. Using a burgundy maroon wool yarn and size 8 needles, we began making a (very lovely – you can imagine how the first project made by a 7 year old looked) potholder.
I found a nice YouTube video demonstrating this method here:
It is an excellent method of casting on, leaving a nice finish on the edge, while remaining stretchy. This is the method I use most often even still, after all these years.
Next, Mrs. Easton taught me to knit using the “Knit” stitch. Another YouTube demonstration showing this method is here:
When each row is knitted using the Knit stitch only, you end up with a pattern called the Garter Stitch. This gives a sort of horizontal ribbed pattern to your knitting.
She also taught me how to knit using the Purl stitch. This stitch is the opposite of the knit stitch. Using this stitch on alternate rows creates what is called the stockinette stitch. Alternating knitting and purling within a row can create a vertical ribbing and is commonly seen at the edges of projects like sweaters, mittens, gloves, etc. I found an online video demonstrating this stitch as well (she also demonstrates how to bind off using a purl stitch method).
She also taught me the proper way to hold my thread to keep a steady tension. Now at that point I had no idea there were so many different ways to hold the yarn… Pinky wrap (that’s the method I use), continental, throwing… and many variations on each. This video gives a reasonable explanation of the method, although it is not the favorite of the person demonstrating… feel free to investigate other methods and find what suits you. I find my knitting to be of very even tension and matches the knitting gauge pretty closely using this method, so I’m not changing!
Finally, after many weeks of struggling with dropped stitches (she helped me fix the mistakes, but still there were a few “holes” where my errors were evident), gaining the coordination to knit row after row… I had an almost 8” square knitted potholder. The final thing was to learn to bind off. This video gives a very simple demonstration of that technique.
With these simple techniques, you have the basics of everything there is in knitting. Everything you find in patterns will be these skills or a variation of one or more of them. This was the full extent of my toolbox when I began. By buying knitting magazines, or some books with beginner patterns, you can start from here and learn to knit anything… color combinations, knitting on double-pointed needles, felting… the world of knitting is fascinating and useful.
A project from last year... hat and gloves
I buy yarn when I find it on sale, most often. I’m always thinking about projects for the next winter and looking whenever I’m in a fabric or craft store. I also love buying yarn online from www.KnitPicks.com . I think they often have yarn at a very good price and have a great selection of colors and types of yarn.
Over the years I have accumulated a pretty large collection of books that have many different methods and stitch patterns, as well as methodology for creating your own patterns using various types of yarns and needles. I once had the great good fortune to buy a lot at an auction of things gathered by another avid knitter of a previous generation. I have a huge collection of knitting needles in varying sizes from that great find.
Really, knitting is a wonderful skill to have on the homestead. I highly recommend you investigate it (or renew your interest in it).
Check out my friend Tiffany’s lovely knitting project here: Alpaca Mitts – really beautiful. Tiffany is much more adventurous on intarsia knitting and does some really complex patterns… I’m hoping for more of her projects to be posted over there.
There is also an entire community of knitters sharing ideas, projects, photos, etc. over at Ravelry.com. I don’t post much over there, but have been very amazed and impressed with some of the beautiful work submitted by members.
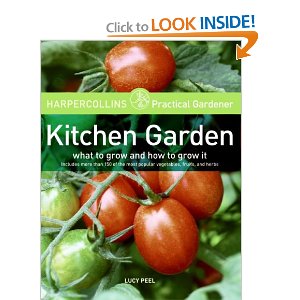
This little gardening book is one that I have found to be very helpful. One of the first books I purchased upon my decision to may a foray into the gardening world, I continue to return to it for ideas on crop rotation, tips on tree pruning, etc.
I particularly like the way the book is laid out, giving the reader a pleasant read through, as well as a well-organized reference. The book has three main sections, garden practice, comprehensive plant guide and lastly, problem solving.
Within the garden practice section, you’ll find various topics including assessing your site, crop rotation, growing under cover, and composting. In the detailed plant guide, there is much information that is very specific about particular seed varieties and details such as when to sow, transplanting and when to harvest for each type.
The book layout is very nice, with helpful tabs for the different sections. I love the colorful photos throughout and the color-coded boxes with helpful tips and care charts.
As I begin thinking about our first garden on the new homestead, this book has become another old friend that I am visiting again this winter.
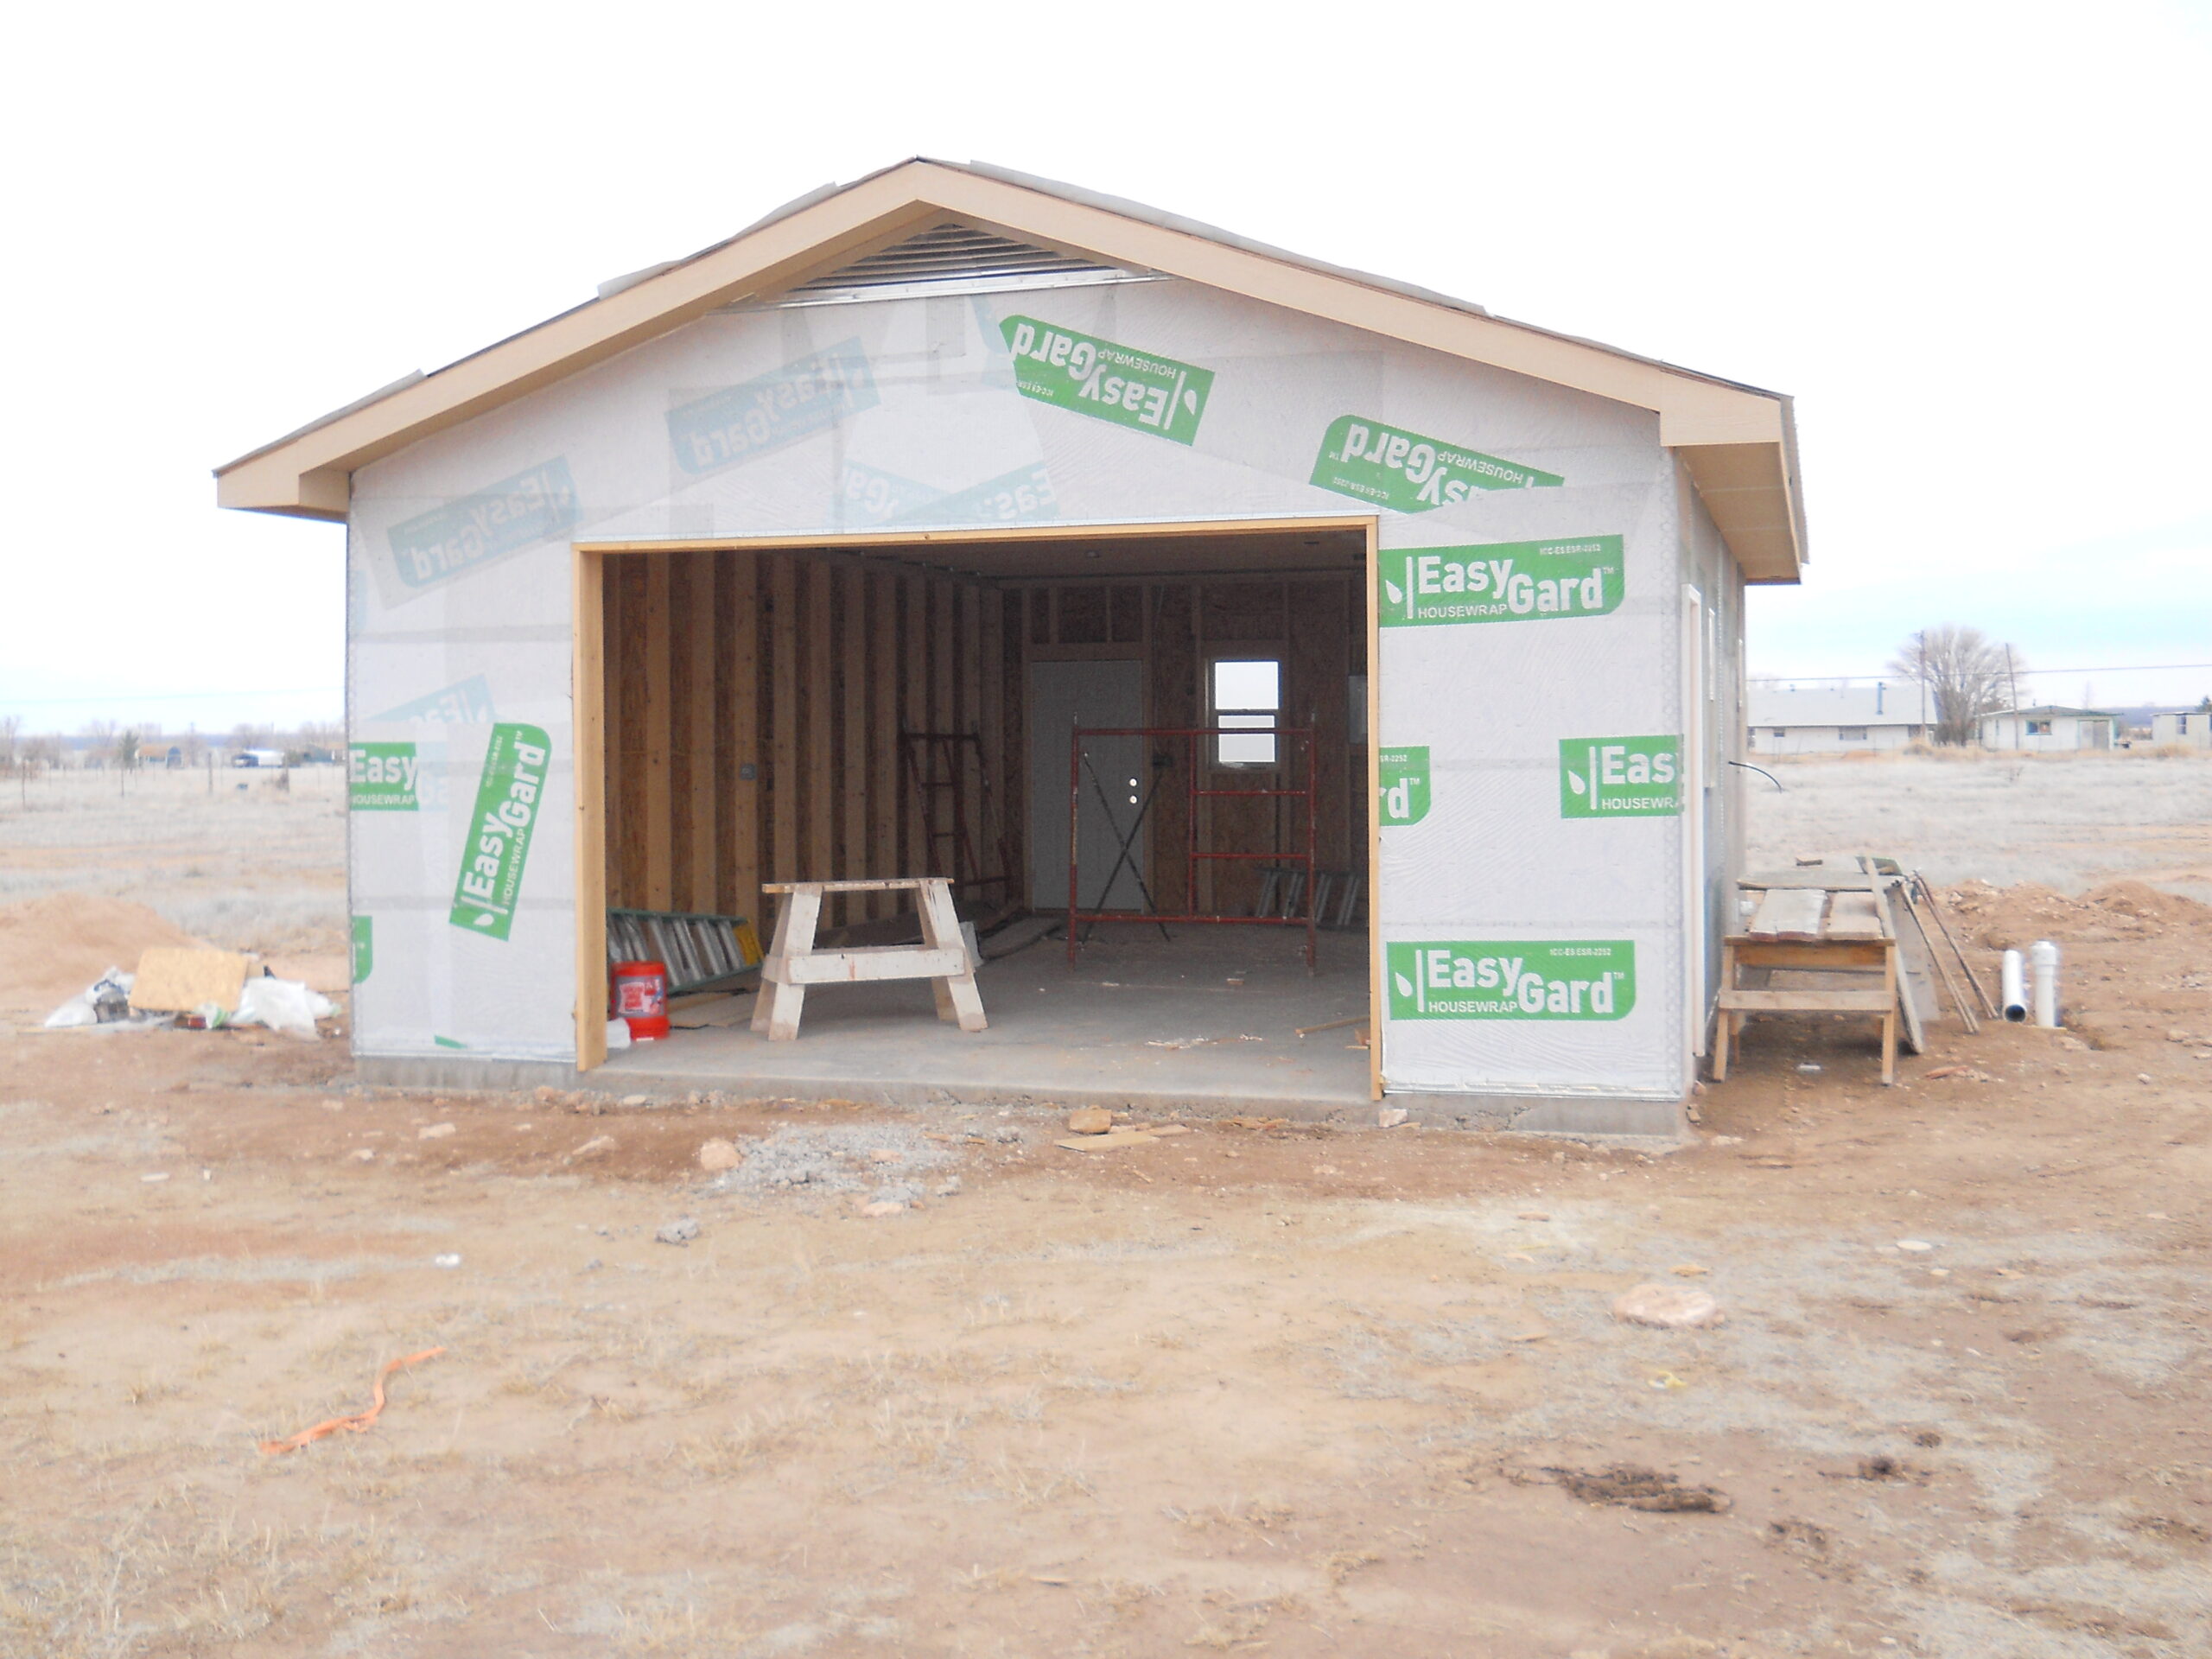
The workshop is taking shape...There’s no doubt a lot of money to be saved by doing some or all of your home construction yourself. There are some simple ways of deciding how to sort that out. In some cases the requirements are governed by law. You may encounter the need for specific equipment, and finally there may be levels of expertise or physical abilities that make it impractical for doing the work yourself.
Building a house is a series of linked projects. Assuming you already own your land the project begins with research , learning all there is about the land, the type of home, construction materials, building codes and permitting procedures. From there it progresses to the design phase. The design phase encompasses everything from the house plans, the plot plan, the interconnection of all utilities, design of landscaping and any supporting infrastructure needed to prepare your homestead. The design phase never really ends. Changes are made up to, and in some cases, well after you move in. The more effort you put into the research and the design phases, the less problems and cost overruns you will encounter due to changes and oversights. You also have the permitting process. This requires lots of time and effort to get your well permit, septic permit, building permit, electricity run to the site, and cable/phone hook up.
The projects continue with excavation/site preparation, foundation work/masonry, , rough-in plumbing , framing, roofing, rough-in electrical , more plumbing, installation of HVAC system, , insulation, drywall installation, exterior finishing, , painting, flooring, bathroom/kitchen installation, finish plumbing , finish electrical, miscellaneous items, punch-out list (completion of all minor items needing touch-up/attention) and a final inspection . Each of these phases (and this is not a complete list) impacts the other. Some can be done concurrently, where others must be completely done before moving to the next phase. If errors are made in one phase, they will compound themselves with each subsequent phase until corrected. That costs time and money. The projects that I’ve highlighted in Blue above are the ones I will definitely do myself. The ones in Red will be subcontacted out. The ones in Black are undecided. As you can see from the list above, we should be able to save a significant amount on labor and project management fees.
The Law
Each state is different. In some portions of the state of New Mexico, a person, who is not a licensed contractor, can act as their own Owner-Builder. We are building in a region where you can perform your own plumbing work. Any electrical work requires that you be a licensed electrician. I suppose you could study and sit through the test and get a license, but there are a lot of aspects relating to electricity that are, in my opinion, worth allowing a professional to handle. One could also make the same argument for allowing a licensed plumber to do the work, but in my case I am going to do that work myself. Legally, in the county where I have submitted my application for my building permit, I am allowed to do everything except electrical work.
Equipment
Some jobs require a minimum of equipment to perform. Installing rolled insulation is one of those. You need to cut the rolls, you need a staple gun to secure them, and you need a ladder, or in some cases a small section of scaffolding to comfortably and safely reach the high spots. You will also need eye protection, respiratory equipment, and a set of coveralls to minimize the intrusion of the fiber material into your drawers! Other phases of the construction require a significant outlay of equipment. Some of the equipment can be purchased and retained for later use on the homestead, whereas others can be rented. Depending on how experienced you are with the equipment, the rental costs could exceed the cost of the tool itself if you keep it rented for 2 weeks! I am comfortable renting trenchers and small tractors, but anything else I plan on buying unless I do not see any utility in having that tool on the homestead. We plan to install a metal roof. Some of the bending and long cutting tools can be expensive; unless you plan on doing sheet metal work on the homestead they are not practical to buy. I’m not sure where you would rent those tools either. Based on tools, I do not plan on doing any of the metal roofing work myself. I will also leave the concrete pouring and finishing to a subcontractor. For most of the rest of the jobs, I have set aside an equipment budget to purchase or rent the hand and power tools needed. Then, after the homestead is built, I will have a suitable variety of practical tools for other projects. It’s also a nice excuse to buy more tools!
Sweat of your Brow and Know How
I’ve never built a house before. I’ve acted as a subcontractor on a home, closely supervised the construction of another, and lived in several other homes ranging from new construction to one built in 1893. We’ve moved 18 times over our 30 year marriage. My level of expertise is wide, but not deep. I have a lot to learn, and I have to gain a lot of experience to get it right so that I save money and build a safe house. Three things will help me here; research, reading and good friends who know what they are doing. The friend is not to ask to do the work, but to ask for advice and guidance. In our case we have such a friend and we are making it a business proposition as mentioned in an earlier thread. The combination of his advice, my back-work should result in victory. There are some things that I feel uncomfortable with. Roofing comes to mind. I know absolutely squat about metal roofing, and as mentioned before I do not have the tools to do a proper job. I’m planning to leave that up to a subcontractor. Stucco is another one of those areas that I consider an art. I could probably learn how to do it over time, but there is a reason why underlings apprentice for awhile before being turned loose. We’ll sub that out also. Things like painting, trim work, installing insulation, installing cabinets, sheet rock installation, tile work, I feel comfortable that with a little guidance and some basic tools, I can do those things myself. Framing is an area that I have not made up my mind on. I think I could frame a custom house, but I think it would take me 5 times as long and in the process I might waste the savings of not using a sub on mistakes and re-work. The home I’ve designed has a rather complex roof line, that if not done properly can be costly. Not to mention, a 10:12 pitch roof is tall and that is not something I can do myself. A final thought on framing is I can probably get the house framed and the roof dried in within 2 weeks before the heat of the NM summer kicks in if I subcontract that portion out. After that, nearly everything else will be done in the shade with a breeze blowing through the open walls.
I suppose time becomes the final aspect of deciding what to do yourself. In our case, I am retiring, so my “retirement job” will be building the house. Rather than paying a general contractor to do all of the coordination and scheduling, I will do that myself. If time is a factor and you do not have everyday free to work on the house, it will either take you much longer to finish an owner-builder home, or you will have to subcontract nearly everything out. As far as the time value of money; many of the Owner-Builder books discuss the saving as being in the 10-15% area for this alone. For a $200,000 house, that is as much as $30,000! When you add up the costs of all of the other labor, the amount subcontactors add on to projects for ordering and delivering the materials it could add another significant amount to the savings. The more you do yourself, the more you save. I estimate that the house will be built for a cost that is approximately 60-70% of a turn-key purchase. For a $200k house, that’s a savings of $60-80k.