Vegetable Dehydration – Tomatoes

Dried Tomatoes
Almost all vegetables work really well for dehydration. When I first began learning the tricks of dehydrating, my first tomatoes were producing faster than we could eat them up. Since they don’t require any special preparation (no blanching), they are one of the easiest veges to dry for storage.

Simply slicing them about 1/4″ thick and arranging them on the dehydrator trays, then letting them dry overnight produced wonderful, bright-red, delicious slices of summer. When you eat a dried tomato, you’ll be surprised at the very distinct flavor. Since tomatoes are used in so many things we make in the kitchen, including chili, many soups, italian foods, etc., dried tomatoes offer lots of possibilities as a dried food. Many people take the dried tomato slices and grind them into tomato powder. The powder can then be used to reconstitute for use as a sauce or paste. The powder also takes less space for storage.

I also tried making the tomatoes into a puree and then drying them like a fruit roll-up. This worked well, but I found it was more difficult to get them really dry, so they had a shorter shelf life. It did work nicely when I wanted to make chili and wanted to get the tomato sauce flavor. I just dropped in a tomato rollup and added a bit more liquid to the recipe.

If you, as I did, have an abundance of the cherry tomatoes that you want to dry, simply slice them in half or thirds and place skin-side down on the trays and dry as you would regular-sized tomato slices. You can even use them for your own sun-dried tomatoes by covering the dried tomatoes with olive oil and storing in the refrigerator until use.

After drying tomatoes to a very dry degree, as recommended when long-term storage is the plan, I store some in mason jars and some in mylar bags. For those stored in mylar, I also include oxygen absorbers before sealing the bags to help them to store longer. I have sometimes used oxygen absorbers in the mason jar storage, but not always. I do, however use a vacuum sealer to pull as much air out of the jars as possible before storing in my cupboard. This method has worked very well for me. After nearly three years of storage in mason jars, the tomatoes I’m still enjoying in my cooking from my first summer garden’s bumper crop still look bright red and beautiful and have a wonderful flavor.

I realize that canned tomatoes and tomato sauce are generally pretty inexpensive in the grocery stores, so many people would, perhaps, wonder if it is really worth the trouble to store them from your garden… I would say it is very satisfying to eat food you grew yourself, knowing that no pesticides were used and remembering the pleasure from picking them from your own vines. I don’t really think you can put a price on that.

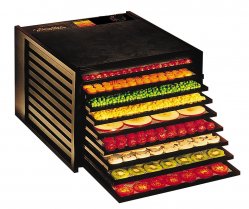
As I have mentioned before, I love my Excalibur (9-tray) dehydrator, but I also use my Foodsaver vacuum sealer constantly. The Foodsaver has a very convenient hose attachment that allows you to seal standard and wide-mouth mason jars to increase storage life. I made a YouTube video demonstration of this some time ago (please realize that my oldest boy did the camera work and there was a bit of extra camera movement that some have not appreciated!).

Plan ahead this winter as you pore over seed catalogs, planning for your summer garden. Leave plenty of room for tomatoes!
You might be interested in this earlier post about dehydration: Dehydrating From Your Garden


Restoring a WWII Clark Airborne Tractor aka Dozer

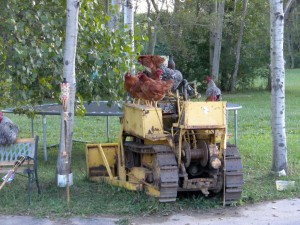
Used as a chicken roost by the former owner...

Why the heck would I want to do that? I have been doing research for a book I am writing on the 139th Airborne Engineer Battalion. They were the combat engineer element of the 17th Airborne Division who fought just west of Bastogne during the Battle of the Bulge, and they rode in gliders during Operation VARSITY as the 17th Airborne Division invaded Germany on 24 March 1945.

As I pored through the archival material at the National Archives I came upon an entry that said simply: “AIRBORNE CLARK TRACTOR damaged by mine. Operator injured.” It was 4 February 1945. For some strange reason I had to have one of these things. It’s not logical or practical, it just is. Since I am an avid collector of all things associated with the 139th it seemed logical to me!

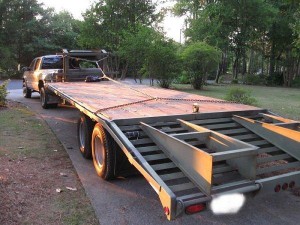
Gooseneck trailer with winch

A two month search uncovered a suitable project just south of Buffalo NY. I scheduled a pickup date, and I and one of my sons drove with a friend from work who wanted to visit his father in Buffalo. We arrived after a 928 mile trip. It took us exactly an hour to inspect, and winch the dozer onto the 20’ gooseneck trailer behind the Chevy Dually. I was impressed with the efficiency of our loading/safety team. The Dozer is not running, but free-wheeled nicely and the winch and pulley system tugged it right onto the trailer. I secured it with 4 heavy duty class 80 chains and 4 ratchet binders and off we went.

Since I am still three months (93 days, 4 hours and 27 minutes) away form the move to our homestead, I cannot disassemble the big parts. I still have to move it on and off of the trailer to get it to NM. I am able to work on small things such as distributor, generator, carburetor and a few other components. The time I have now has been used diligently to do research, find missing parts, connect with others who are doing the same (and there are dozens of other folks rebuilding Clark Airborne Dozers!!) and to learn more about the project. I filled the fluids, checked the basics and charged the battery. I have found that a recharged battery will turn the engine over, but there was not spark or fuel. I checked the compression and had between 90-99 psi across all 4 cylinders. The TM (Technical manual) calls for 85 psi minimum with no more than a 10psi difference between cylinders. I think I have a solid engine which needs some TLC.

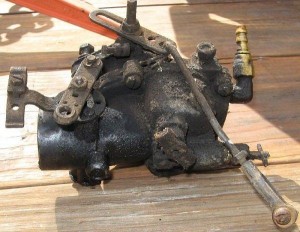
Dirty Caburetor
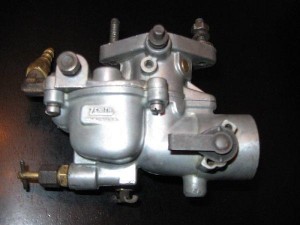
Clean Carburetor

So far I have rebuilt the distributor, found and had a generator rebuilt, worked on the carburetor, and am tending to minor details. It’s a fantastic project and when we get the home built, the boys and I will have a blast resorting this thing to fighting condition.

The value of what we are learning is immense. I see and appreciate the practicality of a non-electronic ignition system and an engine that you can reach all the components for and do not need ANY special tools to do all of the basic work, and much of the advanced repair. Hand tools, a manual, a source of spare parts and some confidence will allow me and the boys to tackle the

Used as a chicken roost by the former owner...

project. I know there will be some pitfalls and parts disappointments, but each of those will be challenges that will mold the young men into future problem solvers. You can follow the progress at the following sites:

A forum thread on the restoration progress here, and for information on parts, another thread devoted to that topic here.

Things to Do on the Homestead

Things to do on the homestead when I retire

Aside from the normal day-to-day life maintenance things we all have to do, and the extra tasks of managing the homestead; garden, animals, trees, water collection, firewood procurement, we plan on leading a life rich with adventurous projects and time-consuming activities. Among them are the practical applications such as welding and blacksmithing, and vehicle maintenance. But there are others, such as learning how to make a timber frame home, fully restoring a WWII Clark Airborne Bulldozer, learning glass blowing, brick making, sculpting and a host of other things.

Practical

There are certain skills that are a necessity on the homestead. The ability to fashion basic implements, and the ability to repair them are very important skills to acquire. An ample supply of stock metal, a small forge, the implements to use them, and some basic welding equipment seem like necessities. Granted, I know next to nothing about any of that sort of thing, as far as any practical experience is concerned. In fact, my son, who has taken a basic blacksmithing class for a Boy Scout Merit Badge will be the journeyman and I the apprentice. I have never held a welding torch and have only engaged in conversations about it. Despite these shortcomings, I am confident of two things; I will find someone near our homestead that will help me to learn, and I will one day be able to fashion and repair metal objects that are of use on the homestead. In time, rather than just bending and fixing a broken piece of metal, my hope is that my boys and I will turn out hand-hammered hardware for handmade wooden doors. The wood will be custom fit and hand engraved to mold into the theme of the home, and the hinges, and hardware will be made to match the theme as well.

Our hope is that the wood we use will be harvested from the forest, hauled to our homestead and rough cut for drying and later use. The notion of finding a slightly used portable sawmill is intriguing and practical. The addition of a few basic wood working tools will provide us the ability to build nearly every wooden object that we need. In time, the skills we acquire from working on small projects will provide us the basis for building timber frame cabins and barns. There are numerous courses where skilled artisans teach laymen the basics of fashioning the components of a timber frame home. We plan on taking one of the 5-day courses and then applying our newfound skills on our homestead.

Enjoyable

My boys and I recently purchased a WWII Clark Airborne Dozer. It was originally built by the Clark Tractor Company of Buchanan, Michigan for use by the Army Airborne Engineers. It was designed to be small and lightweight so that they could fit it into a CG-4A glider and tow it over a landing zone and deliver it right into the combat zone. Since I am writing a book on the 139th Airborne Engineer Battalion, who used such dozers, it seemed like a logical step to get one. Besides, as I told my wife, “It will be very practical on the homestead for moving around the mounds of chicken and cow manure that the homestead will be producing!” You can follow my progress on the restoration and quest for replacement parts at the following threads: http://www.g503.com/forums/viewtopic.php?f=24&t=194152 and http://www.g503.com/forums/viewtopic.php?f=24&t=193653. My posts are under the forum name 17thairborne.
Other hobbies such as glass blowing, sculpting, carving, brick making, beer making, wine making, ammunition reloading are primarily geared toward enjoyment, but also have a practical side. Each of the hobbies could conceivably provide a business in itself for any of the family members, particularly the boys. Besides, what could be finer than sampling your homemade beer and shooting at the vultures overhead with ammo you personally reloaded (just kidding). These are but a few of the things that we desire to pursue on the homestead.

Why

I am tired of sitting in an office, behind a computer, going to endless meetings about nothing whose purpose is to validate a self-sustaining bureaucratic machine that thrives off itself and produces more volumes of administrative requirements to sustain itself in an endlessly growing cycle of waste. I am not against efficiency or the need for administrative processes; I’m just not well suited to negotiate within them, especially when the growth of the paperless office requires reams of paper to prove how efficient it is. When I was on the flightline or in a jet on the range or over some endless mass of sand and rock, I was at more at peace. I like to do things, to make things, to build and to fix. Heating and hammering metal into an object…that has got to be satisfying. Not to mention, a good work out. Taking a 16 foot, 32” diameter tree and turning it into a true, well fitting and perfectly mortised and tenoned component of a house frame has got to feel good.

Precious Water

Colorado Trout Stream
A homestead without water is not worth much. Without your own source of water you are reliant on someone else, your savings/income or yet another government entity to provide you life’s most precious commodity. Checked the price of bottled water lately? A trip into the gas station food mart reveals that water costs 3-5 times more than gas. Granted you can find it cheaper in the food store by the case, but why do we pay such outlandish prices for bottled water? Do we not pay taxes to have clean and healthy water piped into our homes? What are you going to do if the water is contaminated, a pipe breaks, and water taxes go up? If you are totally reliant on the city water supply, you are not in control of the most precious commodity.

In other nations there are wars over water. The continent of Africa and elsewhere is seeing an increasing demand on potable water and water for irrigation. I will not leave my family at the mercies of a government system, municipal worker, or on 75 year old pipes. Do your own research and check it out for yourself. Simply type in Global Water Wars or words to that effect and read the data/news/speculation/hype/scaremongering or however you want to categorize it. As the world’s population grows so too does its demand on water. If you think it does not affect you here in the US you might want to do further research. The demand on the breadbasket of the world (the US) is growing. Our use of water nation wide for irrigation, landscaping and entertainment is growing. Many states have already imposed limitations that impact families and businesses. Check out the news on California, or how about Arizona’s need to secure water for Phoenix and Tucson, how about sink holes in the Southwest, what about the NM/TX water dispute over the flow of the Rio Grande into TX? All of these factors and many others put increased pressure on government agencies to create more restrictions and raise taxes on use of water.

NM Capped Well

I have taken matters into my own hands by finding land where drilling a well is permissible. In most cases you cannot do that in the city, and many residential areas of the suburbs do not permit it either. There are cities and other municipalities that ration water usage by law. Each city, county and state has different laws and restrictions. Start by doing some research into where you want to build your homestead. Get the facts; find out which regions are hurting for water, which ones suffer from contaminants and which ones are pushing for more restrictions and taxation. Here is a good start: http://pubs.usgs.gov/circ/2005/1279/pdf/circ1279.pdf

We have land in New Mexico. We are in a rural area and we are permitted to drill a domestic well. Our well was drilled to a depth of 320’ to secure a consistent supply of fresh water from the aquifer. In NM you can service one acre from a domestic well. That should be enough to grow enough crops and tend a few animals, and if you are inclines, have some productive landscaping. From the enclosed photo, where the stand pipe from the capped off well can be seen, it may not look like a great place to start a homestead, but basic concepts such as hugelkultur, constructions of swales to capture rain water and use of a cistern to collect runoff will turn this into a lush environment within a few years. You can also purchase additional water rights. The cost can be a little as $1,500 per acre up to several thousand depending on quality of water right and source.

We also purchased some land in Colorado. The land has a small year-round stream and we are waiting for our well to be drilled. With any luck it will be complete before the end of January, weather permitting.. We were told it should be between 100’ and 180’ to get consistent, good water. CO requires that you have at least 35 acres before you can drill a well for domestic use. That explains why most parcels of land are at least 35 acres. That is one of Colorado’s measures to restrict water use and keep the aquifers replenished. Each state and regions uses different measures. NM had at one time threatened to put a water meter on every private well. That measure has not passed, but depending on future usage and shortages that could change also.

Wherever you decide to homestead, I urge you to secure a suitable supply of water; one that is controlled by you, with only the minimum of restrictions imposed by others.

Dehydrating from your Garden

A small sampling of my dehydrated goodies...

Since we left Ft. Worth, I’ve not had a garden. It has been something I’ve missed a great deal. However, almost 15 months since our departure, I’m still enjoying the fruits from that garden because of dehydration. I initially got interested in dehydration from a website called Dehydrate2Store.com. Tammy Gangloff, the owner of the site, has wonderful videos showing tips and techniques for getting started with dehydrating, her preferred equipment and supplies and ways to use the dehydrated foods.

Thank you, Ronco!

Like many folks who fell prey to late-night TV advertising (in my case, while on business trips back in the 1990’s), I had purchased a Ronco dehydrator many years before. I used it successfully to make beef jerky, dried apples and fruit leather. But, as with many things, my interest faded and I got rid of that old dehydrator during one of the purges I make when we prepare to make another move to a new place. So, dehydrating wasn’t a completely new concept to me.

Extreme Drying

However, Tammy’s tips gave it an entirely different focus. Instead of dehydrating foods to the stage that leaves them dry, but not crisp (as with many of the commercially available dried fruits), she advocates drying the foods to about 95% dry– very, very dry. Once the moisture is removed to that level, the foods will store for a very long time and allow you to enjoy the fruits of your garden for very long periods to come. By combining the idea of drying the foods more with the tips on storing them so that they are not exposed to oxygen through the use of mason jars and mylar bags with oxygen absorbers, the storage life of the foods are greatly extended. In fact, for many foods, that life can be up to 30 years with proper storage.

Maintaining Nutritional Value

Another attractive feature with dehydrating foods is how much nutrition is preserved through this method of food preservation. Since dehydrating of fruits and vegetables is done at a relatively low temperature (usually at about 120 degrees Fahrenheit), less loss of food quality is experienced when compared with canning or freezing foods.

One aspect of dehydration that is especially helpful is the fact that storage of dehydrated foods is very simple and requires no refrigeration or freezer space. These dried foods can be stored is a relatively small space at room temperature, for much longer than I really anticipate storing them (I really plan to use mine up before the 30 year mark!).

Sidenote: I became a bit less than thrilled with freezing things in the aftermath of Hurricane Katrina, when I lost my entire freezer full of raspberry and strawberry freezer jam! That was the point that I returned to the more traditional canning methods so that I wasn’t dependent on a steady power supply to keep my preserved foods.

The Cadillac of Food Dehydrators

After watching Tammy’s video demonstration of efficient dehydration, I decided I needed a very good dehydrator for our home. She recommended the Excalibur dehydrator, which I ordered directly from the manufacturer. As it happened, I bought a refurbished unit that had been used for trade shows or demonstrations and got a significant discount.

Excalibur Dehydrator

The 9-tray model I purchased does not have a timer, which people have asked about occasionally. I have never missed not having a timer, I must admit. Dehydrating is not an exact science — the food won’t overdry if you leave it an extra 15 minutes (or an hour — haha). The main features you want to be sure to have on any dehydrator is a thermostat and a fan that blows the air across the trays from the back of the unit. I like the Excalibur because of its high capacity and trust all the customer reports of its long life and durability.

Foods that Dehydrate Well

Among the foods that we have particularly liked to dehydrate are the following: Carrots, Celery, Onions, Peppers, Herbs, Tomatoes, Bread (for croutons and bread crumbs), Apples, Pears, Peaches, Zucchini, Cucumbers, Potatoes, Blueberries, Pineapple, Mushrooms and Garlic.

For a way to preserve more of the bounty from your garden, check out the possibilities with dehydrating… you won’t regret it.

Advent is Drawing to a Close…

Preparations for Christmas are almost complete in our household… As the boys get older, they do more and more of the decorating and gift-wrapping than ever. This year, our oldest boy put up and decorated the tree single-handedly. Both boys have taken turns wrapping presents… for each other and for us. I can understand now why my Mother always enlisted one or more of us kids to do the gift-wrapping at Christmastime…

There is a very respectable pile of presents under the tree now (including a carburetor for the bulldozer and a lot of airsoft equipment)  and two very happy boys getting more and more excited as the weekend draws near. They’ve had one day off from school this week so far, but are still getting some schoolwork done. Since we homeschool, we were able to have a good chunk of time off from school during our trip to New Mexico in October… now it’s time to pay the piper and have a few school days when the other kids are out.

This year we’ll be spending our Christmas at home here in Georgia, with just our little family. Being music director for the parish here, I will be at all Christmas services directing the choir. I look forward to it very much. By this time next year, we’ll (hopefully) be preparing for Christmas in our newly built home in New Mexico!

Today and tomorrow will be mad baking days… cookies, bars, and candies will be freshly baked for sharing with neighbors and friends. On Christmas Eve, I’ll make up a batch of cinnamon rolls for Christmas morning. That is always a favorite.

I hope you all are enjoying wonderful winter weather, a good hot cup of something yummy to drink, and anticipating family time as we are.

Finding the Right Piece of Land

Demographics
We spent a lot of time trying to figure out where we were going to homestead. There were several practical, personal and emotional considerations. Of course, financial capacity will drive the eventual choice, but the full spectrum of $/acre within a given region can be rather wide. Each of these factors had its influence on where we decided to purchase and finally build. Having moved 18 times during 30 years of service with the military we had the opportunity to live in and travel through many countries, states and regions. Each location in which we spent time had its appeals and detractors. In some places we enjoyed the weather and terrain, in others we enjoyed what the local area had to offer in terms of activities and freedoms. Regardless of where we were, we always asked the same question, “How would we like to retire here?” Many of the considerations which went into our decision seem like common sense, but the emotional aspects of our lives can overshadow our good sense. You may want to begin by using your emotional and personal considerations first, and then apply the practical considerations to your shortened list of places you would consider building a homestead. For purposes of this article I will begin with the practical first.

From the practical standpoint there were numerous considerations that we evaluated. Simple on-line research was available to answer questions about things like local, county, state and property taxes. Tedious analysis of things such as census information, crime statistics, education levels, drug seizures and arrests, population factors, per capita income, vandalism, health risks and EPA information were all valuable in helping us to form an impression of the area. It seems that evaluations by county were the most reasonable way to get a feel for a certain area. Since we weren’t interested in living in a subdivision with restrictive covenants, we were not as worried about the situation in the nearby population centers, although that data provided some clues as to the conditions in the surrounding open areas. We are not opposed to closed-in residential areas with covenants; we are just opposed to further restriction on our lives. Part of sampling the ‘flavor’ of the research is determining how many government, local and civic groups would be telling us what we could and could not do. Granted, a failure to restrict standards in a certain area can impact property value, but freedom is, in our opinion, more important than property value. When establishing a homestead we were in for the long-haul, not for the short-term capital gain. If you evaluate the factors mentioned above, and spend some time getting to know the area it is conceivable that you can find an area with limited restrictions where the neighbors aren’t going to build a human waste disposal and redistribution plant!

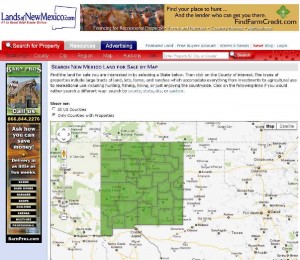
Begin with with a state or a few states that you like, pick the type of terrain in the state(s) that you favor (mountainous, near a lake or river, open rolling terrain…whatever), determine how far from a city/town you want to live and then begin digging through all of the data that is available on the area. Eventually you will rule some areas in and exclude others. When you are reasonably sure you have selected a few regions that you think you would be happy living in begin checking property availability and price. There are dozens of land sale sites that will yield tons of information. I like: www.landsofnewmexico.com You can substitute any state in place of New Mexico (i.e. www.landsoftennessee.com) and search for land, farms and ranches in the state of your choice. You can drill down to the county level based on your research. There is also a nifty map search feature.

Personal and Emotional Considerations

Once you have narrowed down your search into several regions or counties you can then apply your personal and or emotional considerations. You may have a particular social or political affiliation to which you are drawn. It’s obvious that in America some of these types of issues can be demographically influenced. Each region, state and in some cases counties, can be polarized for or against issues or values that are near and dear to you. If you are absolutely opposed to 250 pound wolves having 100% protection from hunters because you want to raise sheep in the northwest, then there are probably some places you would choose and avoid. Again…do the research and pick an area that you would feel comfortable with and one which supports your lifestyle. We ended up finding about 3 counties in 2 states that had an appeal to us. We used a small traveling vacation as a method for seeing the terrain, getting a feel for the region and beginning to answer the question, “How would we like to retire here?”

For us, being near to family was an overriding consideration. We feel the proximity to our parents was a necessity for our young children, our family values and for us. We wanted to live near our parents to spend as much time as possible with them. We’ve simply been on the road too long. Although we were drawn by the research to the state of Tennessee due to weather, terrain, limited taxation, and certain freedoms afforded, it was simply too far from where our immediate family lives.

As a compromise we purchased land near both parents, and saved a bit more to buy another plot of land in a region which offers us nearly all of the things that meet our other needs in Tennessee. It is only 5 hours from where we will build the homestead and offers us the opportunity to get to the mountains, do some fishing and enjoy a different climate. Keep in mind that depending on where you purchase, land prices can be in the realm of less than $1,000 per acre. One does not need 100 acres to begin, nor does one “need” to buy in the “select” areas either. In my opinion “select” denotes a region where the inhabitants focus on a lavish lifestyle and/or property values, and that invites restrictions, lawyers, prying eyes and a reduction in privacy. Having been told that my 2007 Chevy C3500 HD dually was barely fit to park in the subdivision because it looks like a “contractor’s vehicle”, I am sensitive to the protection of my “freedom”.

These were simply our considerations. What you chose to focus on is your business. When you spend the time evaluating what you desire and applying it to the regions that you think you would like, then you will begin to zero in on the ideal homestead for you. Good luck…it’s a fun adventure!

Discount Kitchen Cabinets

During the design phase of the houseplans, the kitchen is always my domain. I pull out my grid paper, mechanical pencils, and, using standard cabinet sizes, draw out my plan. This takes many iterations and, even now, is subject to change.

I’m very flexible about particular cabinet sizes, depending on what I can buy for a very good price. As many people will do when beginning a project like this, I took my initial kitchen dimensions and started with booklets picked up for free from Home Depot. I think people have the idea that buying cabinets from Home Depot will be less expensive than buying them from a custom cabinet installer. I have to say that I am very skeptical that this is a good assumption, after my research. Looking at the cost of cabinets available from the “Ready to Assemble” (RTA) places indicates that there is a generous profit margin between materials cost and delivered, assembled cabinet prices.

Once I had my initial plan put together, I then called the Home Depot cabinet help line and got an actual quote for the cost of the cabinets. In my discussions with the very helpful lady on their cabinet design helpline, I learned that Kraftmaid (which I assumed was a less expensive line) was one of the most expensive… right up there with their Thomasville line. To my surprise, she informed me that the Martha Stewart line was one of the more affordable lines. I also learned that the Hampton Bay cabinets that are offered on their site, are not part of their design services (if you order those, you are on your own!).

Oh, my gosh! They were so very expensive compared to what I thought was a reasonable price. After choosing one of the least expensive designs on the Martha Stewart line, I submitted my plans by email to the lady at the helpline. It took nearly 2 weeks to get a quote back. The quotation (for kitchen cabinets alone — not any bath or laundry cabinetry) was $16,242, not including sales tax or shipping.

I quickly became very motivated to seek out other sources. I discovered something called RTA cabinets (ready-to-assemble). There are many websites that offer discounted cabinets in this form. The main difference it that, as the name implies, you have to assemble the cabinets from the components after they are delivered to you. You can still choose the type of materials, hinges, panels, drawer style, etc. that you would expect from any other cabinet source. Other than the fact that you had to do your own assembly, however, I cannot see much difference between this and the cabinets sold by Home Depot. For the additional work involved in assembling the cabinets yourself, you can save a really huge amount. Not only will many of the sites offer you free shipping for larger orders, but you pay no sales tax because it was purchased out of state.

Taking it one step further, if you are willing to choose cabinets from the selection of cabinets that are on clearance, you can save even more.

One of my favorite sites (so far) is cabinetgiant.com. For example, at their site, if you choose a “closeout” cabinet design, you’ll save over 50% off most of the cabinets compared to their regular price (which is already much less than Home Depot’s comparable assembled products). Choosing a style called Brindleton Maple, which is not on closeout, using my kitchen plan with upper and lower cabinets, crown molding, and all the finishing materials, my estimated total came to only $6,910.

courtesy of CabinetGiant.com

Using closeout cabinets in their Antique White style for Bathrooms and Laundry Room cabinets, the total came to only $2,112. Now, granted, I had to modify my design slightly when certain sizes were not available in the closeout pattern. But for less than half the price at Home Depot, I’d say the extra time is well worth it.

We are not yet to the point where I can push the button and order these cabinets, and the current closeout stock will most likely be depleted by the time we are ready for cabinet ordering. However, this exercise in estimating the expected cost and exploring the possibilities will serve us well when the time comes.

So, although I realize this isn’t for everyone… if you are pretty handy with assembling things using simple tools, and if you are building a homestead, or even just planning to remodel a kitchen or bath, consider ordering ready-to-assemble cabinets and save yourself some big bucks.

Postscript: After Patty’s suggestion, I got started learning SketchUp. I still have a long way to go, but here is a first draft at a new kitchen plan (plan view):

Ah... much better.

Google’s SketchUp is very nice, free to use and offers some nice tutorials. If you are interested in downloading it, you can find it here:

Google SketchUp

Pecan Trees for the Homestead

photo courtesy of Dohmann Pecan Farms, Alvin, TX
Pecan trees are a part of our plan for the homestead. New Mexico is the 3rd largest producer of pecans (after Georgia and Texas), so they grow quite well in the region. We plan to plant several of the trees on the 5 acres, and to eventually produce pecans for our own use and for sale or trade. On a good year, a mature (15 year) pecan tree can produce 50 pounds of nuts per tree. Older trees can produce 100-200 pounds of nuts per year if well-watered and fertilized.

Pecan trees need a good deal of water, so some form of irrigation is a must in dry southern New Mexico. Our plan is to build a watering system using water from our well. We’ve designed and installed our own watering systems in several places, so it shouldn’t be a problem. However, pecan trees do better with an occasional flooding than with frequent sprinkling. They need a deep watering to produce well. Apparently, water is very critical during the late-summer and autumn months for production in the next year.

NMSU has a very helpful publication with information about planting and care of pecan trees in New Mexico. From their publication I learned this:

Plant at least two varieties to ensure pollination. Varieties suggested for planting in New Mexico include ‘Western Schley’, ‘Cheyenne’, ‘Ideal’ (‘Bradley’) and ‘Wichita’. The last two varieties are recommended as good pollinators.

A family friend still sells mature trees, of which we hope to buy at least two. Perhaps we’ll plant 2-3 more bare root trees from nursery stock to add to the orchard at a lower cost.

NMSU has another very helpful publication about the transplantation of mature trees. From that publication, I learned:

Mature pecan trees can be transplanted successfully at
any time of year in New Mexico. However, winter-transplanted
trees certainly experience far less water stress—
orchard water loss is minimal when the weather is cool;
the trees are dormant with minimal to no water needs;
and the root system has a chance to regenerate before
the heat of summer arrives.


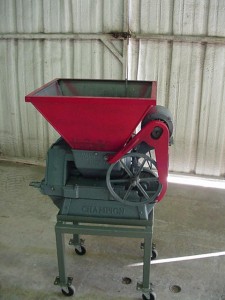
Along with planting the trees, we have investigated the possibility of purchasing a cracking machine. Many homeowners have pecan trees in their yards and, like most people, find hand-shelling too tedious to do in large quantity. Our thought is that we could potentially barter cracking services for a portion of the harvest, which could be bartered for other things or sold.

There is a huge range of pecan processing equipment out there, but most of it seems to cater to large commercial processing operations. I found a couple of different crackers that seem to be a bit more attractive in terms of size and cost to a small homestead project. It looks like the approximate cost of the cracker would be about $3000. More investigation will certainly be done before any purchase is made.

Many cultivars bear in large quantity only every other year, so having several trees will increase our chances of a decent crop every year. With a bit of care, including pruning, watering and soil amendment, when needed, these trees will produce nuts, provide shade and produce leaf mulch long after our lives are done.

Divinity perfected…

Yummy, white fluffiness... melts in your mouth.
As long as I can remember, my Mom’s Divinity was a candy we all looked forward to at Christmastime. Guaranteed to send a diabetic into sugar shock, its light fluffiness never fails to satisfy that sweet tooth craving.

Once I was old enough to help with Christmas candy-making and baking, I always took part in helping to prepare this recipe. Mom always made several batches of it each year so that she could share with neighbors and friends, so there were several opportunities to learn the skill along the way. So, I never dreamed I’d have so much difficulty getting consistent results when I was out on my own.

Let me just say that I’ve had some very lackluster batches in the past years, some so soft that they could be referred to as “spoon candy”, some so dry and crumbly that they wouldn’t stick together.

This year was going to be the year I got it right. After a few long conversations with Mom, picking her brain about the finer points of deciding when to call it “ready” and add the vanilla, I got it right. I think it is now duplicate-able infinitely and want to share it.

Divinity (with notes and secret techniques)

2 egg whites, beaten to stiff peaks with high powered stand mixer
2 1/2 cups sugar (I told you about the sugar coma thing)
1/2 cup light corn syrup
1/2 cup water
1/4 tsp. salt
1 tsp. vanilla

In a 2 quart saucepan, combine the sugar, syrup, water and salt. Cook to the thread stage (230 degrees). Meanwhile, beat the egg whites to stiff peaks. Use a stand mixer with a good motor. Don’t try this with a small hand mixer (You’ll burn the motor out). Dip out about 1 cup of the syrup and slowly add to the beaten egg whites while beating. Scrape down the sides.

Continue cooking the rest of the syrup to the hard ball stage (260 degrees). Again, dip out about 1 cup of the syrup and slowly add to the egg white mixture while beating. Scrape down the sides.

Cook the rest of the syrup to the hard crack (300 degrees) stage (if you are using a water test method, the syrup will actually make a cracking sound when you drop the hot syrup into the cold water).

Finally, pour the rest of the syrup into the egg white mixture while beating.

This is all pretty straightforward… this next part is where I always messed up. It takes a long time beating this mixture before it is ready. After you’ve added all the syrup to the egg white mixture, you have to beat it for a long while. I timed it this time and it took me fully 15 minutes before it was ready. Start watching it very carefully once it starts to show any sign of solidifying… in my case after about 8-9 minutes… this could vary a bit. I think mostly I have lacked patience to beat it long enough in most of my failed batches… THIS IS THE SECRET TECHNIQUE… don’t give up too soon on the beating!

So you ask… “How do I know when it is ready?”

When the divinity starts to hold its shape when you turn off the beaters, and just starts to set up like meringue, it is ready. At first, it is very liquid and soft (obviously won’t hold its shape)… then, gradually it will start to solidify slightly. When you see this, stop beating, add the vanilla very quickly and make haste to spoon it out in dollops onto a sheet of waxed paper.

Mom likes to press a pecan half into the top of each dollop (cuts the sweet taste a bit) and has been known to add a drop of either green or red food coloring with the vanilla for a touch of color.

I realize there have been a lot of food articles this week… bear with us — Christmas is coming.