I’m one of those people who buy a lot of long-term storage food for the pantry. I have dried beans, rice, wheat berries, dehydrated vegetables, spices, baking supplies… you name it — if it can be stored for a reasonable amount of time on the shelves, I probably have at least a small stockpile of it.
But let’s face it. If you want to whip up a quick batch of chili for lunch, doing it with dried beans is not the answer. I discovered pressure canning a couple of years back and was reminded once again today why it is such a great idea. Since I had previously pressure canned my own jars of beans, I could just quickly throw the ingredients together and have lunch ready for my family with very little muss or fuss.
Why to pressure can…
There are several reasons why it is a great idea to learn this skill. The cost of a bag of dried beans is still really reasonable, usually $1.00 or so per pound in the grocery, less if you buy in bulk. From that pound of beans, you’ll end up with about 4 pints of canned beans, about $.25/jar. Even if you add on the cost of the canning lid, the cost is very reasonable. Once you have the pre-cooked, canned beans in your pantry, you can whip up a bean soup, minestrone, chili, or other bean dish in just minutes.
Sometimes people who stock up on staples like beans find they are difficult to cook to a nice, soft texture after they’ve been stored for a few years. Pressure canning takes care of that and softens up even the toughest beans. You’ll be a lot more likely to use those stored foods in your normal food rotation if they are tasty and easy to use.
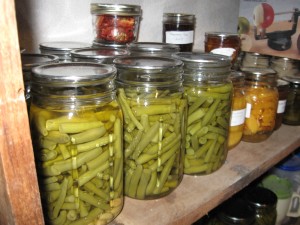
Pressure canning is also great for the abundant harvest from a garden. This summer, my Mom and I canned 30 quarts of fresh green beans. There was no way she had room in her freezer for that much, so canning was a great way to preserve them for yummy winter meals.
How to Pressure Can beans…
Before beginning, you need to buy or borrow an actual pressure canner. I have a 16 qt Presto model that works fine for me. Follow the instructions with the pressure canner very carefully to insure safety. You’ll need to know your locale’s altitude to determine what pressure to use. The key thing is that for any low-acid food (beans are a low-acid food), you need to process them at 240 degrees Fahrenheit for the time required in order to assure safe processing. Since (obviously) 240 degrees is higher than the boiling temperature of water, pressure is needed to achieve that. At higher altitudes, a higher pressure is required to reach 240 since the air is thinner.
Since I have the weighted gauge type pressure canner, it is really pretty simple for me to make the determination about how much weight. For altitudes 1000 ft and below, I can use the 10 lbs weight. For anything else, the 15 lb weight is required.
Now… to the super simple, easy-as-pie, dry beans canning recipe (that I learned from Jackie Clay’s blog, by the way), here is what you do:
Put 3/4 c. dry beans (your choice of type) into a clean pint jar (or 1 1/2 cups into a quart jar)
Fill the jar with boiling water, leaving 1″ headspace at the top of the jar. Place previously-simmered lids on top, firmly tighten the rings.
Process the jar (following your canner instructions) for 75 minutes for pints, 90 minutes for quarts at the pressure required for your altitude.
If you wish, you can add 1/2 tsp salt to pints or 1 tsp. salt to quarts.
Quick Chili for lunch
Now my recipe is really nothing fancy, but it is hearty and easy to do…
Brown 1 lb. ground beef in a big pot. Drain off excess fat if necessary. Add in 2 Tablespoons of chili seasoning mix (I mix this up myself using NM ground red chili), 2 8-oz cans of tomato sauce (or 2 14-oz cans of tomato puree), 1 quart jar of canned beans. Add water if needed. Simmer for at least 15 minutes… serve with cheddar cheese.
Sometimes a prepared food is a good thing.
